Creating a PostgreSQL Multi-Region Replication (MRR) Cluster with Instaclustr
Instaclustr’s automated provisioning system, with some help from our technical operations team, makes provisioning a multi-region replication cluster easy. However, there are still several steps to co-ordinate – this article provides a step-by-step guide.
Table of Contents
New MRR Clusters
If you are creating a cluster and plan on using multiple Data Centres from the beginning, then the process is simple:
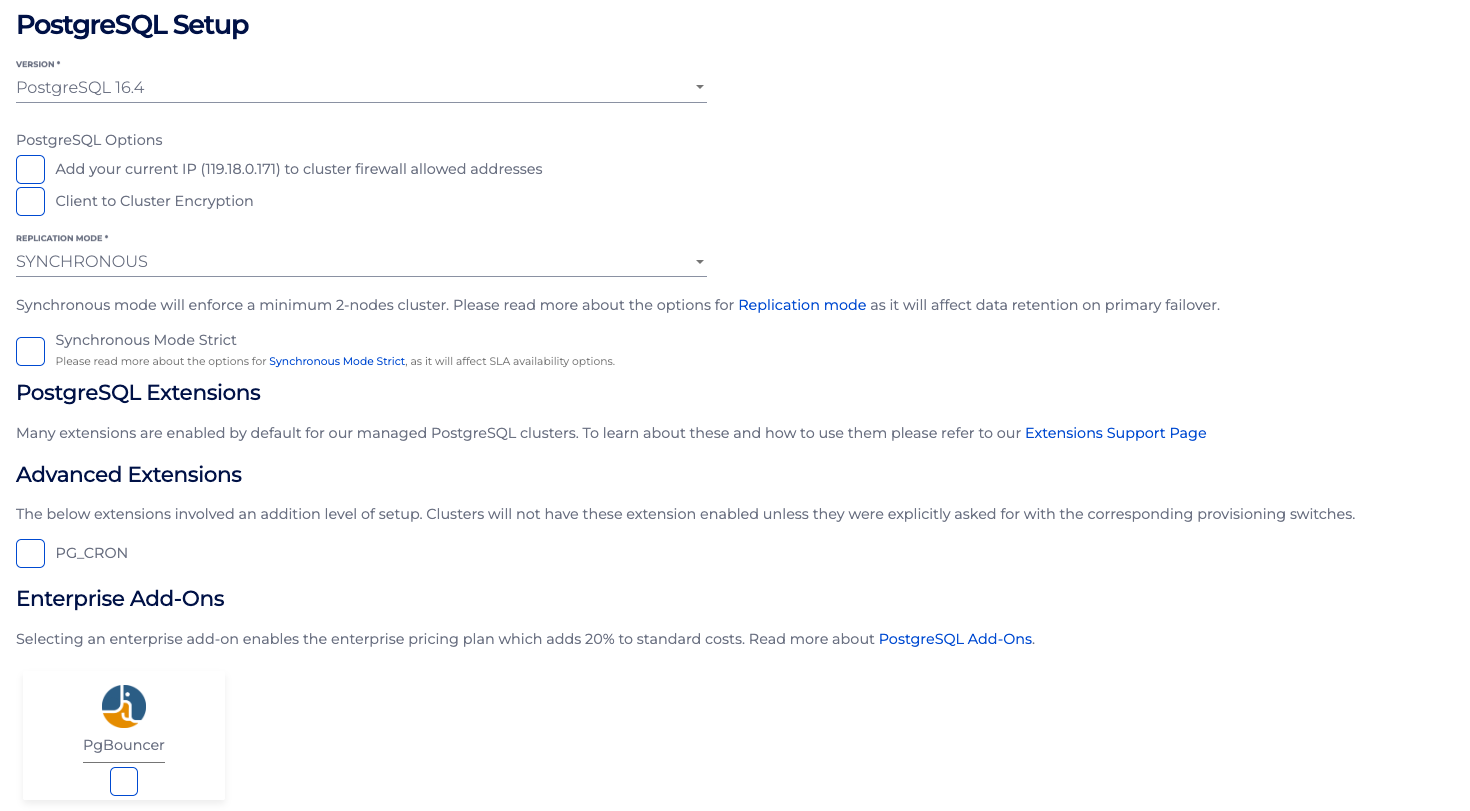
- Create a multi-region replication cluster using the Instaclustr Console. Refer to our support documentation how to Sign Up for an Instaclustr account, and how to Create a Cluster. Choose any PostgreSQL related options, extensions or enterprise add-ons in the PostgreSQL Setup page.

- Then click “Next”, fill in the information for your Primary Data Centre.

- Once finished, click “Next” again and tick to select “Provision a secondary Data Centre for this cluster?. Then fill in the information for your Secondary Data Centre.

- Then click “Next” to the summary page. Verify if the provided information is correct, then accept the Instaclustr terms of service and click the“Create Cluster” button.

New MRR Clusters with Custom VPC
Please refer to the steps in our Creating a PostgreSQL Cluster in a Custom VPC/VNet documentation page.
New MRR Clusters with Private Network
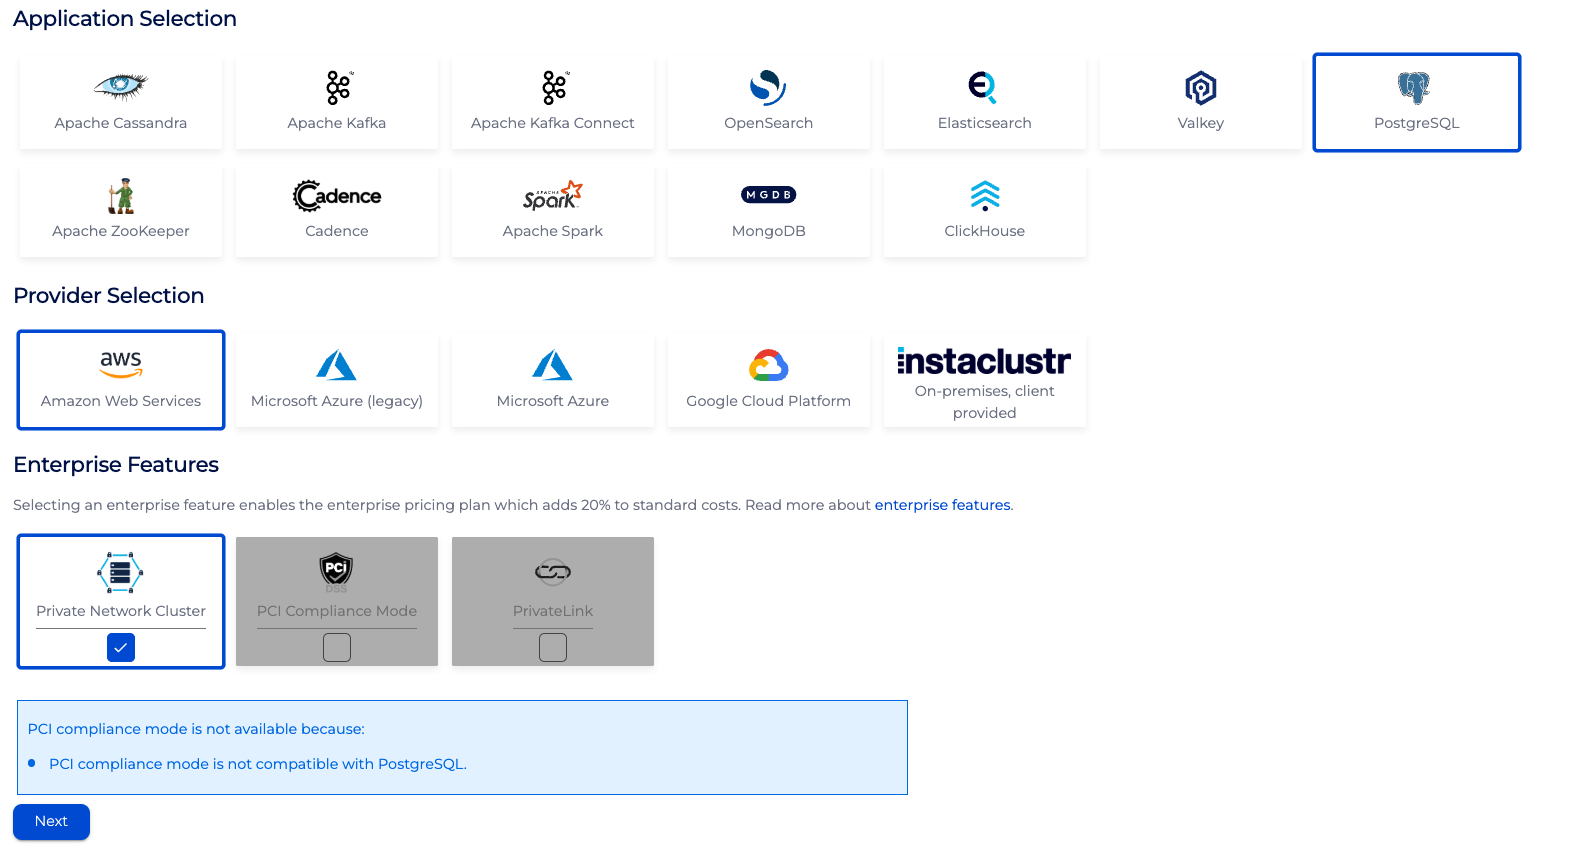
Private Network (Private IP) is currently only available for the AWS and On-premises providers. Once the Provider has been selected, then select Private Network Cluster in the Enterprise Features section.

Then follow the same steps as in the above section New MRR Clusters.
New MRR Clusters with Private Network and Custom VPC
Please refer to the steps in the above sections; New MRR Clusters with Custom VPC and New MRR Clusters with Private Network.
However, please ensure that both the VPC peering connection and route have been handled correctly. Instaclustr Support will receive the request if any unexpected issues arise during the cluster provisioning and will get in touch with the customer.
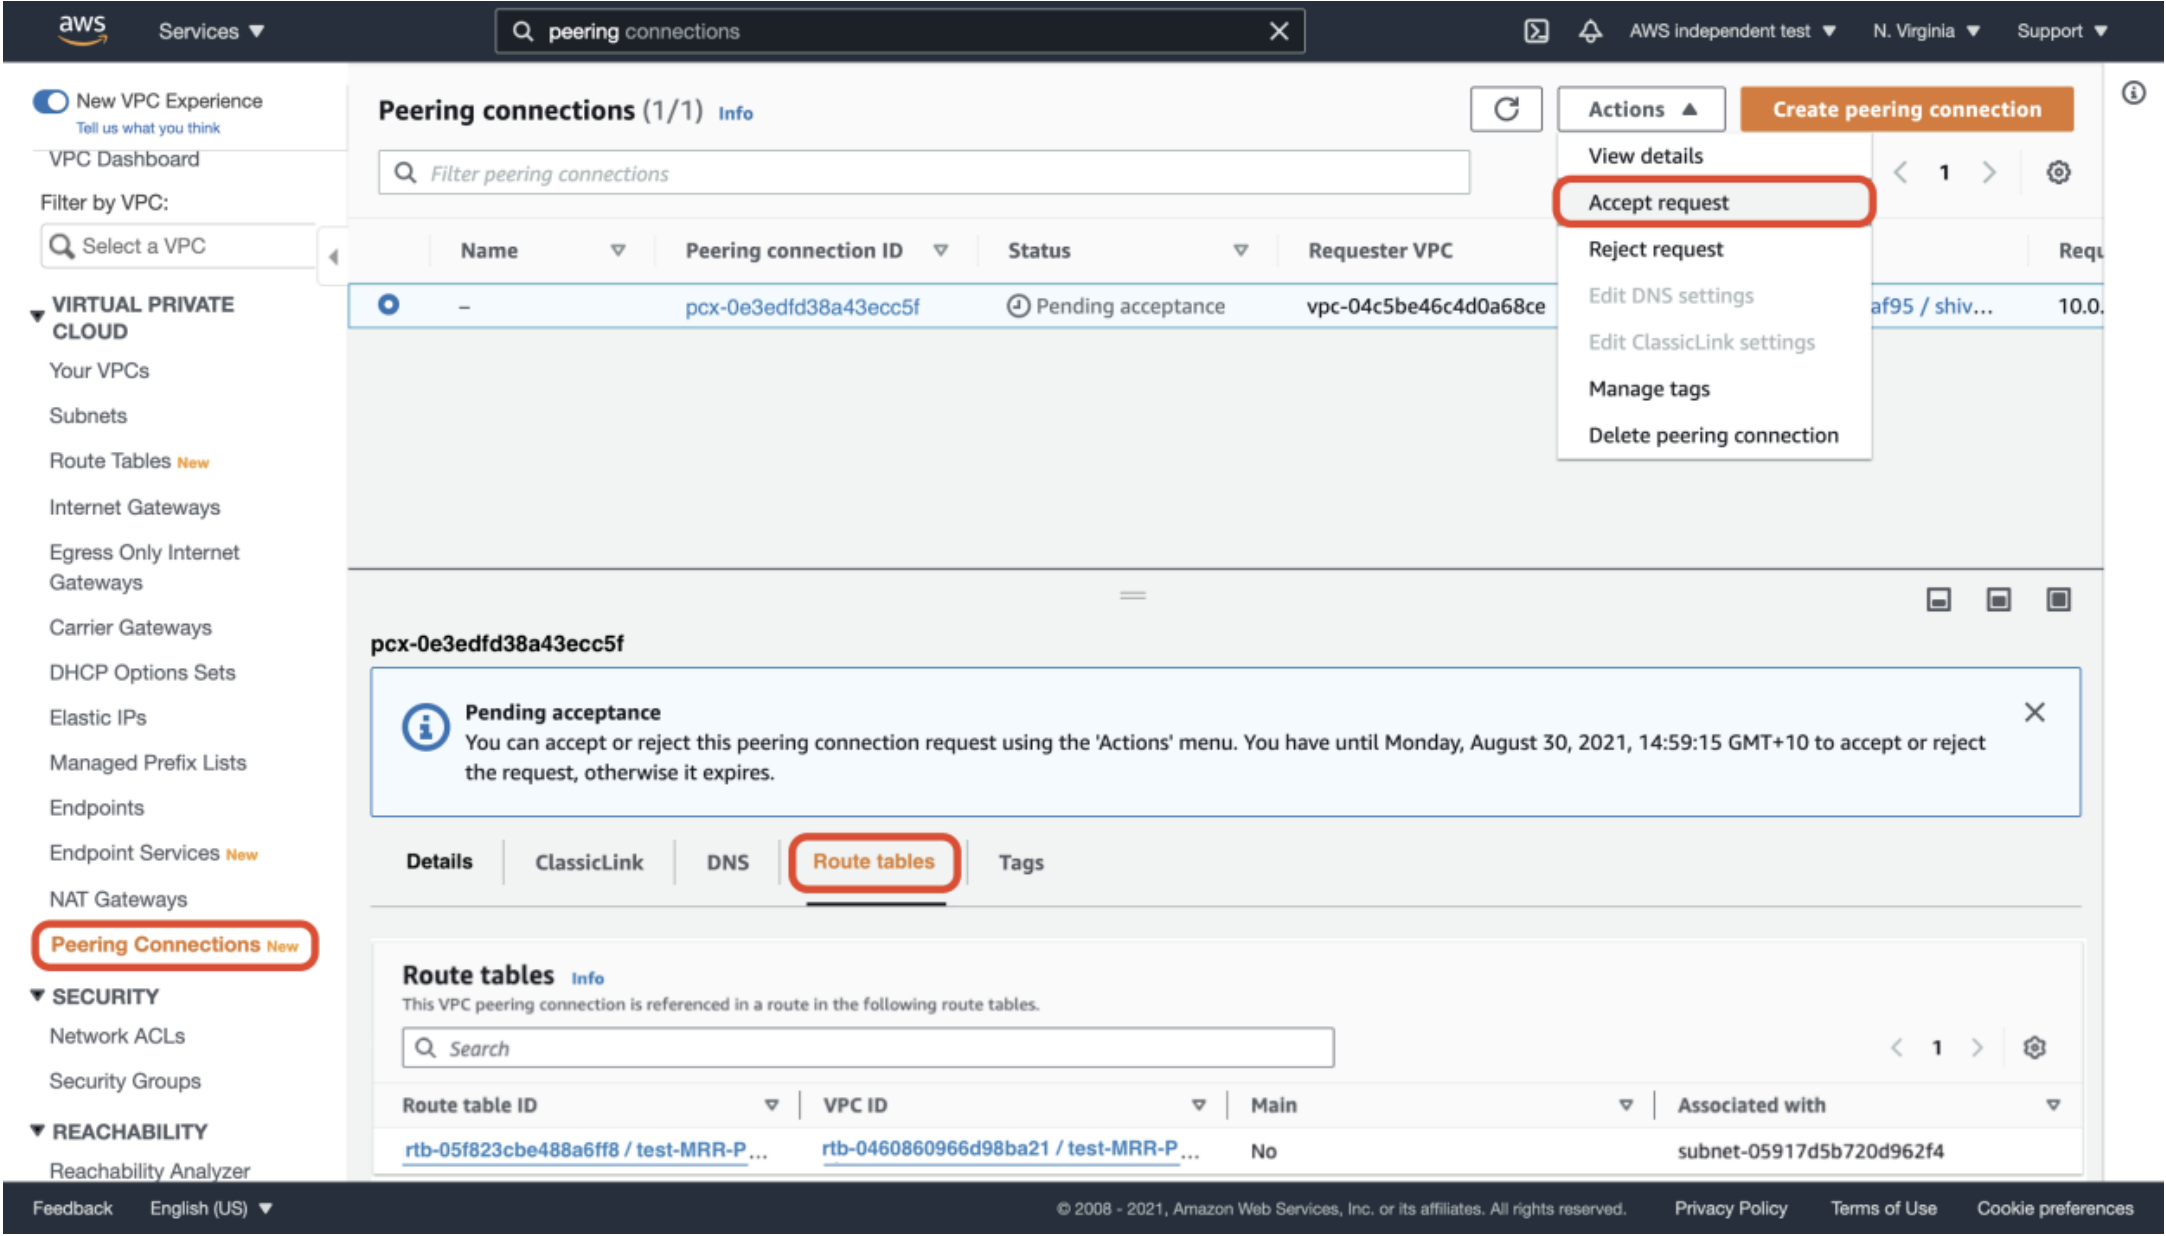
Instaclustr provisioning will handle the request for VPC peering, but the customer must log in to their AWS console to manage and verify (e.g. accept the peering request and add a route in your VPC to the two (2) specific VPCs).
- To accept the peering request, log in to the AWS VPC console and navigate to Peering Connections. Select the pending VPC peering connection and choose Accept Request action. Navigate to Route Tables in the window below, then select Route table ID that relates to the cluster to continue next step.

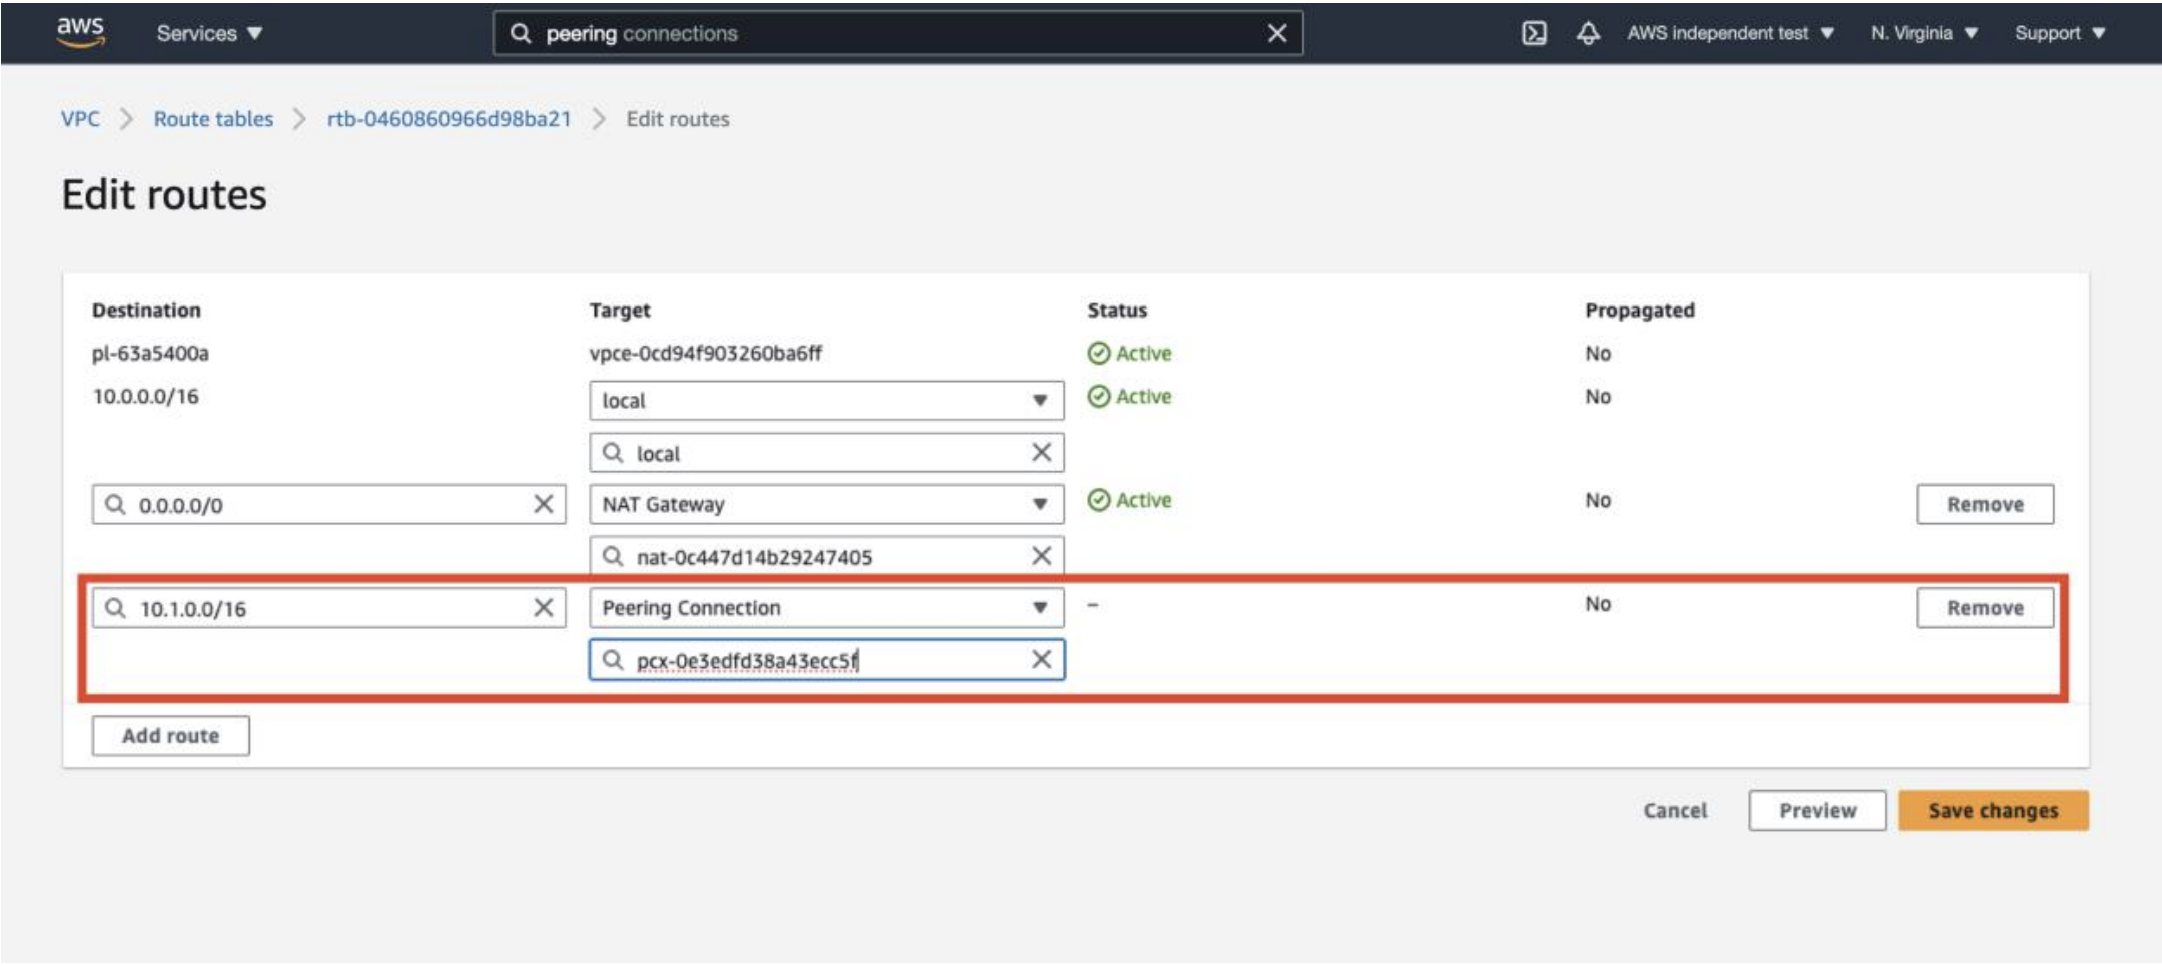
- To add a route in your VPC to the cluster’s VPC, navigate to the main route table of VPC and add a route to the cluster’s network address block (CIDR of the other Cluster Data Centre (CDC)) under Target. Select the Peering Connection that has just been created and “Save changes”. Perform the same on the other CDC if they are in different regions.

Note: If EC2 instances running in the VPC that requires access to the peering connection, make sure that explicit subnet association in VPC’s main route table is created, to the subnet of that instance.
Network Usage
Be aware that cross-region and cross-provider replication will count towards your network usage under Instaclustr’s fair use policy and may incur additional charges when running in Instaclustr’s cloud provider account (RIIA). If you are planning on using multi-region replication in this configuration then please contact Instaclustr Support to assist with capacity planning.
Further Questions
As always, Instaclustr Support is available to provide additional information and guide you through this process.
 By Instaclustr Support


