Connect an OpenID Connect (OIDC) Provider – Elasticsearch
| For Legacy Support Purposes Only |
|---|
Instaclustr supports connecting your Instaclustr provisioned Kibana instance to an Open Identity Connect (OIDC) SSO provider, such as OKTA, Azure AD, Keycloak, and OneLogin.
If you wish to enable OIDC for Kibana, you must first contact our Support team who will enable the ability to add OIDC in your Instaclustr console. Once this has been added, you will be able to see and add your OIDC settings.
Currently Instaclustr does not support adding OIDC to a developer tier cluster; you must use a production instance.
Generic Setup Instructions for OIDC Provider:
Before setting up your OIDC provider you will need to create an OIDC application/client (the name varies across providers) and a set of groups with, at a minimum, the following settings:
- Client ID:
The client ID is the public identifier for the application
- Client Secret:
The secret used by the client to exchange authorization code
- Client Authorization Server URL (HTTPS only):
The URL of the Authorization Server which will approve the token and return the credentials
- A claim that includes es_role_security_api and es_role_kibana_user marked as “roles”:
These two roles are mapped by Instaclustr as part of the creation of a new Kibana instance with OIDC enabled; they allow initial access to Kibana to create further roles for other users in the OIDC provider to be mapped to. The claim setting in your OIDC provider tells Kibana if the user logging in is an approved member of the security groups. Check your provider documentation for further information on how to change what is passed to Kibana through the claim.
- A user that is a member of the groups and has permission in your OIDC provider to access the application/client:
This connects the user to the groups. This will be the username and password the user will use to authenticate to Kibana.
Login/Logout URLs
Initially you will not have the details of your Kibana instance before provisioning. If your provider requires these details when setting up the application, you will need to use placeholder values until after the cluster has been created.
Add OIDC Provider to the Instaclustr Console:
- Ensure you have contacted Instaclustr Support and had our team enable OIDC.
- Log into your Instaclustr console.
- Select the settings cog in the right hand corner of the screen, then Cluster Resources, then OpenID Connect Providers.
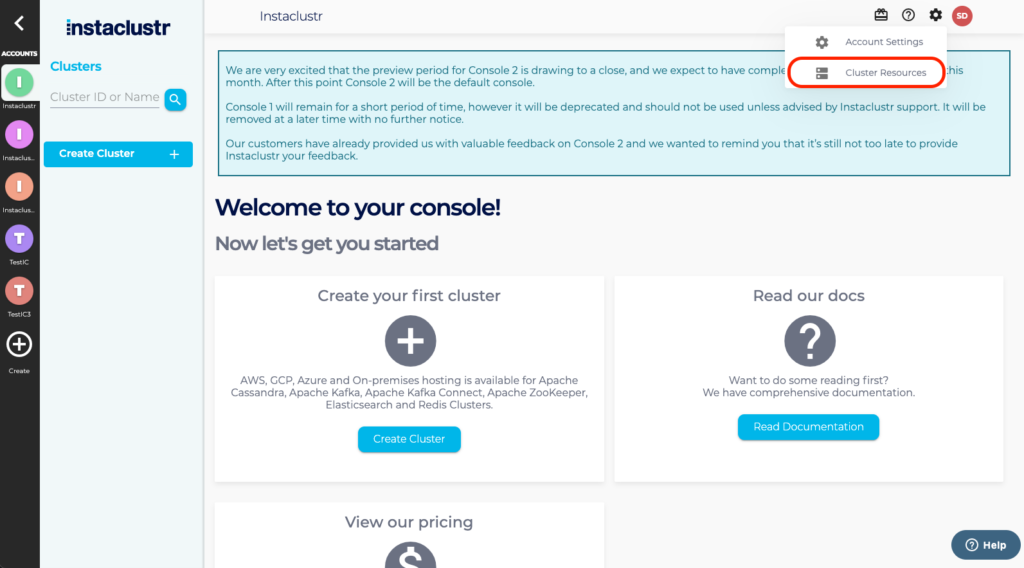
- Select Add New OIDC Provider.
- All fields are required except Description. As you will have a different OIDC Application (or Provider) for each app, Client Name is chosen by you and should be a name that you can use to identify this OIDC provider and application when adding OIDC to your new cluster.
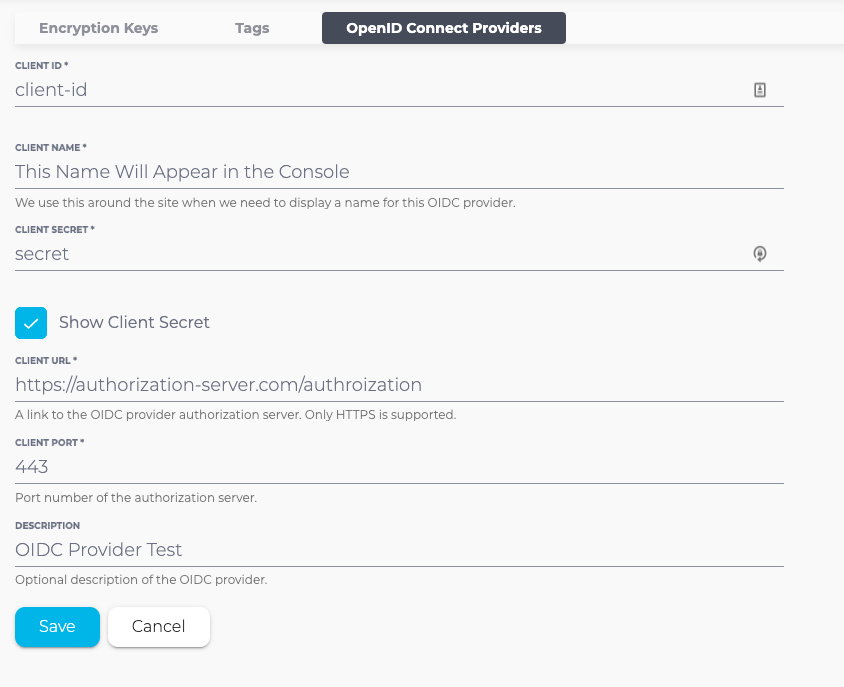
- Select Save.
Add OIDC to a New Elasticsearch Cluster With Kibana Installed:
- Select Create Cluster from the navigation menu.
- Select the correct OIDC Provider based on the name set in the previous step.
- Select the OpenID Connect (OIDC) for Kibana checkbox on the Elasticsearch Cluster Setup page.
- Select the correct OIDC Provider based on the name set in the previous step.
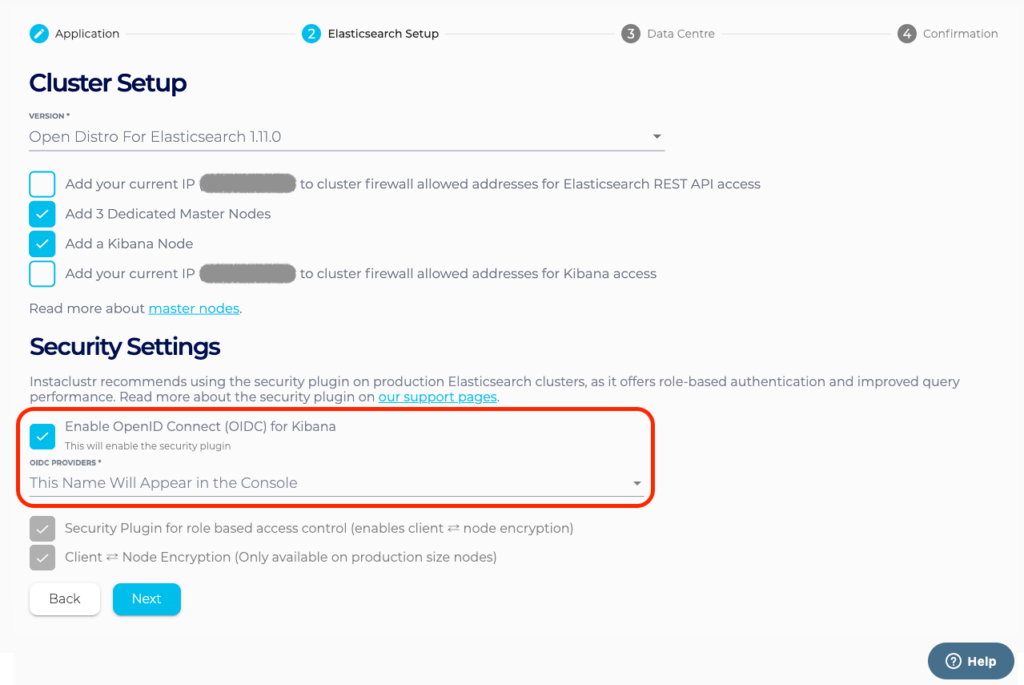
- Complete the creation of the cluster.
- After provisioning is complete, add the redirect URIs to your OIDC provider (see section below).
- Open your Elasticsearch cluster and select Connection Info from the navigation bar.
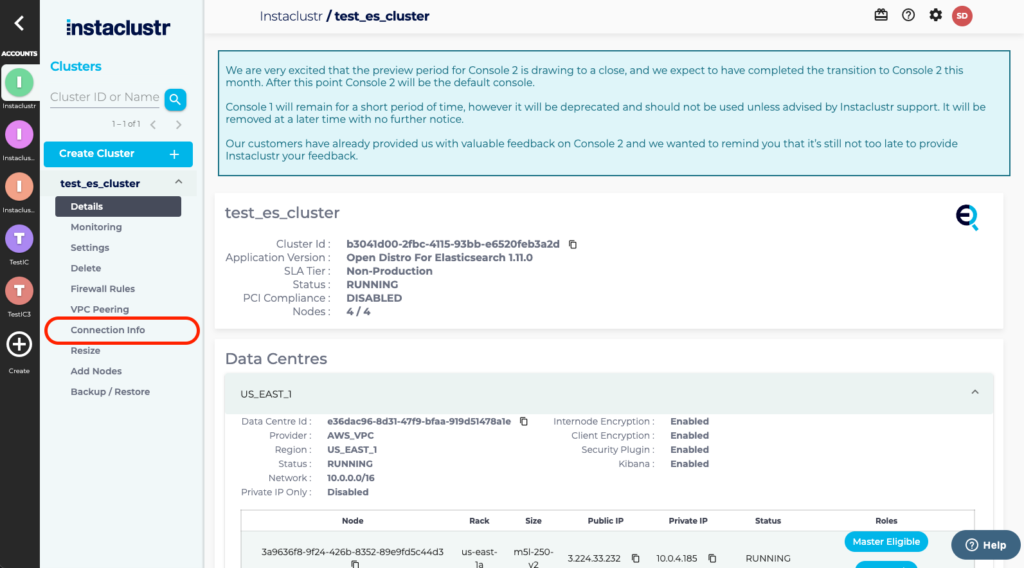
- Click on the link for Kibana.

- Kibana will redirect login to the OIDC Provider. Log in using the credentials set in the provider.
Add OIDC to an existing cluster With Kibana Installed:
- Ensure that you have added the OIDC provider you wish to use for your cluster on the Instaclustr Console.
- Contact [email protected] with the details of your cluster and the name of your OIDC configuration, and they will be able to complete the process of adding the OIDC Provider to your existing Kibana.
Updating the OIDC Provider Details:
If your provider details have changed, such as client id, secret, authorization server URL, or port, you can update the details in the console, however the changes will not take effect until our Support team implements the configuration.
If your details have changed:
- Update the OIDC Provider configuration from the OpenID Connect Providers tab of the Instaclustr console and save your changes.
- Contact [email protected] with the cluster and name of your OIDC configuration and they will be able to assist with implementing the changes on your cluster.
Adding Redirect URIs to Your OIDC Provider:
Once the cluster has been created, use the following URL details in your OIDC Application Settings:
Login Redirect URLs:
- https://<your-kibana-url>/auth/openid/login
- https://<your-kibana-url>
Logout Redirect URLs:
- https://<your-kibana-url>/app/kibana
Initiate Login URL:
- https://<your-kibana-url>/auth/openid/login
To find the Kibana URL for your instance:
- Select your instance in the Instaclustr Console and then select Connection Info from the navigation menu.
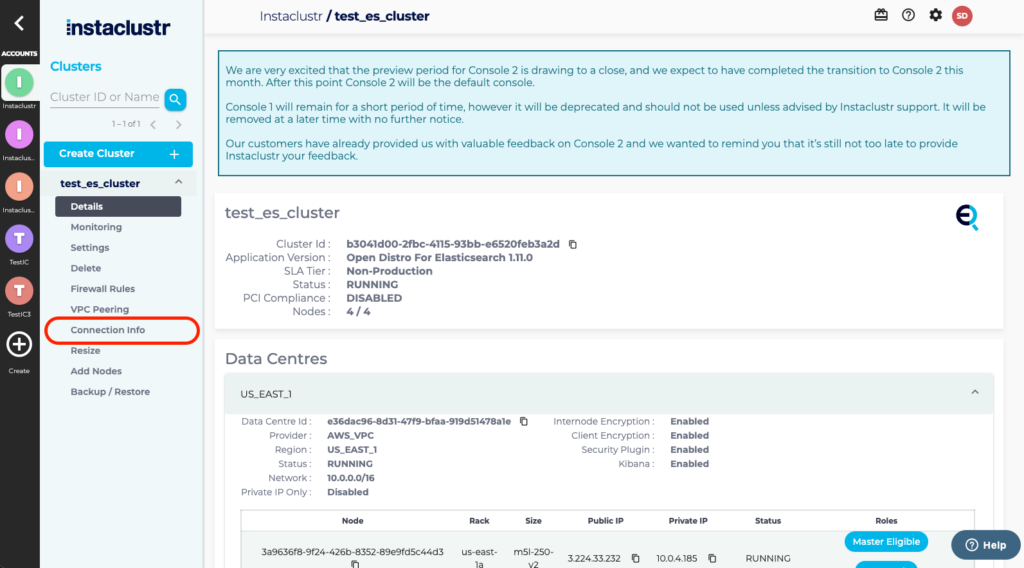
- Scroll down to Kibana, where the URL for your instance will be listed.
