Domain Integration
ClickHouse clusters on our platform by default have security restrictions preventing egress traffic but can be integrated with public domains to enable access.
Once a domain is integrated, the cluster will be able to access specific domains from the cluster, or use the ClickHouse table engine functions where access path is domain-based (e.g., URL, AzureBlobStorage, AzureQueue, S3, S3Queue, etc) to read and write data to that domain. Examples for both scenarios are provided later on the page.
Clusters on the Netapp Instaclustr managed platform are secured through egress firewall rules to protect against data exfiltration. Integrating with Domains adds a whitelist rule to the firewall enabling access. Consider the security risk before enabling a Domain integration.
How To Enable
You can set up ClickHouse Domain integrations using the Instaclustr Console, API, or Terraform provider. Steps for using each method is provided below.
Using the Console
The following steps explain how to integrate a ClickHouse cluster with a Domain.
- First select the “Integrations” option in console. The page will show supported integration types of the cluster
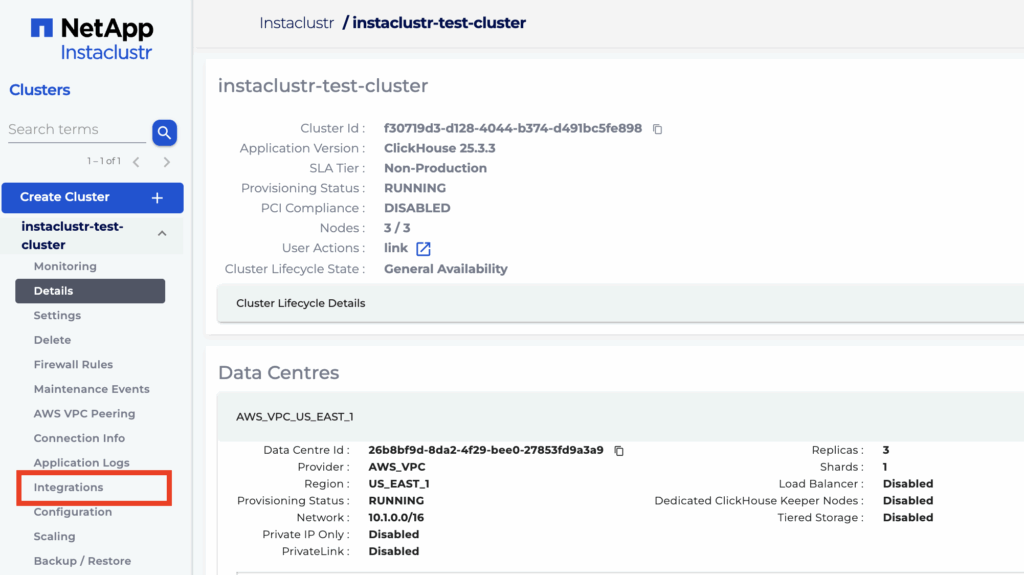
- Click “Configure” for Domain integration to configure or view domain integrations for the cluster.

- Specify the domain to integrate with and click “Add” to add the domain into the list below. Repeat the process to add all the domains you wish to integrate with.
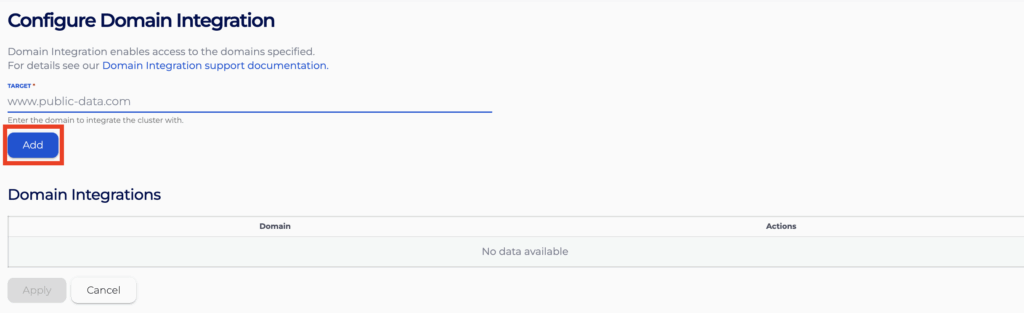
- Finally press “Apply” to apply the integration change
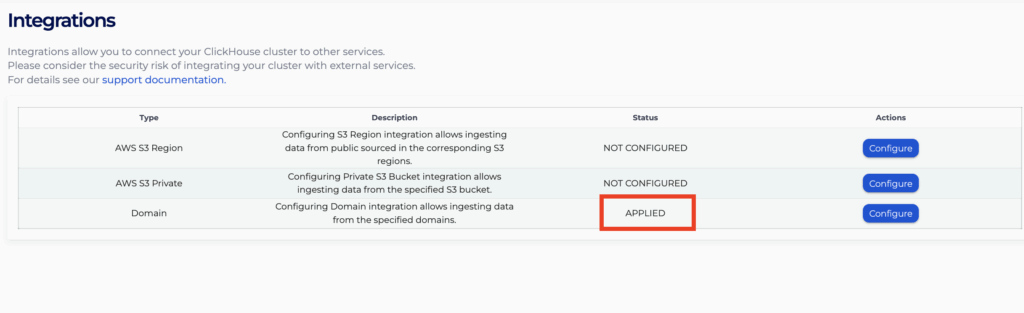
- You will see the status of it becoming “APPLIED” on the integrations page. It might take 10 to 15 minutes for the rules to be enforced.
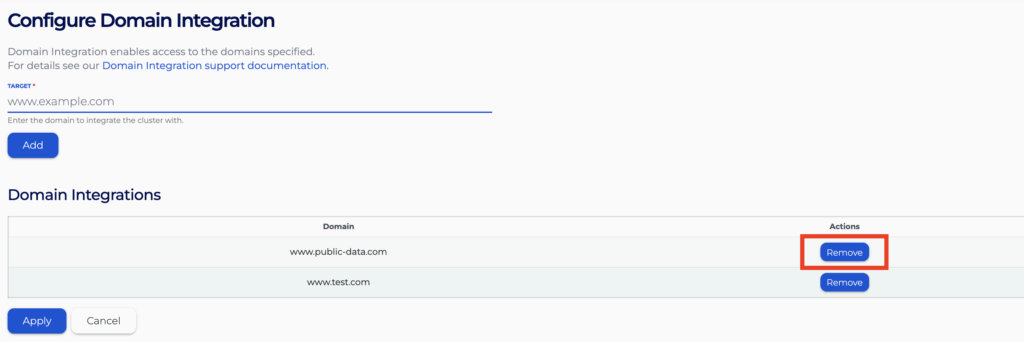
- The integrations will now show on the same “Configure” page, and you can choose to remove the domains by clicking “Remove” and then “Apply” the change again.
Once domain integration is enabled, you would be able to use certain domain-based ClickHouse table engines. Below are a few examples.
Using the API
You can create, view, and remove your Domain integrations using the Instaclustr API. An example for the POST endpoint is provided below.
- Endpoint: https://api.instaclustr.com/cluster-management/v2/resources/applications/clickhouse/integrations/domain/v2
- Payload
1234567891011{"clusterId": "<cluster-id>","domains": [{"target": "www.example.com”},{"target": "www.anotherexample.com"}]} - Example response:
1234567891011121314{"clusterId": "68ae9de1-9acf-4d95-8d90-3f3d1b48a92a","domains": [{"status": "APPLIED","target": "www.example.com"},{"status": "APPLIED","target": "www.anotherexample.com"}],"id": "domain-68ae9de1-9acf-4d95-8d90-3f3d1b48a92a"}
For details on all API endpoints, please refer to the Instaclustr API documentation.
Using the Terraform Provider
You can manage your AWS Private S3 Bucket integrations using Terraform. The steps are as follows:
- Follow this support document to set up your Instaclustr Terraform Provider V2.
- Populate the resource template below with information about the integration.
1234567891011resource "instaclustr_clickhouse_integration_domain_v2" "example" {domain {target = "www.example.com"}domain {target = "www.anotherexample.com"}cluster_id = "<clickhouse_cluster_id>"} - Follow the Terraform init, plan, and apply cycle to provision the integration
For details of the Terraform resources, please refer to the Instaclustr Terraform documentation
How To Use ClickHouse URL Table Engine
ClickHouse’s URL table engine provide robust mechanisms for working with large datasets stored on the web. By leveraging these engines, you can efficiently manage and query your data directly from ClickHouse. Brief examples regarding usage are included below.
For detailed information, refer to the official documentation:
URL Table Engine
The URL table engine allows you to create tables that read from and write to online data, in a range of formats.
Creating a URL Table
To create a table using the S3 engine, you need to specify the URL and the format of the data. Here is an example:
|
1 2 |
CREATE TABLE url_table ( id UInt32, name String )\ ENGINE = URL('https://public-data.com/file.csv', 'CSV'); |
Loading Data
Load data into the table by inserting data directly:
|
1 |
INSERT INTO url_table VALUES (1, 'Alice'), (2, 'Bob'); |
Querying Data
Query data from the URL table as you would with any other table:
|
1 |
SELECT * FROM url_table; |
AzureBlobStorage Table Engine
The AzureBlobStorage table engine provides an integration with Azure Blob Storage ecosystem, allowing you to create tables that read from and write to Azure Blob storage account data, in a range of formats.
Creating an AzureBlobStorage Table
To create a table using the AzureBlobStorage engine, you need to specify the storage account endpoint, the Shared Access Signatures (SAS), and the format of the data. Here is an example from the ClickHouse GitHub documentation:
|
1 2 3 |
CREATE TABLE azure_blob_table (key UInt64, data String) ENGINE = AzureBlobStorage('DefaultEndpointsProtocol=http;AccountName=devstoreaccount1;AccountKey=Eby8vdM02xNOcqFlqUwJPLlmEtlCDXJ1OUzFT50uSRZ6IFsuFq2UVErCz4I6tq/K1SZFPTOtr/KBHBeksoGMGw==;BlobEndpoint=https://azurite1:10000/devstoreaccount1/;', 'testcontainer', 'test_table', 'CSV'); |
Loading Data
Load data into the table by inserting data directly:
|
1 |
INSERT INTO test_table VALUES (1, 'a'), (2, 'b'), (3, 'c'); |
Querying Data
Query data from the AzureBlobStorage table as you would with any other table:
|
1 |
SELECT * FROM test_table; |
AzureQueue Table Engine
The AzureQueue table engine provides an integration with the Azure Blob Storage ecosystem, allowing streaming data import.
Creating an AzureQueue Table
Similar to creating an AzureBlobStorage table, an AzureQueue table could be created as follows (examples taken from the ClickHouse GitHub documentation):
|
1 2 3 4 |
CREATE TABLE azure_queue_table (key UInt64, data String) ENGINE = AzureQueue('DefaultEndpointsProtocol=http;AccountName=devstoreaccount1;AccountKey=Eby8vdM02xNOcqFlqUwJPLlmEtlCDXJ1OUzFT50uSRZ6IFsuFq2UVErCz4I6tq/K1SZFPTOtr/KBHBeksoGMGw==;BlobEndpoint=https://azurite1:10000/devstoreaccount1/;', 'testcontainer', '*', 'CSV') SETTINGS mode = 'unordered'; |
As an alternative to using account key for access, you could format a connection string as follows using the SAS token generated from the storage account level with desired permissions:
|
1 2 3 4 |
CREATE TABLE azure_queue_table(`id` UInt64, `name` String,`value` UInt64) ENGINE = AzureQueue('BlobEndpoint=<protocol: http/https>://<blob-domain>;SharedAccessSignature=<SAS-token>', '<container-name>', '*.csv', 'CSV') SETTINGS mode = 'unordered'; |
Unlike AzureBlobStorage table engine though, the AzureQueue table engine is used for streaming data, therefore SELECT queries are not particularly useful as all files will only be read once. It is more practical to create real-time threads using materiralized views as follows:
|
1 2 3 4 |
CREATE TABLE azure_queue_engine_table (key UInt64, data String) ENGINE=AzureQueue('', 'CSV', 'gzip') SETTINGS mode = 'unordered'; CREATE TABLE stats (key UInt64, data String) ENGINE = MergeTree() ORDER BY key; CREATE MATERIALIZED VIEW consumer TO stats AS SELECT key, data FROM azure_queue_engine_table; SELECT * FROM stats ORDER BY key; |