Elasticsearch Basics
If you’re getting started with the Open Distro of Elasticsearch, or its replacement, OpenSearch, you need to start with a firm foundation on how to configure nodes within a given cluster. A key part of setting your configurations is deciding what node types you want for individual nodes.
Read: OpenSearch and Elasticsearch Architecture
Much like Apache Cassandra—where multiple copies of the data are kept across nodes and you can add more to a live cluster—Elasticsearch scales horizontally. With Apache Lucene at the core, Elasticsearch provides a distributed, scalable, low-latency way to search your most valuable information, from articles to logs.
Within Elasticsearch, each node (be it a physical server, virtual server, etc.) is part of a cluster. Each cluster is simply a collection of different nodes, and each node can only be a part of one cluster (so clusters can’t share nodes).
As a distributed system, Elasticsearch automatically handles partitioning documents into shards (which are stored on multiple nodes), balancing shards across nodes, duplicating shards for redundancy and availability, and routing requests to the appropriate node. These management features are the essence of what Elasticsearch does “above” the actual Apache Lucene indices.
Elasticsearch clusters
Clusters in Elasticsearch are identified by unique names, and can automatically reorganize when individual nodes are added or removed. Different node types within a cluster perform different tasks, and, like clusters, each node gets a unique name. Note that while the terminology regarding node types may change in the evolution from the Open Distro of Elasticsearch to OpenSearch, the core concepts and node tasks for each role will remain the same.
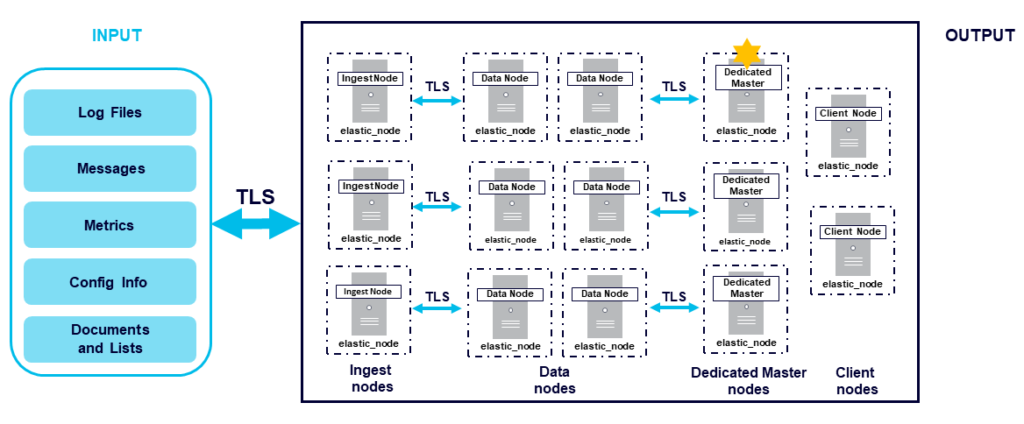
The main node types you need to be familiar with are master, data, ingest, and coordinating. Read on to learn more about different node types, best practices for node type configurations, and how to configure node types using the Instaclustr Managed Platform and APIs.

Master Nodes
Typically in Elasticsearch, all nodes are master-eligible by default. Master nodes are responsible for certain critical tasks throughout the cluster, including creating or deleting indexes, tracking nodes, and allocating shards to nodes. The master node for your cluster is elected from among your master-eligible nodes, and there can only be one node serving in the master role at a time.
Dedicated master nodes can be provisioned with fewer resources than data nodes because they only handle cluster state and not user data (note that in the Instaclustr Managed Platform, during provisioning and configuration users select “dedicated master nodes” rather than “dedicated master-eligible nodes”).
Placing these nodes into different failure zones or availability zones of a cloud, along with multiple copies of the data on the data nodes, enables the cluster as a whole to survive numerous types of server, zone, and data center failures.

Data Nodes
Data nodes are responsible for holding data and performing data-related operations. This includes CRUD operations, indexing, search, and aggregations. You can configure data nodes so that they only do search and aggregation, not any indexing, to reduce the load in the individual nodes. All nodes are data nodes by default.

Coordinating Nodes
Coordinating nodes direct requests to a master node or data node. These nodes essentially act as smart load balancers. Coordinating nodes help reduce the load on individual data and master nodes, which makes a particularly big difference in the case of large clusters. Coordinating nodes are sometimes called “client” nodes. All nodes are by default coordinating nodes.
Ingest Nodes
Ingest nodes are in charge of pre-processing documents before they are indexed. These are also known as “transform” nodes because they help transform documents for indexing. All nodes are also ingest nodes by default. Some organizations elect to use ingest nodes instead of Logstash for piping in and processing log data.
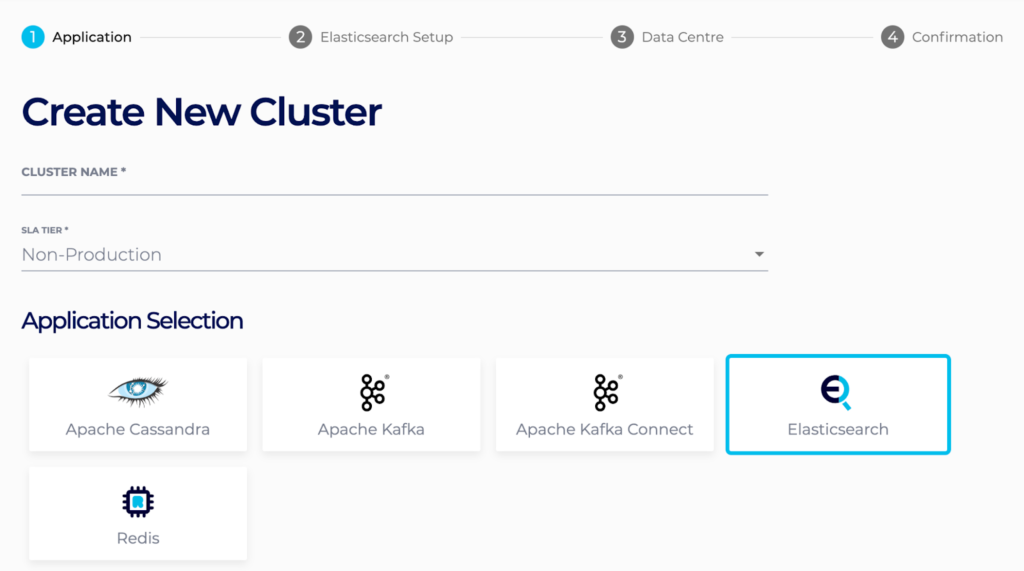
Creating a Cluster in the Instaclustr Managed Platform
For Instaclustr Managed Elasticsearch customers, new clusters can easily be created from within the Instaclustr Managed Console. The minimum you need to get started is to choose your cluster name, technology (the Open Distro of Elasticsearch in this case), and software version.
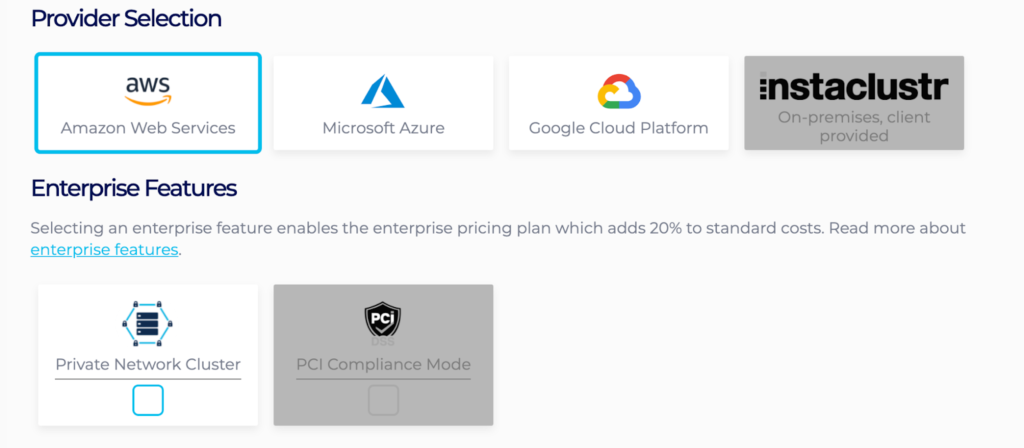
Then you choose your cloud and any enterprise features you want.
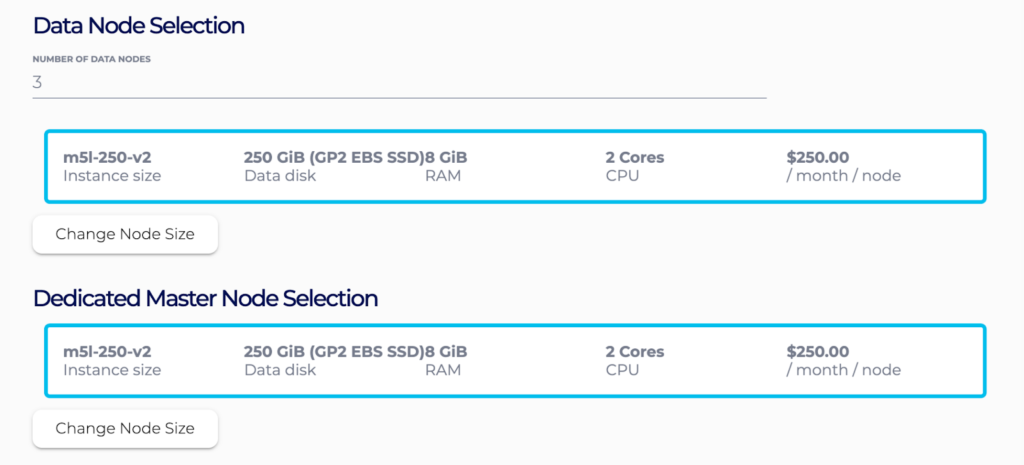
Then choose different features of your cluster setup (such as dedicated master or Kibana nodes), as well as your cloud region and your number of nodes, their type, and their sizes.

If you prefer to interact with the platform via API, you can also create a new cluster through our Provisioning API. API requests should go in the form of a POST request to the provisioning API here:
|
1 |
https://api.instaclustr.com/provisioning/v1/extended |
The following is an example of a JSON payload for a POST API request to provision a three-node production cluster hosted in AWS.
|
1 2 3 4 5 6 7 8 9 10 11 12 13 14 15 16 17 18 19 20 21 22 23 24 25 26 27 |
{ "bundles": [ { "bundle": "ELASTICSEARCH", "options": { "clientEncryption": "true", "dedicatedMasterNodes": "true", "masterNodeSize": "m5l-250-v2", "securityPlugin": "true" }, "version": "opendistro-for-elasticsearch:1.8.0" } ], "clusterName": "elasticsearch_test", "clusterNetwork": "192.168.0.0/18", "dataCentre": "US_EAST_1", "nodeSize": "m5l-250-v2", "provider": { "name": "AWS_VPC" }, "rackAllocation": { "nodesPerRack": 1, "numberOfRacks": 3 }, "slaTier": "PRODUCTION" |
For further details on making API calls check out our API documentation here.
Configuring Node Types in the Instaclustr Managed Platform
The great thing about the Instaclustr Managed Platform is how easy it makes it to provision and configure your Elasticsearch cluster through your preferred means: the Console (no code required) or API. You can easily spin up a cluster, set node types and sizes, monitor performance, and resize as necessary.
Within the Instaclustr Platform, there are no dedicated data, ingest, or coordinator nodes; rather, if using dedicated master nodes, then by default the other nodes will hold all of the alternative roles and perform related tasks as needed.
The following are some tips to consider when configuring your own cluster:
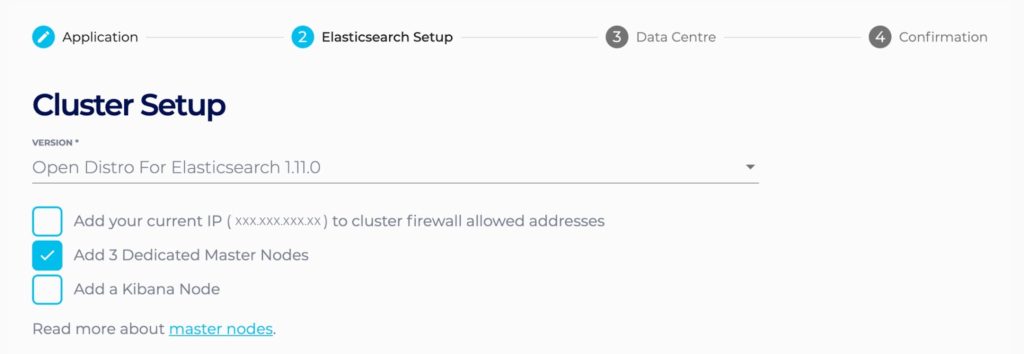
Tip #1: Use Dedicated Master Nodes for Production Clusters: Typically all nodes are master-eligible, but if those nodes go under heavy load it can overwhelm the master node and cause problems for your cluster. Having three dedicated master nodes that are responsible just for serving in this role, and not for data or ingest, prevents this issue.
You can easily configure this setup for your cluster in the Console for the Instaclustr Managed Platform by checking the appropriate box when you’re in the Elasticsearch Setup section:
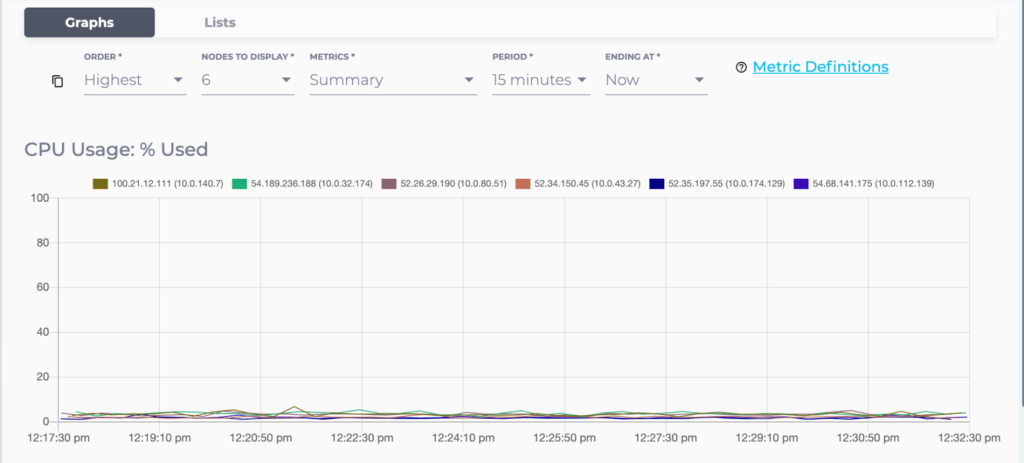
Tip #2: Monitor CPU Usage and OS Load: If your node is at the upper end of its potential CPU usage, or if its average OS load is greater than the number of cores, it may be time to resize or add additional nodes for greater processing capabilities.
If you’re an Instaclustr Managed Elasticsearch customer, you can easily monitor CPU usage from within the Console or via our Monitoring API. If you need to resize a node after provisioning, this can also be done via the Console or the Provisioning API without the need to get help from Instaclustr Support.
Using the Monitoring API, you can also make a GET API call to get metrics. Users need to make an GET request to this address:
|
1 |
https://api.instaclustr.com/monitoring/v1/{clusterId}/metrics |
n::cpuUtilization is the metric value to get CPU utilization and n::osload is the value for metric to use for current OS load.
You can draw from the following code sample in Python and Python 3 to make a request:
|
1 2 3 4 5 6 7 8 9 10 11 12 13 |
import http.client conn = http.client.HTTPSConnection("api.instaclustr.com") headers = { 'authorization': "Basic REPLACE_BASIC_AUTH" } conn.request("GET", "/monitoring/v1/{clusterId}/metrics", headers=headers) res = conn.getresponse() data = res.read() print(data.decode("utf-8")) |
Tip #3: Choose Higher-End SSD Instances for Critical Workloads: Solid state drives (SSDs) generally provide the highest performance for Elasticsearch nodes because Elasticsearch workloads tend to be I/O bound. But when setting up your cluster, you’ll have a range of disk sizes to choose from.
When selecting your disk size, it’s important to know your anticipated workload. For data that is going to be infrequently accessed and where latency isn’t an issue, such as security logs, you can likely choose a less expensive storage option to save money. However, if a customer interaction is downstream, such as if you’re using Elasticsearch for the search function within a customer-facing application, it’s worth getting the fastest disks available to optimize these interactions.
How Will Things Change With OpenSearch?
If you’re currently using the Open Distro of Elasticsearch, you’re likely planning to move to its replacement, OpenSearch. The core node types will not change as a part of this transition, though some terminology may change. To learn more, continue to check out the Instaclustr blog for updates as we roll out OpenSearch as part of our Managed Platform for our customers.
Have more questions on configuring node types or other best practices for Elasticsearch or OpenSearch? Reach out to schedule a consultation with one of our experts.
Transparent, fair, and flexible pricing for your data infrastructure: See Instaclustr Pricing Here
Related Guides:
-
Apache Kafka: Architecture, deployment and ecosystem [2025 guide]
-
Complete guide to PostgreSQL: Features, use cases, and tutorial