In my previous posts (Part 1 and Part 2), I’ve covered what a cluster is and what it does. Now we’ll take a detailed look at what it takes to assemble and set up a cluster. We’ll go over assembly, OS installation, setting things up with Ansible, and deploying our services with Docker.
Assembly
To start assembling the cluster, we need a few things:
- 7 Raspberry Pi 4s, 4x4GB, 3x8GB: the 3 8GB Pi computers will be used as worker nodes, and the 4GB models will be used for application servers and an admin node.
- 6 Orange Pi 5s, 3x4GB, 3x8GB: the 8GB models will be used as worker nodes, and the 4GB models will serve as cluster managers.
- At least 20 Power over Ethernet (PoE) ethernet cables:
- You need at least 13 for the power converters to the switch (I use 3ft/1m cables for this)
- 1 for your router or other internet connection (I use a 6ft/2m here to reach my other switch under my desk)
- I always like to keep a few spares just in case something happens (I have a rolling office chair and sometimes bend cables for travel storage). My rule of thumb is the longer the cable, the more likely it’ll break.
- PoE switch: I use a 16-port Netgear switch that can give up to 60W of power (more than enough).
- 13 PoE to 5V USB-C adapters: These turn the high-voltage PoE power into a 5V/2.4A one. They also pass internet data; the cable splits into a USB-C for power and CAT-6 for data. One for each Pi.
- At least 13 microSD cards: These are for the Operating Systems (OS) for the Pi computers (see OS Installation). You’ll probably want a few spares as well because these love to break.
- They should have at least 8GB of memory, but I recommend 32GB. You can even buy these in bulk or large quantity packs. But BE CAREFUL and don’t buy from shady dealers/brands. It’s not worth it!
- 7 USB drives: These are so the Raspberry Pi computers can store application and other data. Same warning about shady deals as with MicroSD cards.
- 6 M.2 drives: These are so the Orange Pi computers can store application and other data
- Case(s) for the Pi computers: You’re going to want at least a fan operating on these. There are cases for multiple Pi computers out there. I made a custom case for 2.0 and put fans and heat sinks on each Pi.
Here’s the setup: first take the Pi computers, put them in cases, and connect them to the 5V USB-C adapters. These have a plug for the internet and a plug for power. Plug both into the Pi.
Then connect the 5V adapters to the switch (which is powered off) using the ethernet cables.
Next, plug the switch into your internet source. You can use your home ethernet or a router with Wi-Fi repeating if you’re on the go.
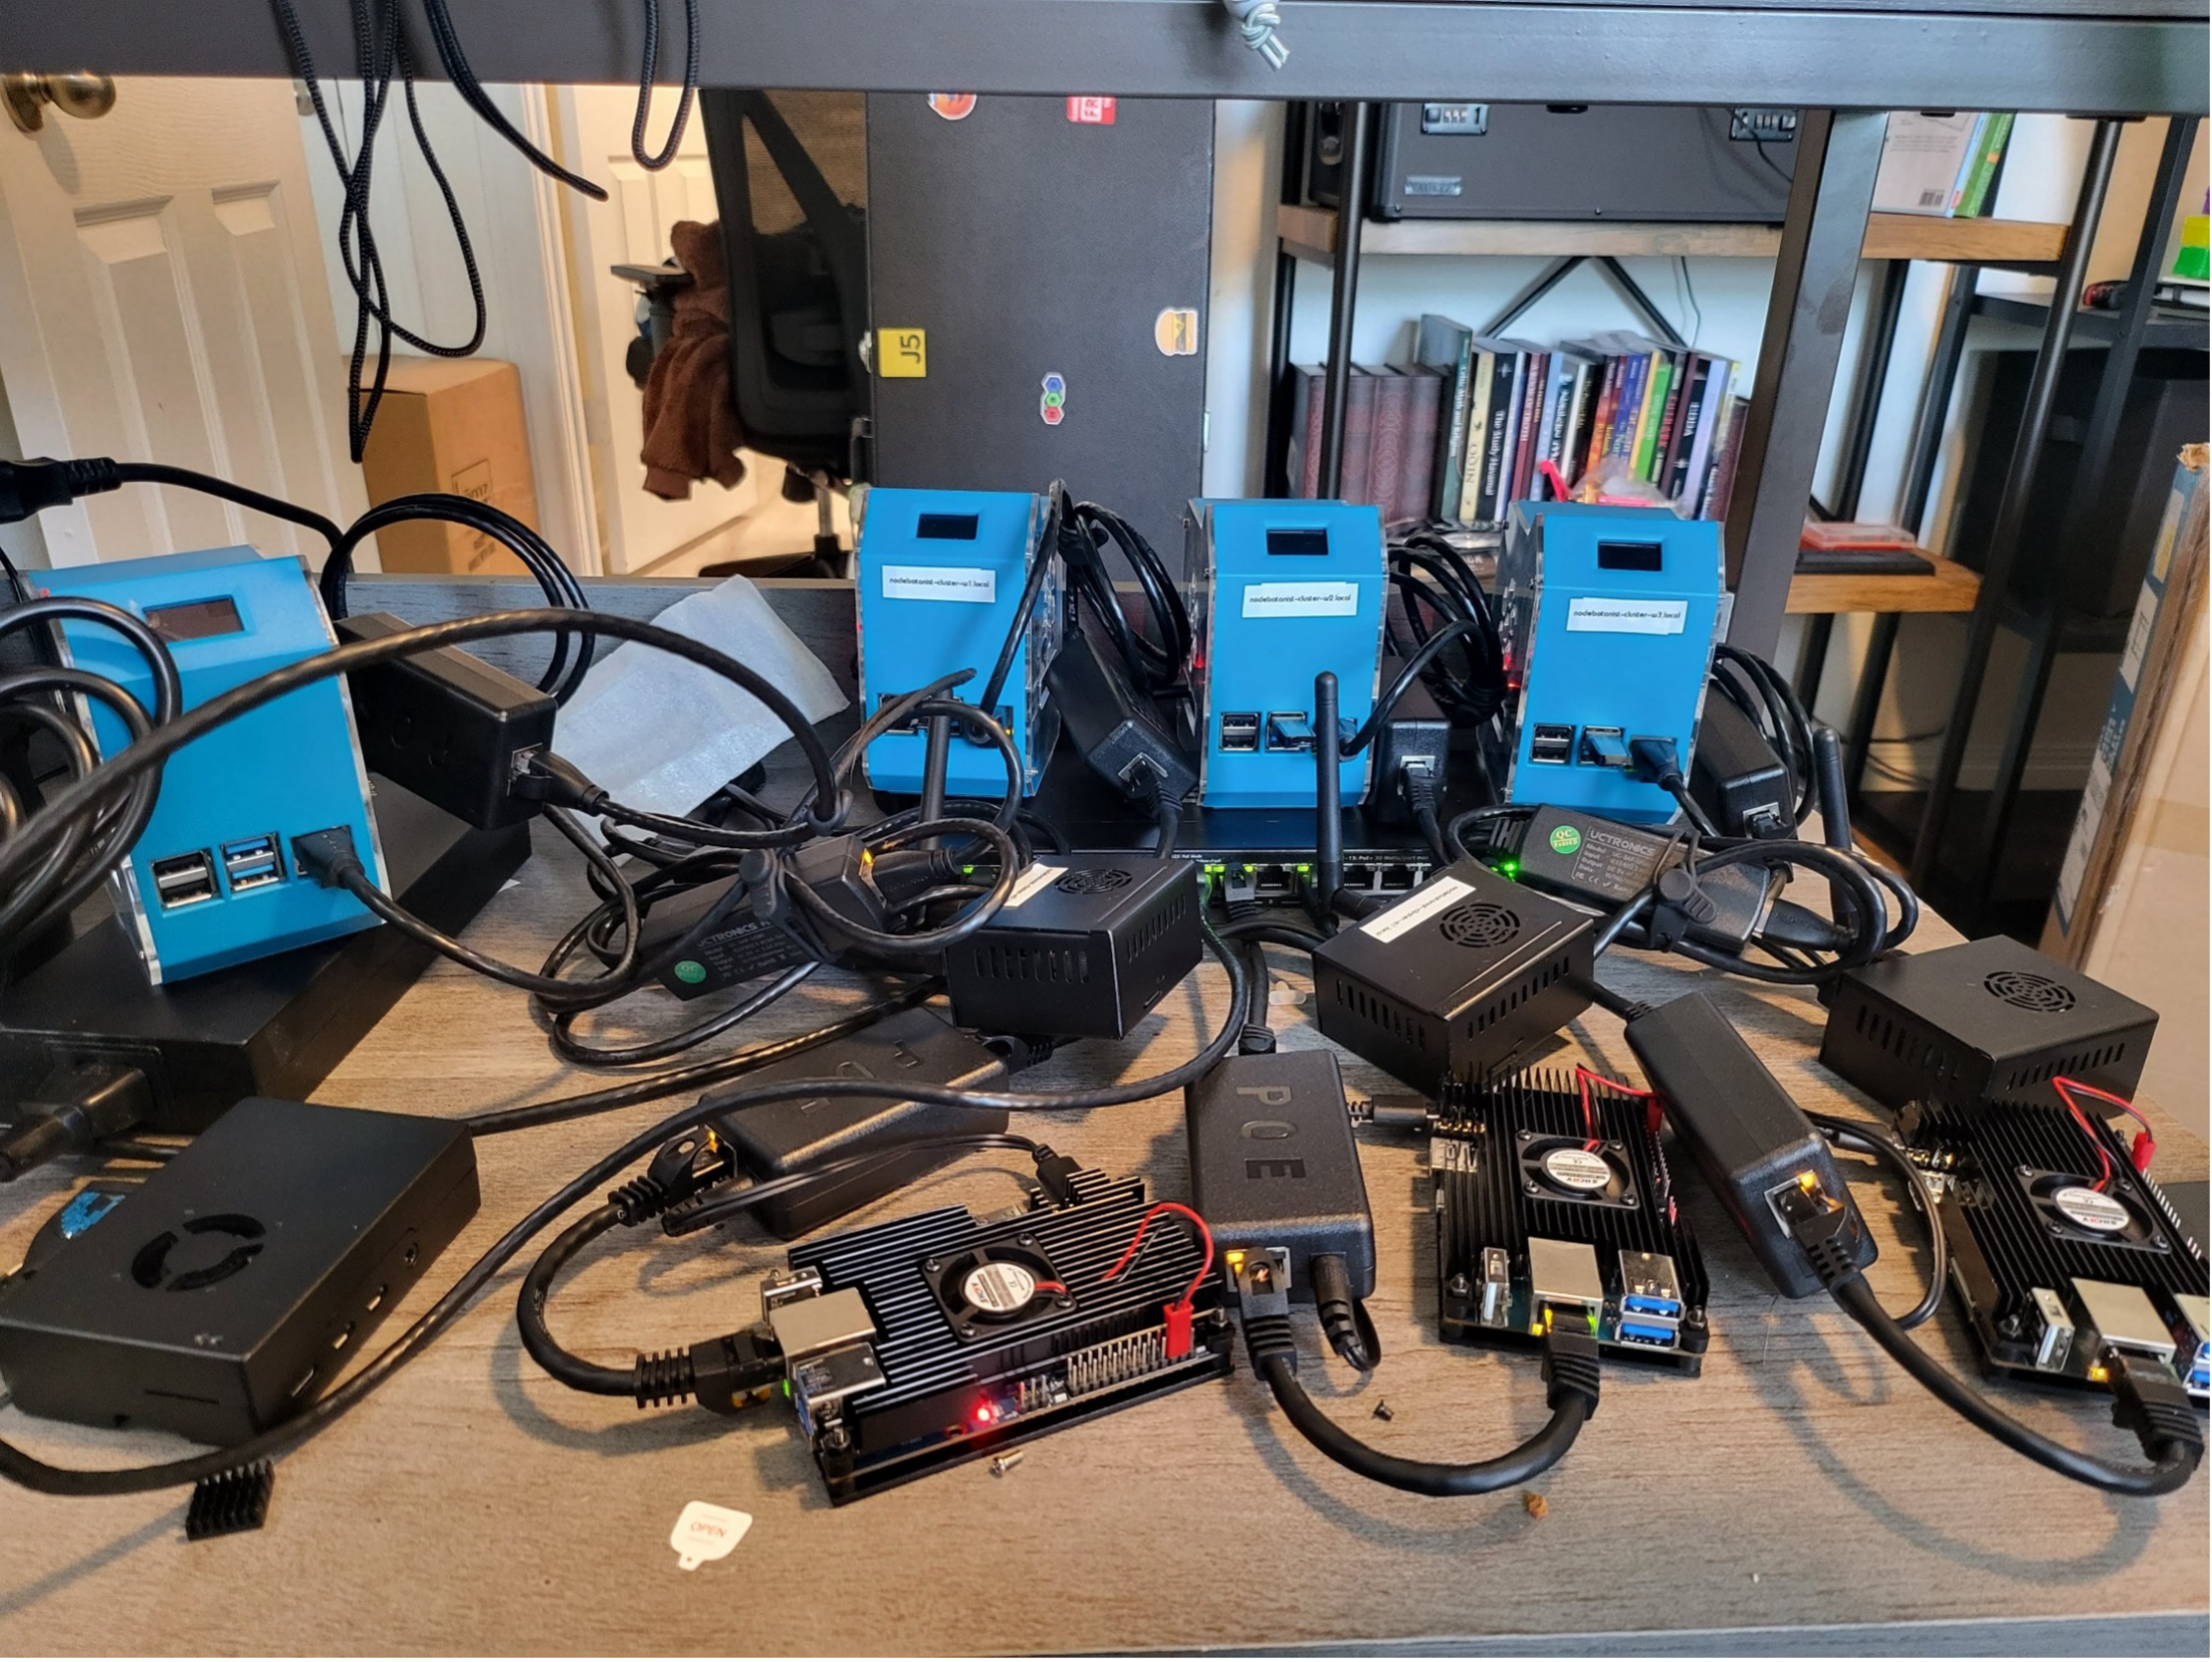
Source: Kassian Wren
You still don’t want to plug in the switch to power, as we need operating systems on the Pi computers for them to do anything.
OS Installation
You’ll need a few things to install the operating systems:
- 13 microSD cards: I recommend at least 16GB cards; I used 64GB. Make sure they’re compatible with Raspberry Pi if you can, but it’s likely if you get them from a reputable retailer, they’ll be alright.
- USB adapter for microSD: so you can read/write the cards from your computer if it doesn’t have a microSD or SD card slot. You may also need a microSD to SD card adapter.
- Raspberry Pi Flasher installed.
- Balena Etcher installed.
- An Orange Pi OS iso image: I used the official Ubuntu image (I can’t provide an https link to one, you’ll need to search).
Once you’ve gathered and installed everything, you’ll want to do the following 7 times:
- Insert a microSD card into a USB adapter and into the computer
- Open Raspberry Pi Flasher if it’s not open
- Select “Choose Device” and select the Raspberry Pi 5
- Select “Choose OS” and select the latest Raspberry Pi 64-bit OS image
- Select “Next”
- When prompted, select “Edit Settings”
- Check the first box next to “Set hostname” and in the field enter one of the following:
- admin.mycluster
- w1.mycluster
- w2.mycluster
- w3.mycluster
- a1.mycluster
- a2.mycluster
- a3.mycluster
- Check the box next to “Set username and password” and set the username to ‘pi’ and the password to ‘raspberry’
- For those of you who are reasonably worried about the security of this, worry not, we change it to ssh key access only through Ansible later.
- Go to the “Services” tab
- Check the box next to ‘enable SSH’ and the radio button next to password authentication
- Click ‘save’, ‘yes’ and ‘yes’ to start the burn process
- When done, eject and remove microSD and set aside
And the following 6 times:
- Insert a microSD card into a USB adapter and into the computer
- Open Balena Etcher if it’s not open
- Follow the prompts to pick your microSD card and the ISO you downloaded
- Start the image burn
- Once it’s done, pop out the microSD card and set it aside
Then install the SD cards, with the orange and raspberry pi OS’s correctly matched to the hardware. And if your cases are labeled with a hostname, match the raspberry pi cards by their hostname.
Unplug the Orange Pi computers (except one, any one) from the switch, and give the switch power. This should boot all the Raspberry Pi computers and ONE Orange Pi.
Now you’ll need to get the IP addresses of the Orange Pis, since you can’t easily set a hostname like we did for raspberry Pi.
- Let the Orange Pi that’s plugged into the switch boot
- Use your router menu or another tool that maps devices on your network to find the orange pi on the network and get its IP
- Log that IP somewhere it’s easy to copy/paste it
- Leave this Orange Pi alone and on, and plug in the next Orange Pi to power/ethernet
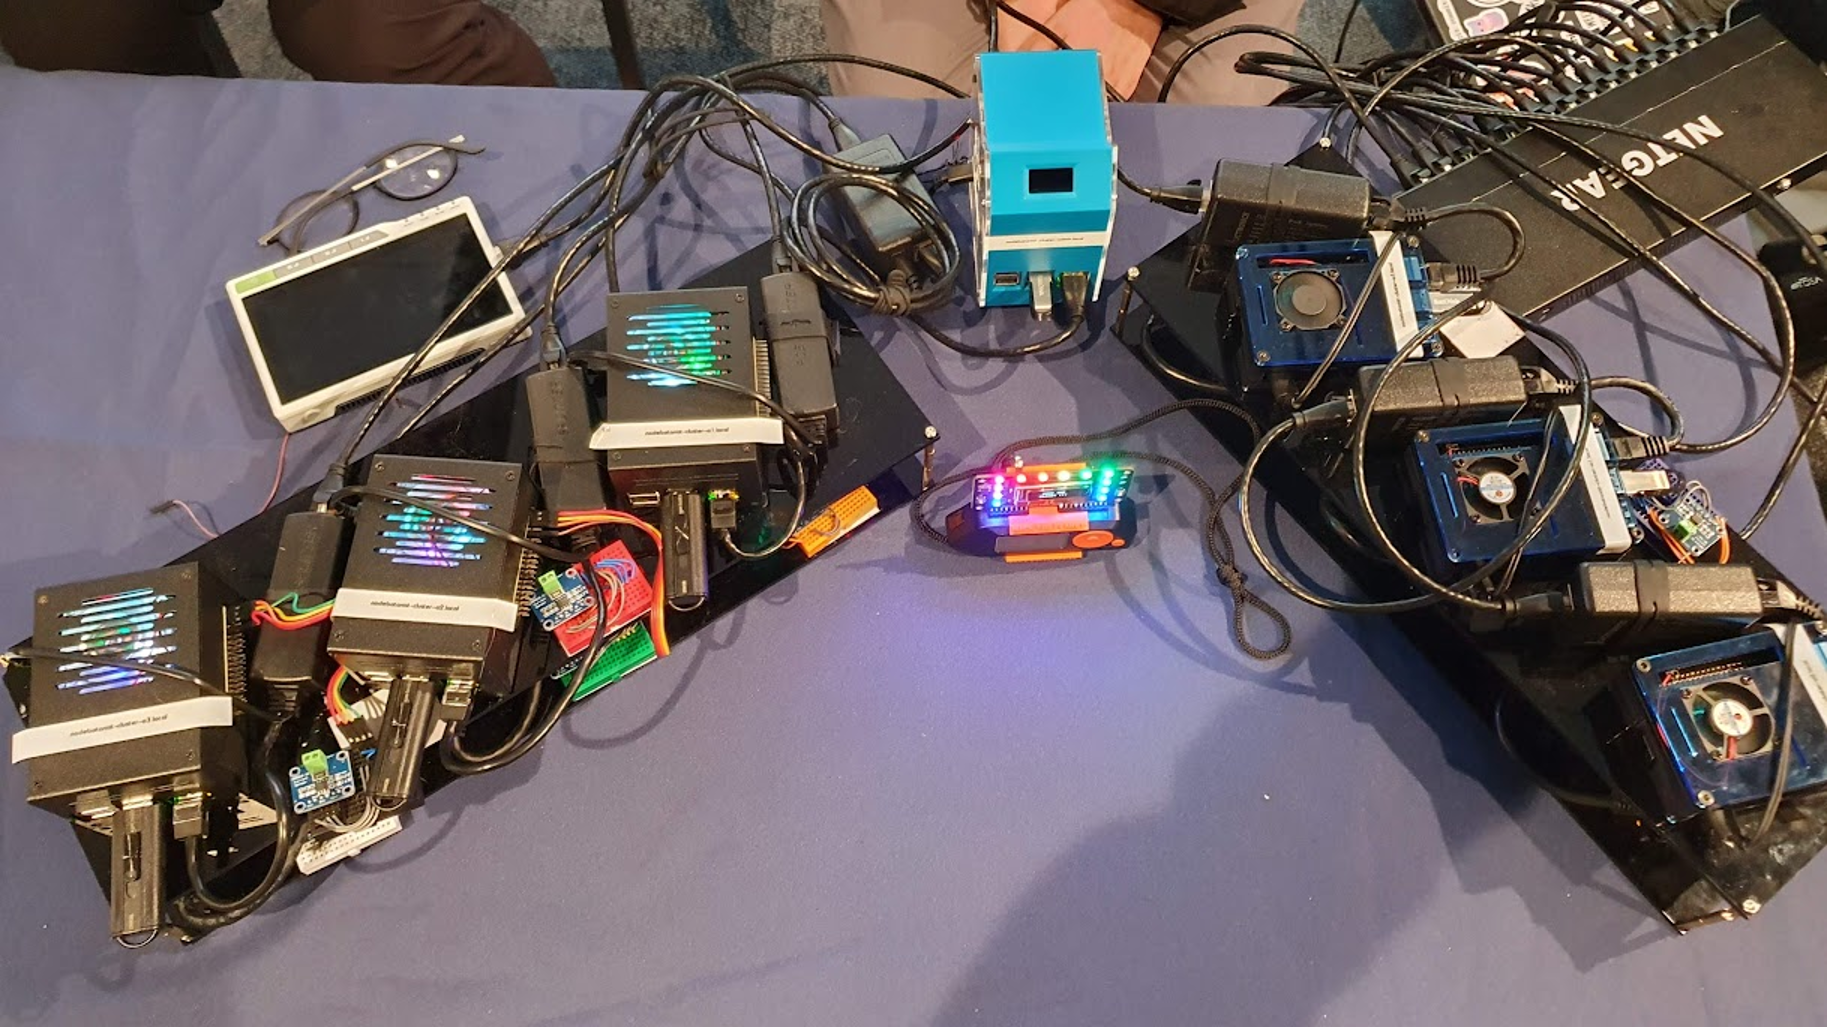
A picture of the cluster plugged in and booting from a conference showing. There is a network switch and rows of small computer boards with fans and network cables connecting everything.
Source: Kassian Wren
Once you’ve got all the IPs, you can dig into the Ansible setup.
Automated Setup Scripts with Ansible
We used Ansible to automate not only the initial OS setup, but Docker cluster creation and management.
Stage 1: Setting Up for Ansible
We’ll need a certificate to authenticate with the cluster, which can be generated with the following command.
For Ansible to work, it needs a few things; a way to ssh into each Pi, hostnames and IPs, etc. Luckily, we know just enough bash to automate this as well. See code below:
|
1 2 3 4 5 6 7 8 9 10 11 12 13 14 |
for ipend in [copied from previous steps, in the format ### ### ### ###] do sshpass -f orange-pi-password.txt sudo ssh-copy-id -o StrictHostKeyChecking=no -i cluster root@192.168.132.${ipend} done for index in 1 2 3 do for type in a w do sshpass -f raspi-password.txt ssh-copy-id -o StrictHostKeyChecking=no -i cluster pi@nodebotanist-cluster-${type}${index}.local done done |
This script:
- Cycles through each orange pi IP address
- Installs the cluster certificate for user root
- Cycles through each raspberry pi hostname
- Install the cluster certificate for user pi
Once this script has set up ssh connections to the Pi computers, Ansible can update the Pi computers, install software, and set up the Docker cluster.
Running Ansible Scripts
Then, we run a series of ansible scripts that do the following:
- Stage 2: Updates/Dependencies script
- Update/upgrade package lists with apt update/upgrade
- Install dependencies (python3, passlib)
- Create ansible and nodebotanist user, add to sudoers
- Nodebotanist is for running commands on the cluster manually
- Ansible user for logging, automation purposes (previous stages ran commands as pi/root user, next stages use ansible user)
- Disable password ssh authentication (now allows cert auth only)
- Copy ssh auth certificate to ansible, nodebotanist user
- They can now log in with the cert we created in stage 1
- Stage 3: Updates for Orange Pi computers
- Change the Orange Pi hostnames to easier-to-use ones
- Install avahi-daemon on Orange Pi computers
- Reboot Orange Pi computers
- Stage 3b: Storage format/mount
- Unmounts the USB drives (Raspberry Pi) and M.2 drives (Orange Pi)
- Creates a new primary partition (this erases all data on drive)
- Creates an ext4 file storage on the USB/M.2 drives
- Mounts the USB/M.2 drives (which also edits fstab so they auto-mount on start)
- Stage 4: Install Docker
- Installs dependencies for Docker (ca-certificates gnupg curl)
- Installs docker.io package
- Add nodebotanist and ansible users to Docker groups (so we don’t have to sudo all the time)
- Stage 5: Create cluster groups using Docker swarm
- Create a Docker swarm
- This creates 2 tokens: worker token and manager token. These are used to join other machines to the cluster
- Get and save these tokens
- Creates swarm manager bootstrap and operational groups, sorts manager machines into them
- Operational: in the swarm
- Bootstrap: needs to be added to swarm
- Same groups for workers
- Adds bootstrap managers to cluster using manager token
- Adds bootstrap workers to cluster using worker token
- Create a Docker swarm
Once we’ve run these using Ansible, we have updated Pis running Docker swarm and a working, but idle, cluster of 13 machines. Now we can use Docker Compose to start up our Cassandra and Kafka services on it.
Setting Up Docker Services—Starting Up Apache Cassandra® and Apache Kafka®
We’re going to use Docker Compose to start up Cassandra and Kafka services on our cluster. The way this works is we create a docker-compose.yml file that describes each container that should run in the cluster.
- Stage 6a: Starting up Cassandra
- Describes 6 Cassandra containers, one on each worker node
- Links them all to a virtual network called Ericht_net
- Sets up volumes to store data
- Use the depends_on clause to make sure cassandra-01 (the leader) is online before starting up nodes 2-6
- Stage 6b: Starting up Kafka
- Describes 6 Kafka containers, one on each worker node
- Links them to the same virtual network as the Cassandra containers (Ericht_net)
Once we’ve run stage 6, we have a cluster that is running Cassandra and Kafka! Now to test.
Coming Up Next
Adding Docker volumes for data permanence. Watch our for Part 4 in IoT Overdrive!
Want to try Kafka and Cassandra without the headache of building your own cluster? Click here for a 30-day free trial and get started on the Instaclustr Managed Platform!