Introduction
There are many getting started resources available for you so you can better understand Cassandra. We recommend you understand a bit about Cassandra before trialling our platform so you can get the full benefit of the trial.
Create your cluster
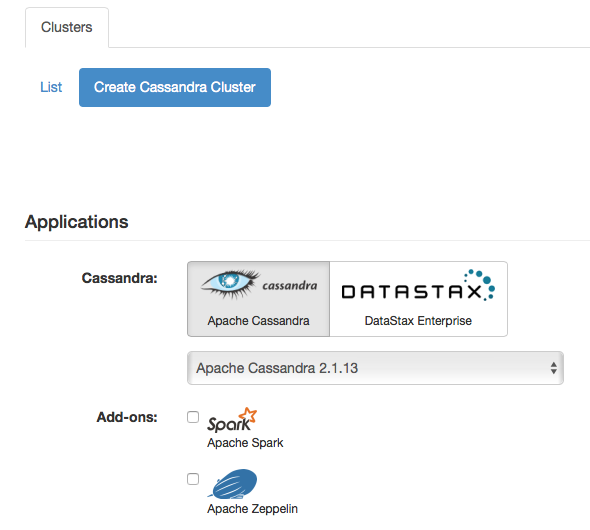
The “provision your cluster” console lets you choose a number of things for your cluster. First, you must choose which version of Cassandra to use (currently we offer 2.1, 2.2, or DataStax Enterprise using Cassandra 2.1; if you are just getting started with Cassandra, we recommend the highest version number supported (2.2 at current) so you will have the most new features).
Select Add Ons
You can also choose to add Apache Spark (fast analytics and streaming) and Apache Zepplin (brings data exploration, visualization, sharing and collaboration features to Spark) but neither are available with the free trial (too much RAM overhead for a t2.small to handle Cassandra and more).
Figure 1: Select Cassandra version and add-ons
Name your cluster
Cluster: You have to name your cluster, this can be whatever you want as long as it is only letters, numbers, and underscores. Many people use first initial plus last name (this makes it easier to find the cluster if you want to save your data at the end of the free trial).
Set your network using CIDR address notification (we recommend using one of the suggested networks for your free trial).
Figure 2: Name your cluster and set your network address

Select your datacenter
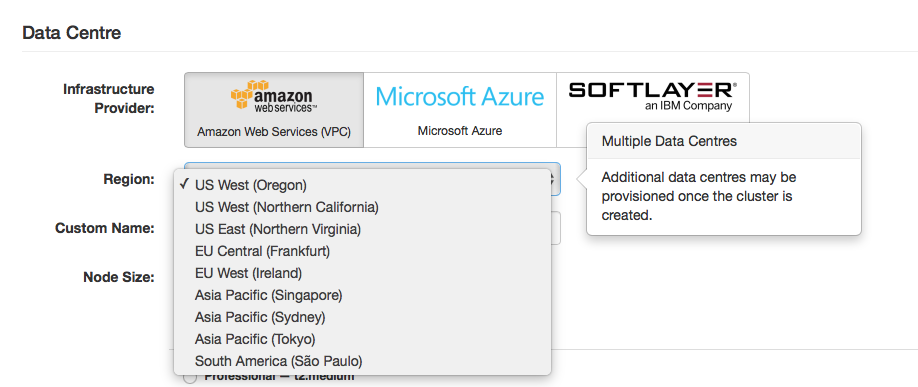
If you want to use the free trial, you must use AWS but we also offer our managed service on Microsoft’s Azure and IBM’s Softlayer for paid developer and production deployments. We currently are deployable in 9 AWS data centers (see below), 9 Azure data centers, and 22 Softlayer data centers.
Figure 3: Available AWS data centers
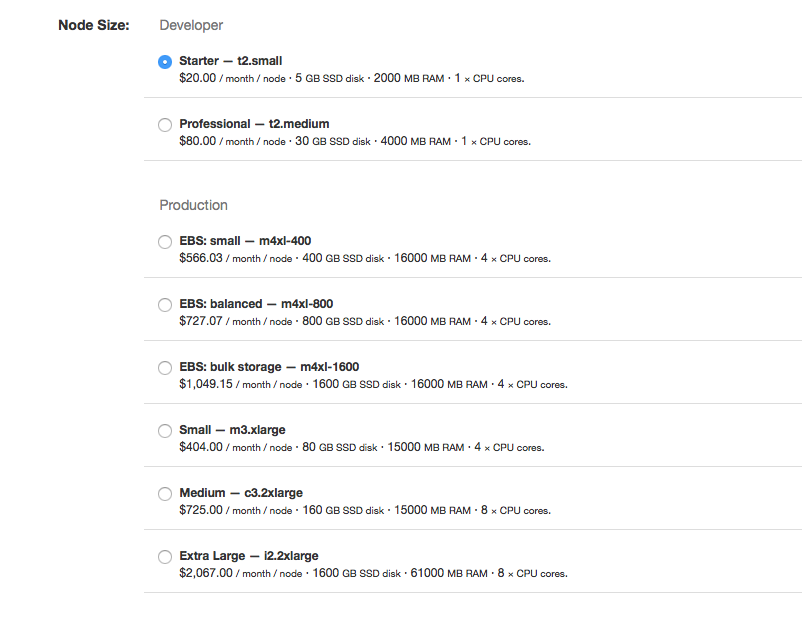
To take advantage of our free trial offer, make sure to select the t2.small instances for AWS. If you are looking for a bit more power for development but still inexpensive, you can select the t2.mediums (not covered under the free trial).
Figure 4: AWS node types (prices vary depending on your selected region)
Select number of nodes
Select how many nodes you would like to have. Under the free trial, you are covered up to three nodes. You also want to decide if you want your nodes evenly distributed across racks. If this box is checked, your cluster will automatically choose the number of available racks available in your selected data center (three racks in US West Oregon, US East Northern Virginia, and EU West Ireland, two racks in all other AWS data centers) so you must uncheck this if you want to use three nodes in a two rack data center (or two nodes in a three rack data center).
Figure 5: Select your number of nodes and rack distribution

Cassandra options
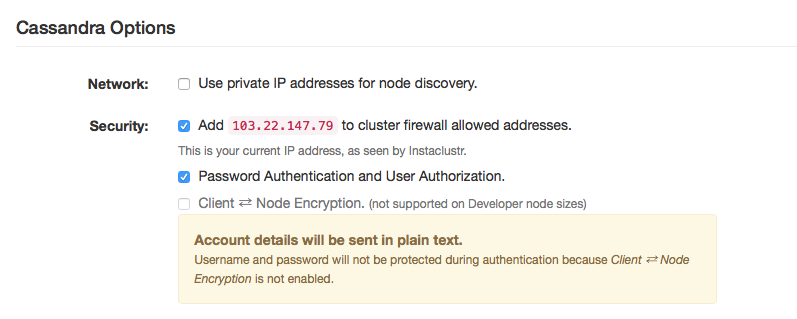
Your last decisions prior to provisioning your cluster involve network and security. If you select the use private IP addresses option, clients will only be able to connect to your cluster if they have access to your cluster’s private network.
For security, by default, we add your current IP address (as seen by us) to those allowed by your cluster firewall. You can add additional IP addresses later (once your cluster has been provisioned) in Cluster Settings.
By default, we turn on password authentication and user authorization (your password will be given to you in Connection info tab and the default superuser is called icassandra) to access your cluster. If you don’t have this, anyone who can access a port on your cluster can see and change your data.
Client to node encryption is available for production level nodes.
Figure 6: Cassandra options for network and security
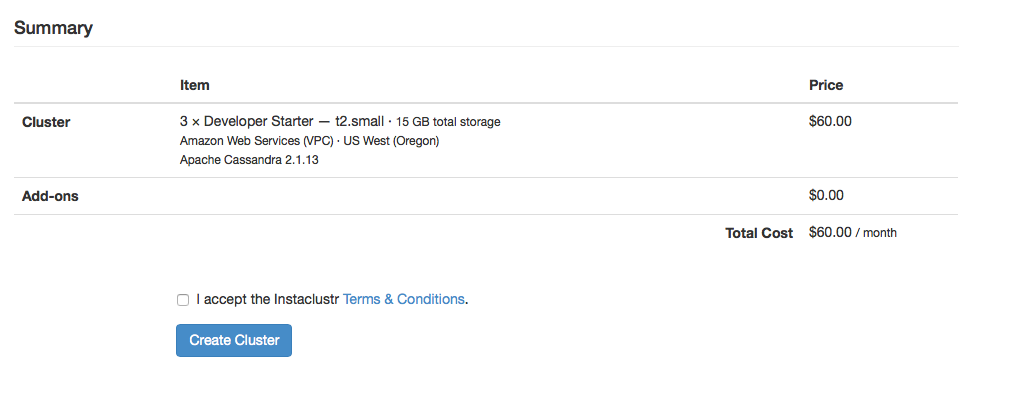
Lastly, accept the Instaclustr terms and conditions and click create cluster. Congratulations! You’ve got your very own Cassandra cluster to trial.
Figure 7: Summary of your cluster
Final note
It will take about 10-20 minutes in general to create your cluster; if you want something to read while waiting, if you are new to Cassandra, we recommend this white paper on data modeling and if you’re deeper into Cassandra, we recommend our blog post on benchmarking multi-DC Cassandra and Spark).


