Kubernetes—Greek: κυβερνήτης = Helmsman
If you are Greek hero about to embark on an epic aquatic quest (encountering one-eyed rock-throwing monsters, unpleasant weather, a detour to the underworld, tempting sirens, angry gods, etc.) then having a trusty helmsman is mandatory (even though the helmsman survived the Cyclops, like all of Odysseus’s companions, he eventually came to a sticky end).

(Source: Shutterstock)
Introduction
A few months ago we decided to try Kubernetes to see how it would help with our quest to scale our Anomalia Machina application (a massively scalable Anomaly Detection application using Apache Kafka and Cassandra). This blog is a recap of our initial experiences (reported in this webinar) creating a Kubernetes cluster on AWS and deploying the application.
Kubernetes is an automation system for the management, scaling, and deployment of containerized applications. Why is Kubernetes interesting?
- It’s open source, and cloud provider (multi-cloud) and programming language (polyglot programming) agnostic
- You can develop and test code locally, then deploy at scale
- It helps with resource management—you can deploy an application to Kubernetes and it manages application scaling
- More powerful frameworks built on the Kubernetes APIs are becoming available (e.g. Istio)
Kubernetes and AWS EKS
Our goal was to try Kubernetes out on AWS using the newish AWS EKS, the Amazon Elastic Container Service for Kubernetes. Kubernetes is a sophisticated four year old technology, and it isn’t trivial to learn or deploy on a production cloud platform. To understand, set-up, and use it, you need familiarity with a mixture of Docker, AWS, security, networking, linux, systems administration, grid computing, resource management and performance engineering! To get up to speed faster, I accepted an invitation to attend an AWS Get-it-done-athon in Sydney for a few days last year to try out AWS EKS. Here’s the documentation I used: EKS user guide, step by step guide, and a useful EKS workshop which includes some extensions.
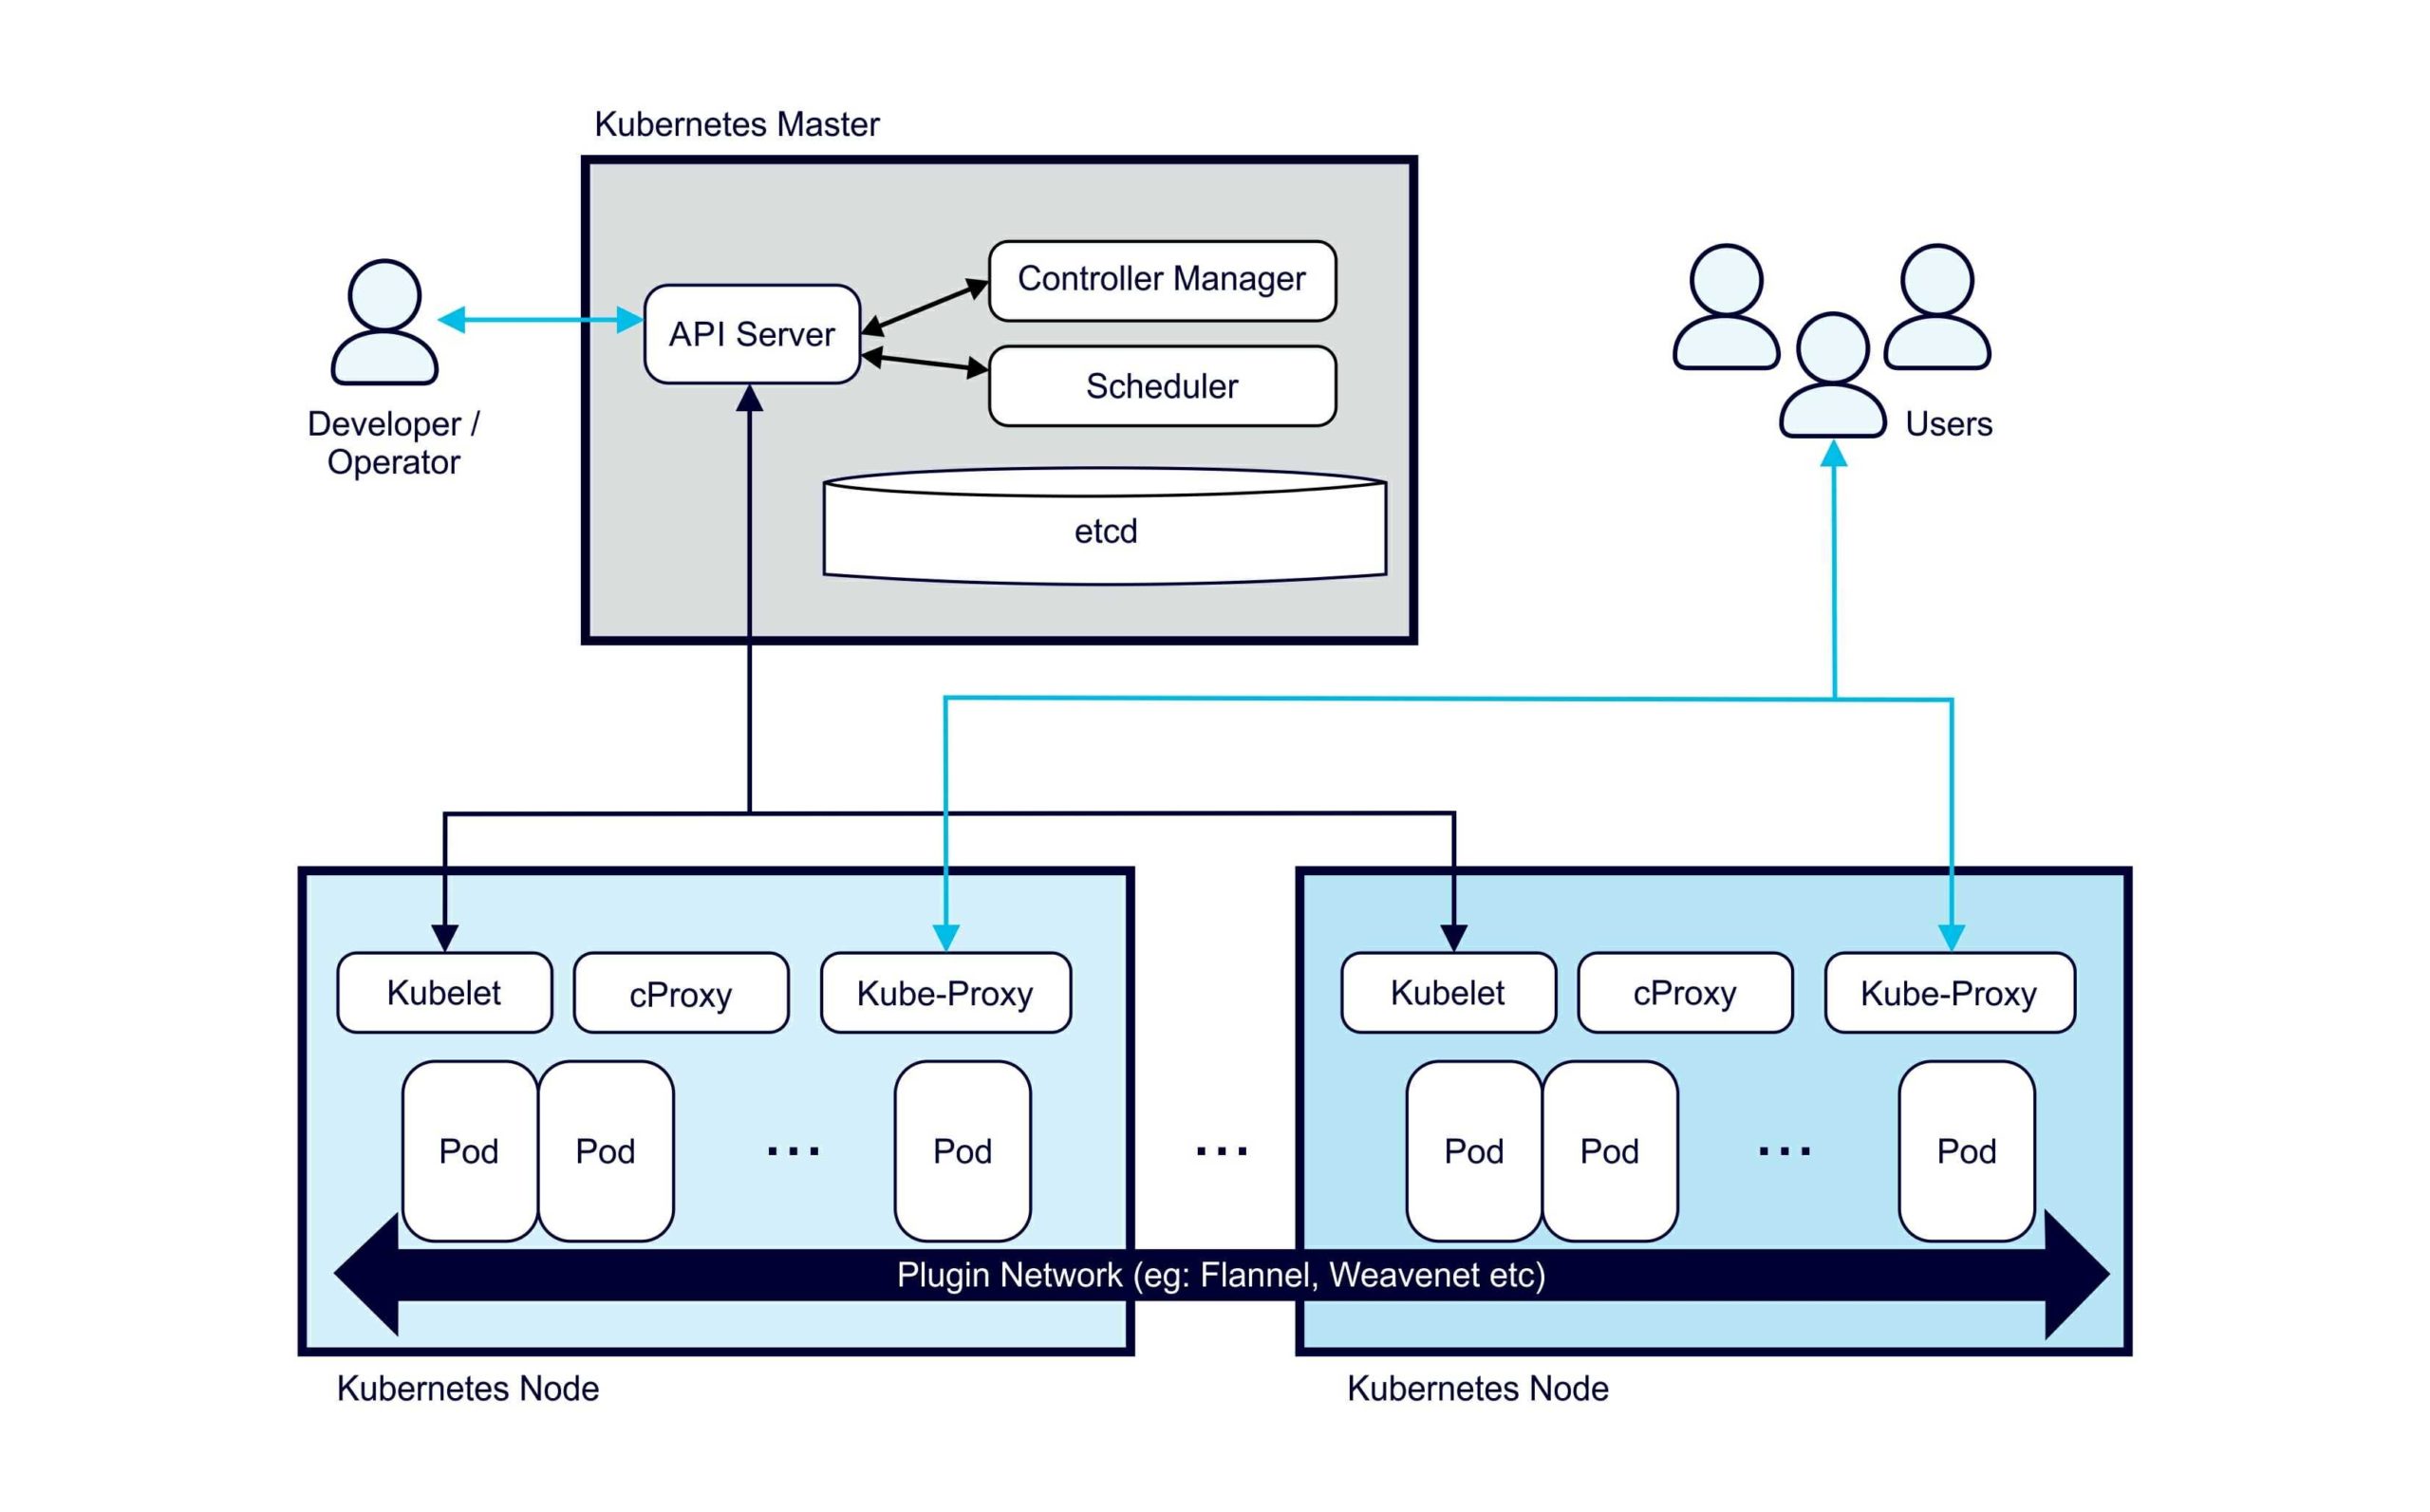
At a high level Kubernetes has a Master (controller) and multiple (worker) Nodes.
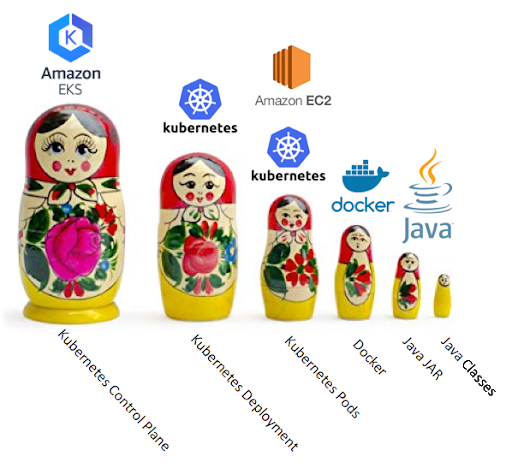
Kubernetes has a lot of layers, a bit like Russian nesting dolls. The smallest doll is the code, the Java classes. Then you have to package it as a Java JAR file, then turn the JAR into a Docker image and upload it to the Docker Hub. The Kubernetes layers include nodes (EC2 instances), pods which run on nodes, and deployments which have 1 or more pods. A Kubernetes Deployment (one of many controller types), declaratively tells the Control Plane what state (and how many) Pods there should be. Finally the control plane, the master, which runs everything. This is the focus of AWS EKS.
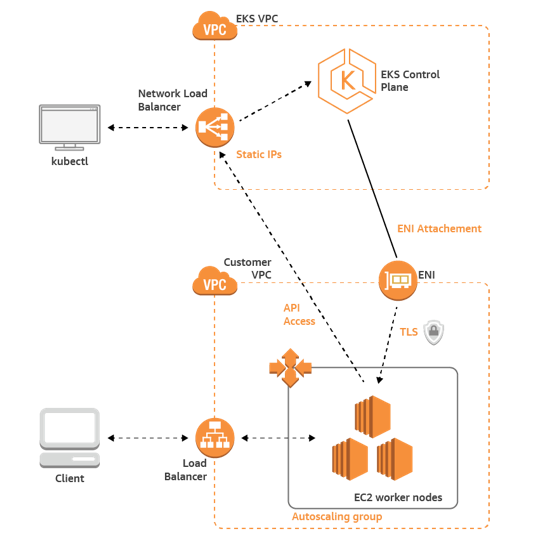
This is a high level overview of AWS EKS. It looks simple enough, but there are a few complications to solve before you can get your application running.
Regions
 “Toto, I’ve a feeling we’re not in Kansas anymore” (Source: Shutterstock)
Each AWS EKS runs in an AWS region, and the worker nodes must run in the same region. When I created EKS last year there were only 3 supported regions. There are now lots more EKS regions. Unfortunately, my Kafka and Cassandra test clusters were in Ohio, which was not one of the EKS regions at the time. Virginia was the nearest EKS region. Ohio is only 500 km away, so I hoped the application would work ok (at least for testing) across regions. However, running EKS in a different region to other parts of your application may be undesirable due to increased complexity, latency, and extra data charges. It also introduced some unnecessary complications for this experiment as well.
Kubernetes Snakes and Ladders
It turns out that there are lots of steps to get AWS EKS running, and they didn’t all work smoothly (the “snakes”), particularly with the cross-region complications. Let’s roll the dice and test our luck.

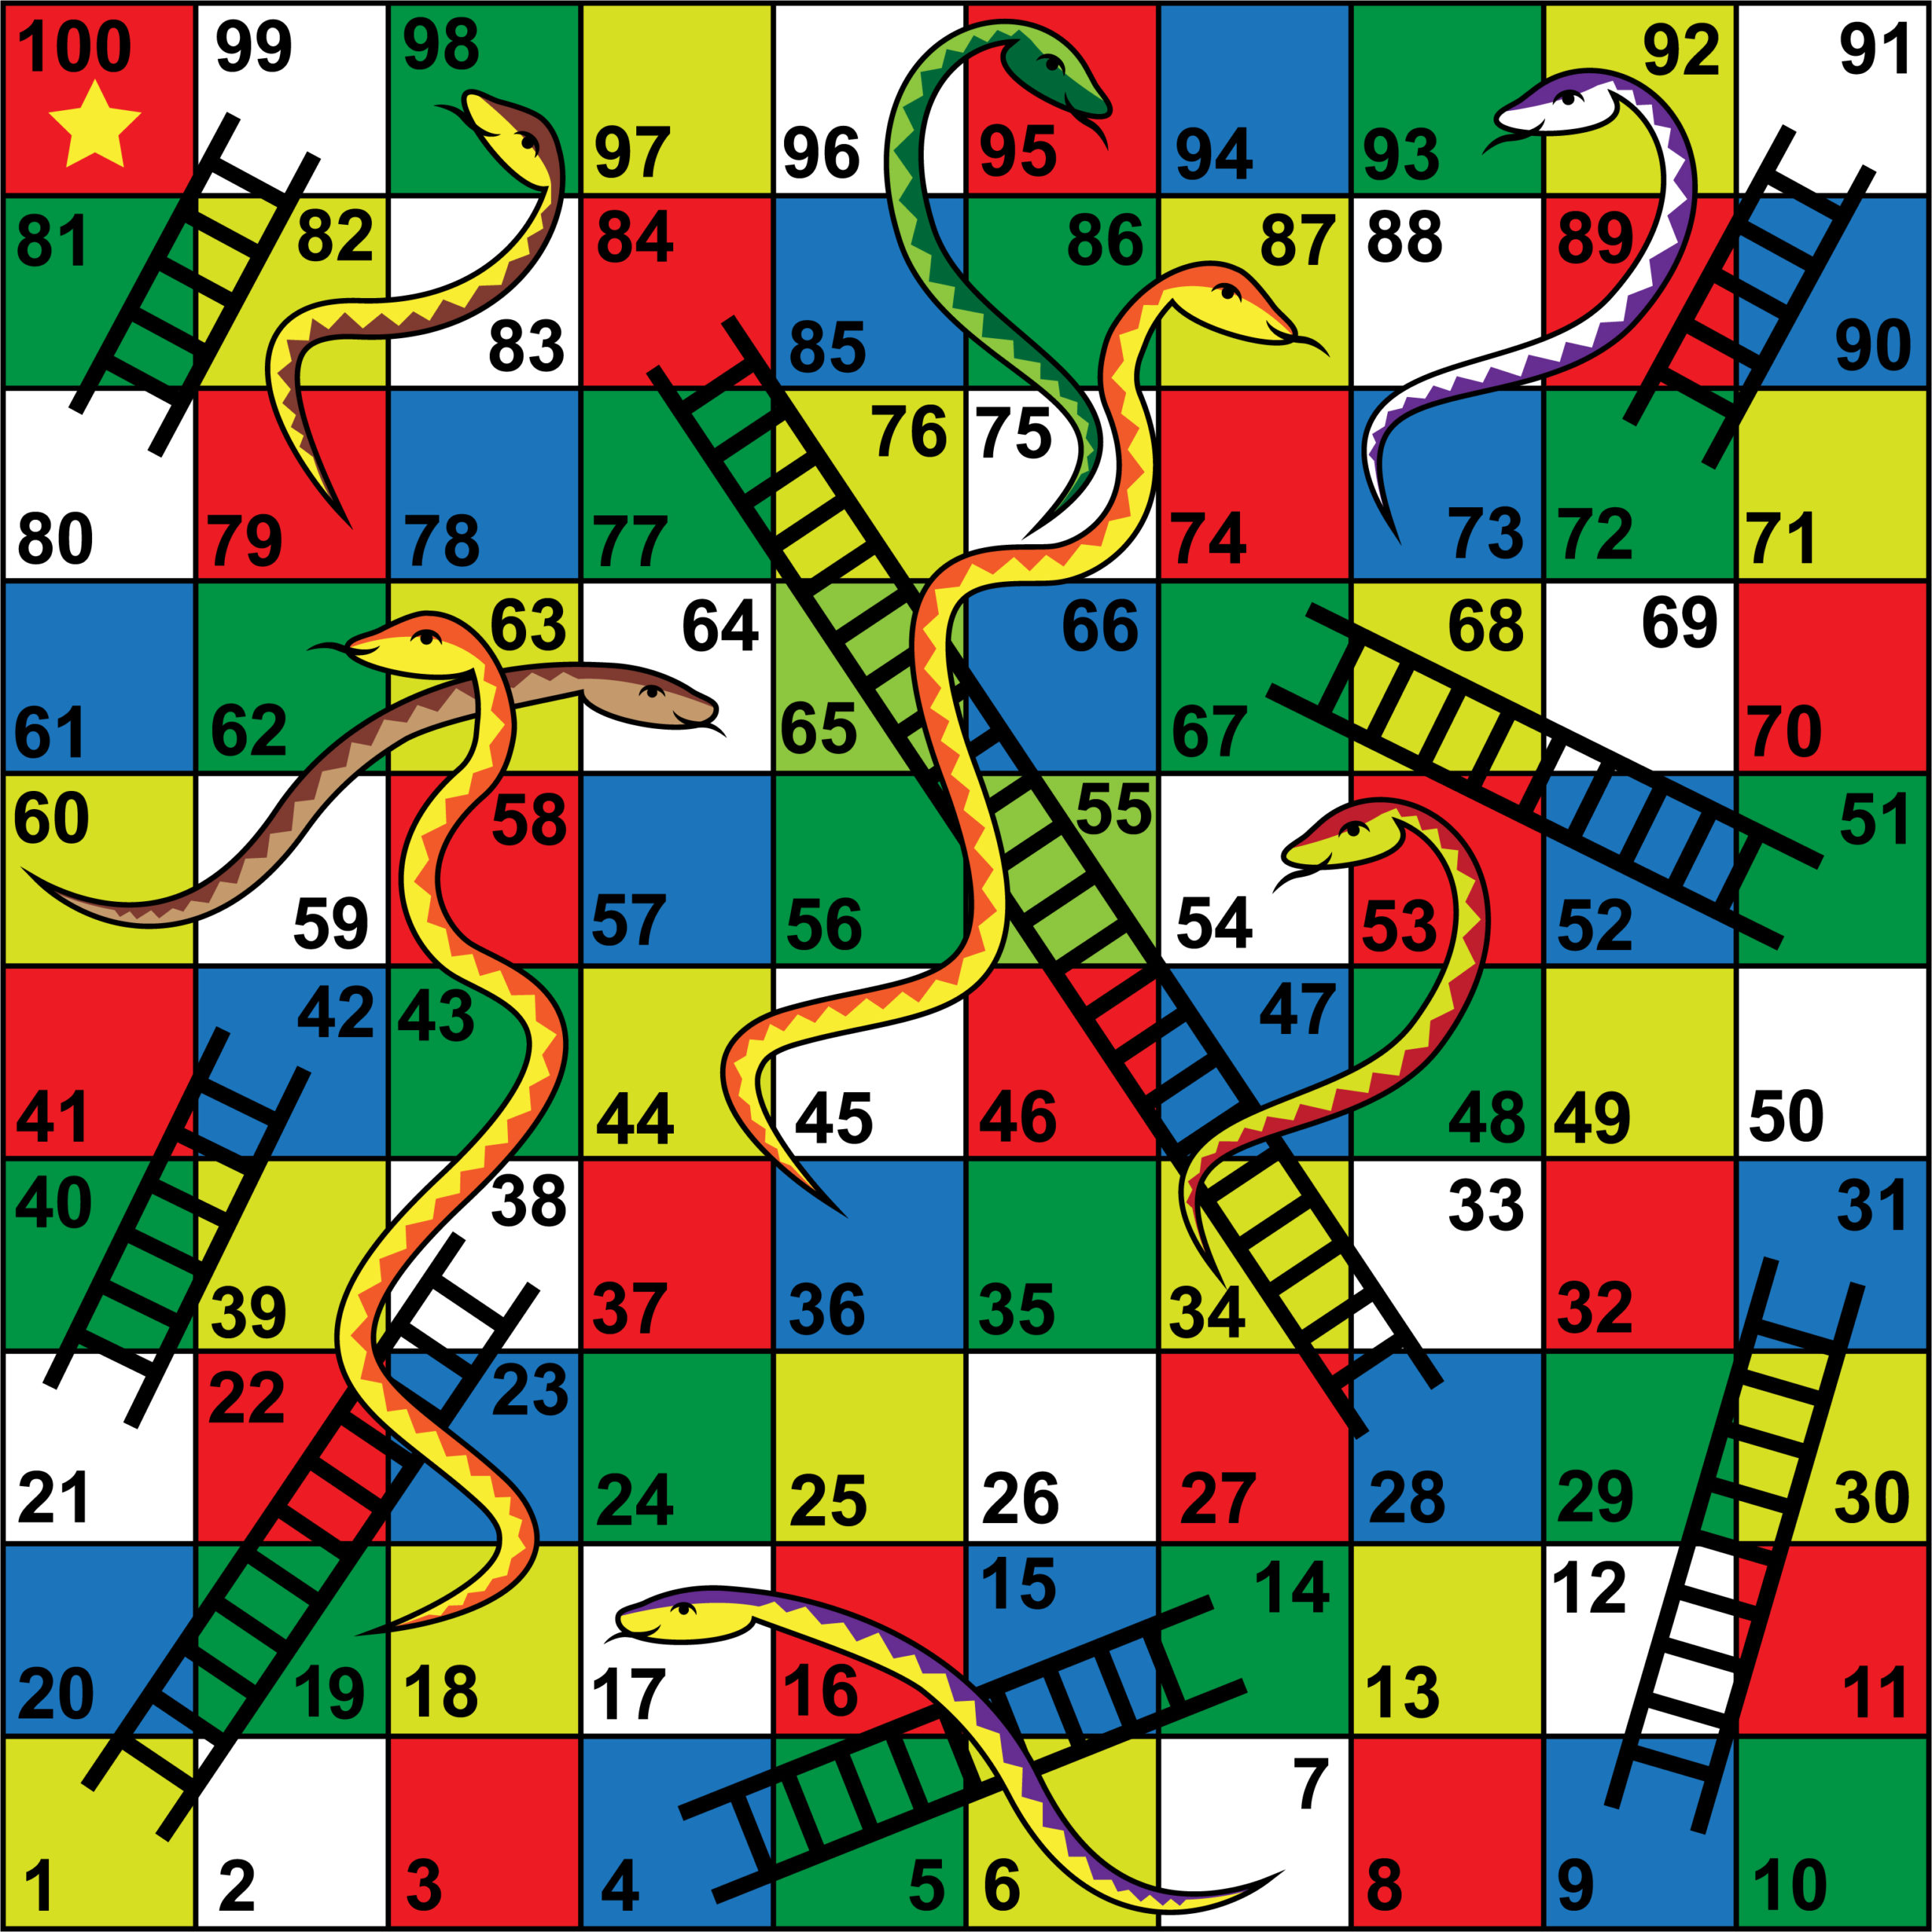
Anomalia Machina 7: Snakes and Ladders (Source: Shutterstock)
First, we have to prepare things:
1. Create Amazon EKS service role (5 steps)
2. Create your Amazon EKS Cluster VPC (12 steps)
3. Install and Configure kubectl for Amazon EKS (5 steps)
4. Install aws-iam-authenticator for Amazon EKS (10 steps)
5. Download and install the latest AWS CLI (6 steps)
Many (38) steps and a few hours later we were ready to create our AWS EKS cluster.
6. Create your Amazon EKS Cluster (12 steps)
7. Configure kubectl for Amazon EKS (3 steps)
Next, more steps to launch and configure worker nodes:
8. Add key pairs to EKS region (extra steps due to multiple regions, down a snake)
9. Launch and configure Amazon EKS worker nodes (29 steps)
We finally got 3 worker nodes started.
10 – Deploying the Kubernetes Web GUI dashboard is a good idea if you want to see what’s going on (it runs on worker nodes). But then down another snake as the documentation wasn’t 100% clear (12 steps).
11 – Deploy the application (5 steps). Does it work?
12 – Not yet… down another snake. Configure, debug, test application (30 steps)
After 100+ steps (and 2 days) we could finally ramp up our application on the Kubernetes cluster and test it out. It worked (briefly). The completed “game”, with steps (1-12) numbered, looked like this:
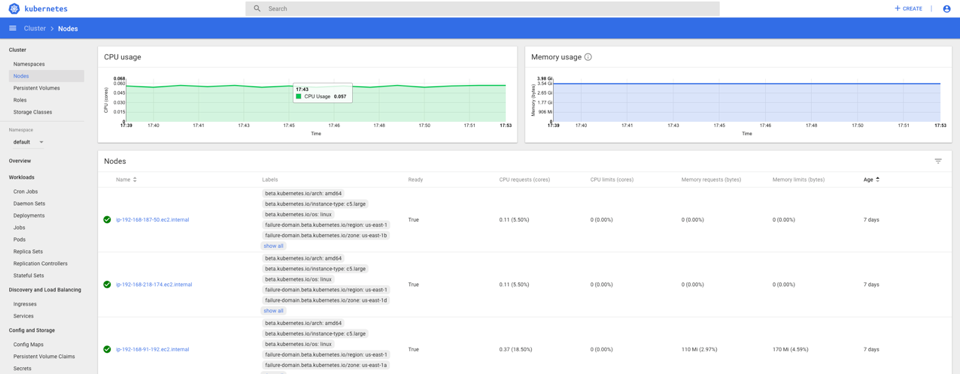
Here’s the Kubernetes GUI dashboard with the 3 worker nodes and the anomaly detection application pipeline deployed. You can kill pods, and EKS magically replaces them. You can ask for more pods and EKS creates more – just don’t ask for too many!
(Mis)understanding Kubernetes Scaling
It’s useful to understand the basics of AWS EKS/Kubernetes scaling (I initially didn’t). When you create a Kubernetes deployment you specify how many replicas (pods) you want. Pods are designed to run a single instance of an application and are the basic unit of concurrency in Kubernetes. They are also designed to be ephemeral – they can be started, killed, and restarted on different nodes. Once running, you can request more or less replicas. I started out with 1 replica which worked ok.
I then wanted to see what happened if I requested more replicas. I had 3 worker nodes (EC2 instances), so was curious to see how many pods Kubernetes would allow – 1, 2, 3, or more? (Note that some of the worker node resources are already used by Kubernetes for the GUI and monitoring). I soon found out that by default Kubernetes doesn’t limit the number of pods at all—i.e. it assumes pods use no resources, and allows more pods to be created even when all the worker nodes have run out of spare resources. As a result the worker nodes were soon overloaded, and the whole system became unresponsive—the Kubernetes GUI froze and I couldn’t delete pods. To try and get things back to a working state I manually stopped the EC2 worker instances from the AWS console.
Did this work? No. What I hadn’t realised was that the worker nodes are created as part of an auto-scaling group.
To change the number of instances (and therefore nodes) you need to change the auto scaling group minimum and maximum sizes. The number of instances will scale elastically within these limits. After I manually stopped the worker instances I checked later and I found that (1) they had all started again, and (2) they were all saturated again (as Kubernetes was still trying to achieve the desired number of replicas for the deployment).
Therefore, another useful thing to understand about AWS EKS and Kubernetes is that Kubernetes resources are controlled declaratively by the higher layers, but AWS EC2 instances are controlled by AWS. If you need to kill off all the pods you have to change the number of desired replicas to 0 in the Kubernetes deployment. But if you need more worker nodes you have to change the max/desired sizes in the workers autoscaling group, as Kubernetes cannot override these values. Apparently Kubernetes does not by default enable elastic node auto scaling using the workers auto scaling group. You need the Kubernetes Cluster autoscaler configured for this to work.
Further Resources
Here is another AWS EKS review:
- An Adventure into Kubernetes with Amazon EKS (which confirms my theory about auto-scaling)
Next blog(s) I’ll provide an update on using Kubernetes to scale the production version of the Anomalia Machina Application (with Prometheus and OpenTracing) and the results at scale.


