Creating a Cadence Cluster with HTTP API
Overview
This article describes how to provision a Cadence cluster with HTTP API using the Instaclustr Console. Cadence HTTP API allows users to interact with the Cadence server using the HTTP protocol. You can read more about Cadence HTTP API and our support for it here.
There are 3 approaches to creating the Cadence cluster with HTTP API:
- Development Shared Infrastructure – The lowest cost option for development environments. This provisions a single dedicated Cadence server and uses clusters shared across customers for the supporting services (Apache Cassandra, OpenSearch and Apache Kafka). Throughput limits apply. It’s available in limited regions.
- Packaged Solution – The best option for simple production and testing environments. This provisions a complete Cadence configuration including the required supporting clusters.
- Cadence Cluster Only – The most flexible option for environments at all scales. This requires that you have already created the necessary supporting clusters and provisions a Cadence cluster to use the existing supporting clusters.
Development Shared Infrastructure
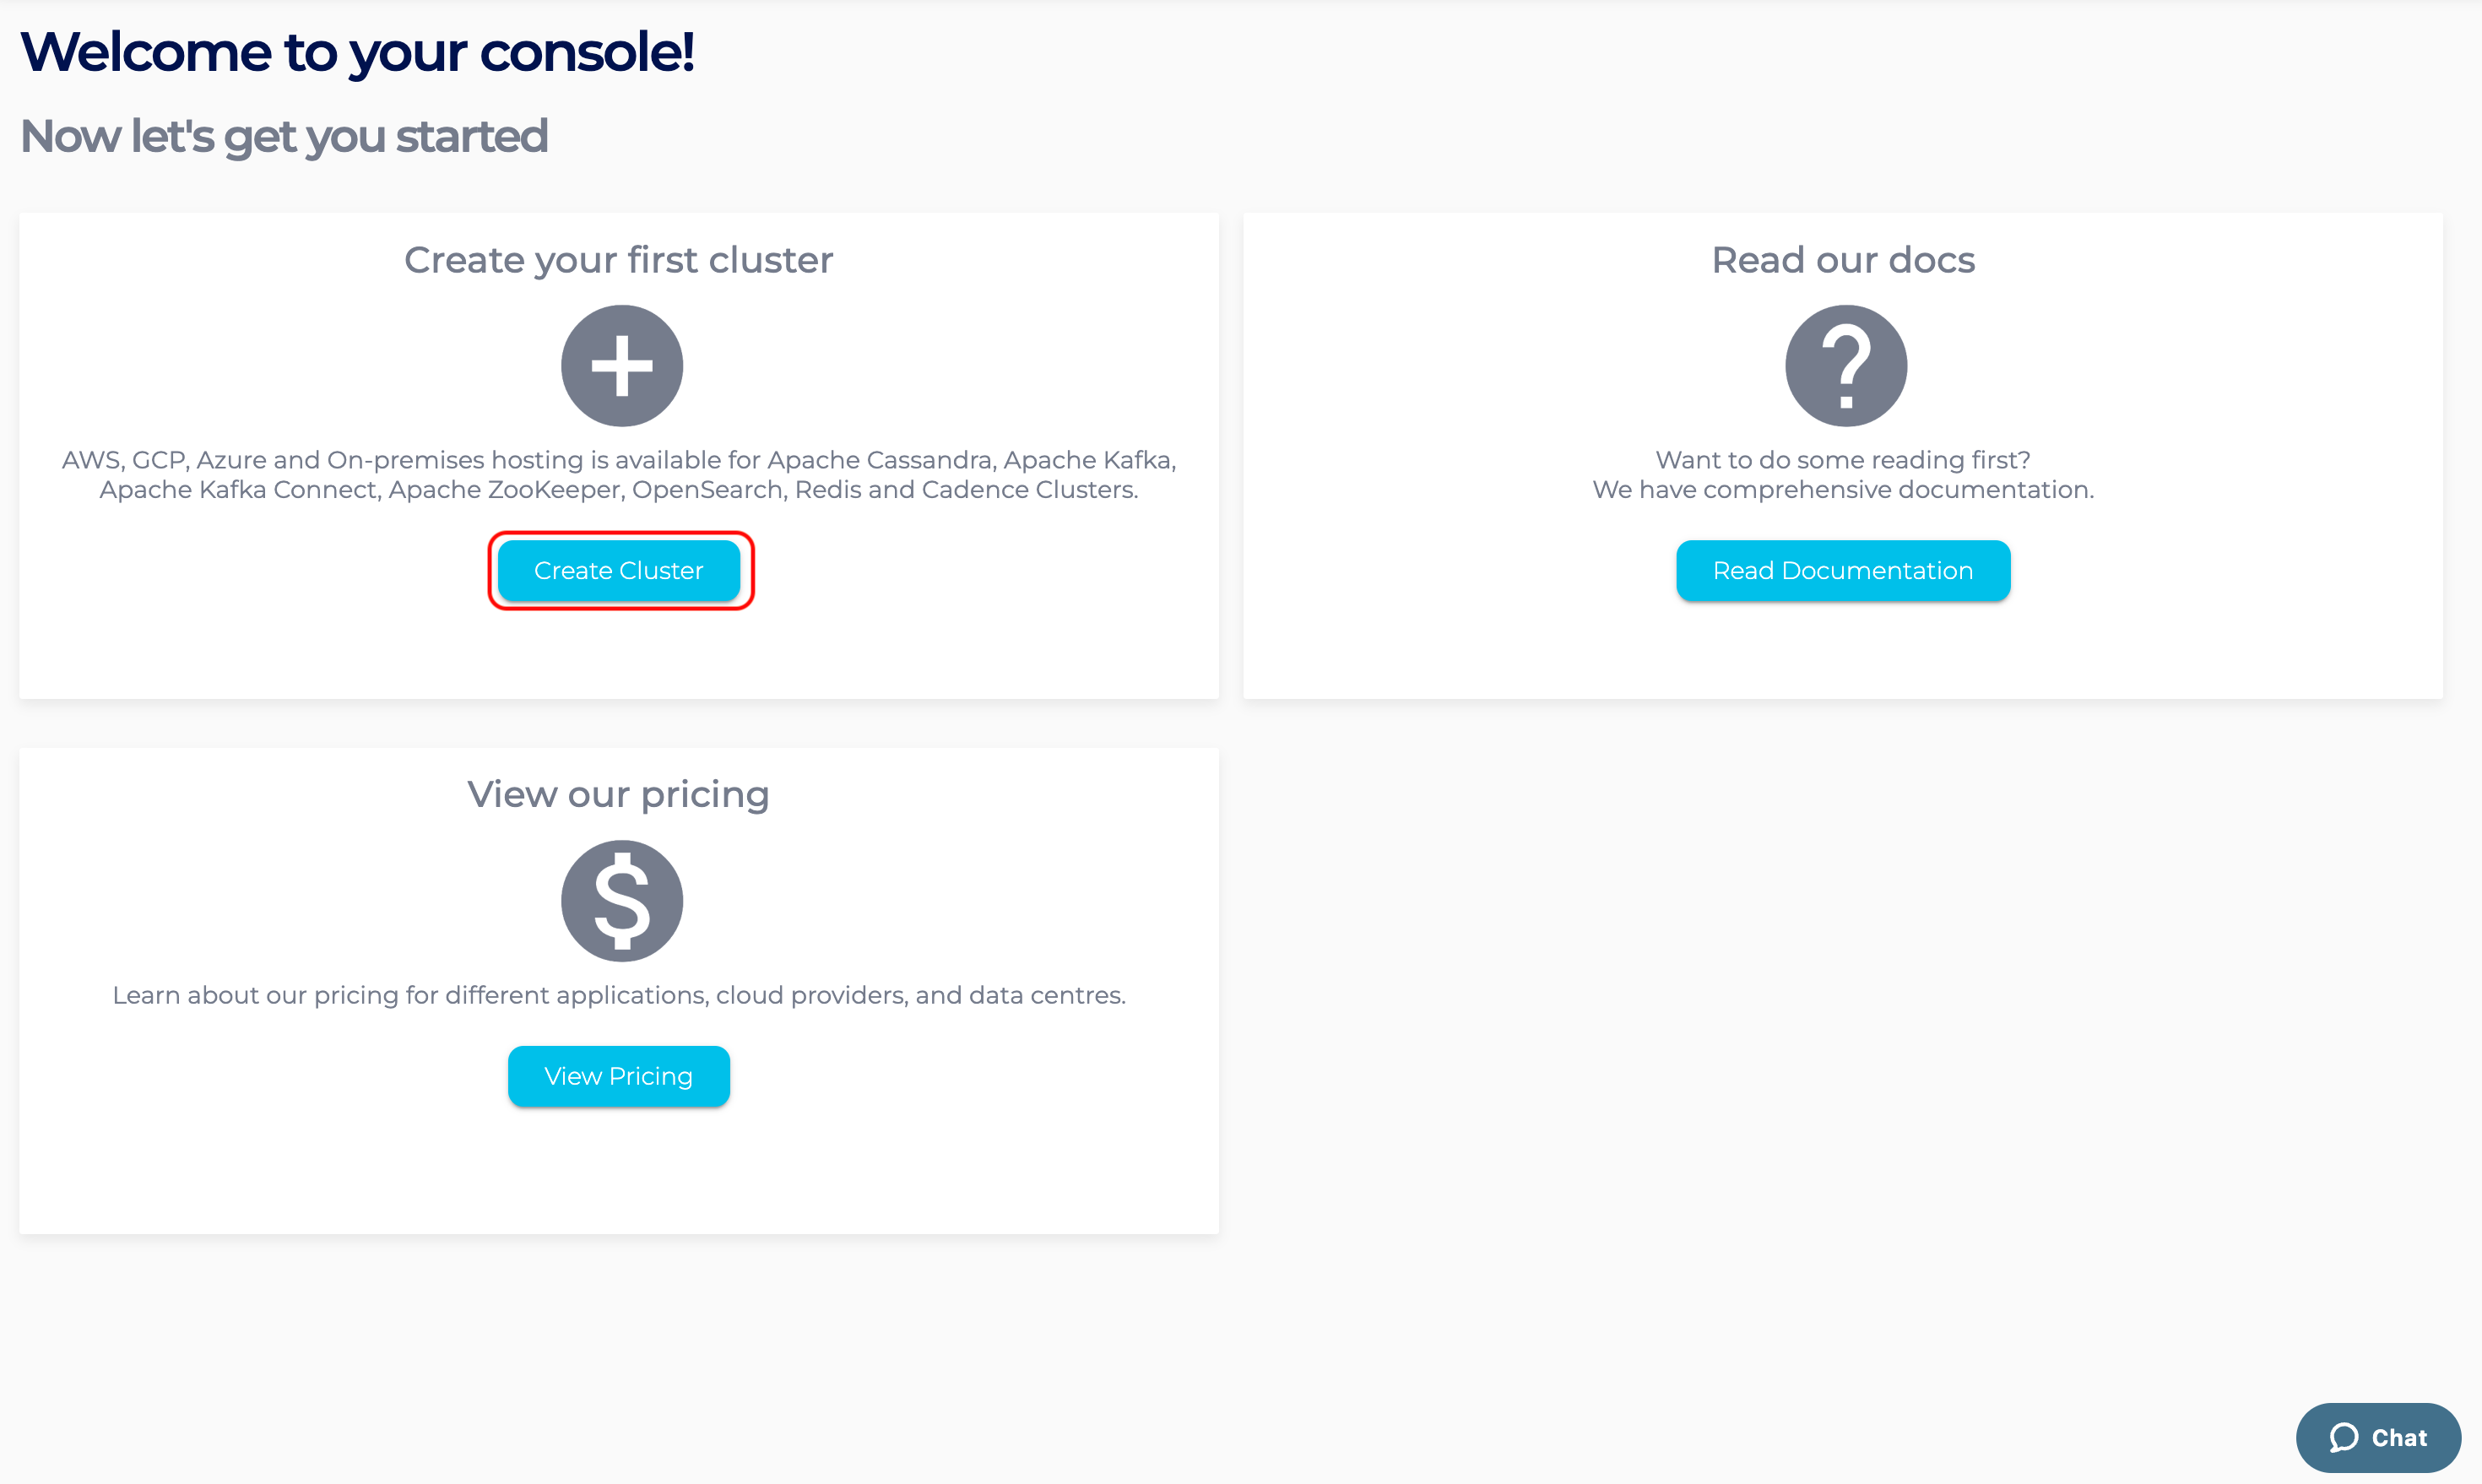
- Log into the Instaclustr Console and click the Create Cluster button. This will take you to the wizard for creating a new cluster.
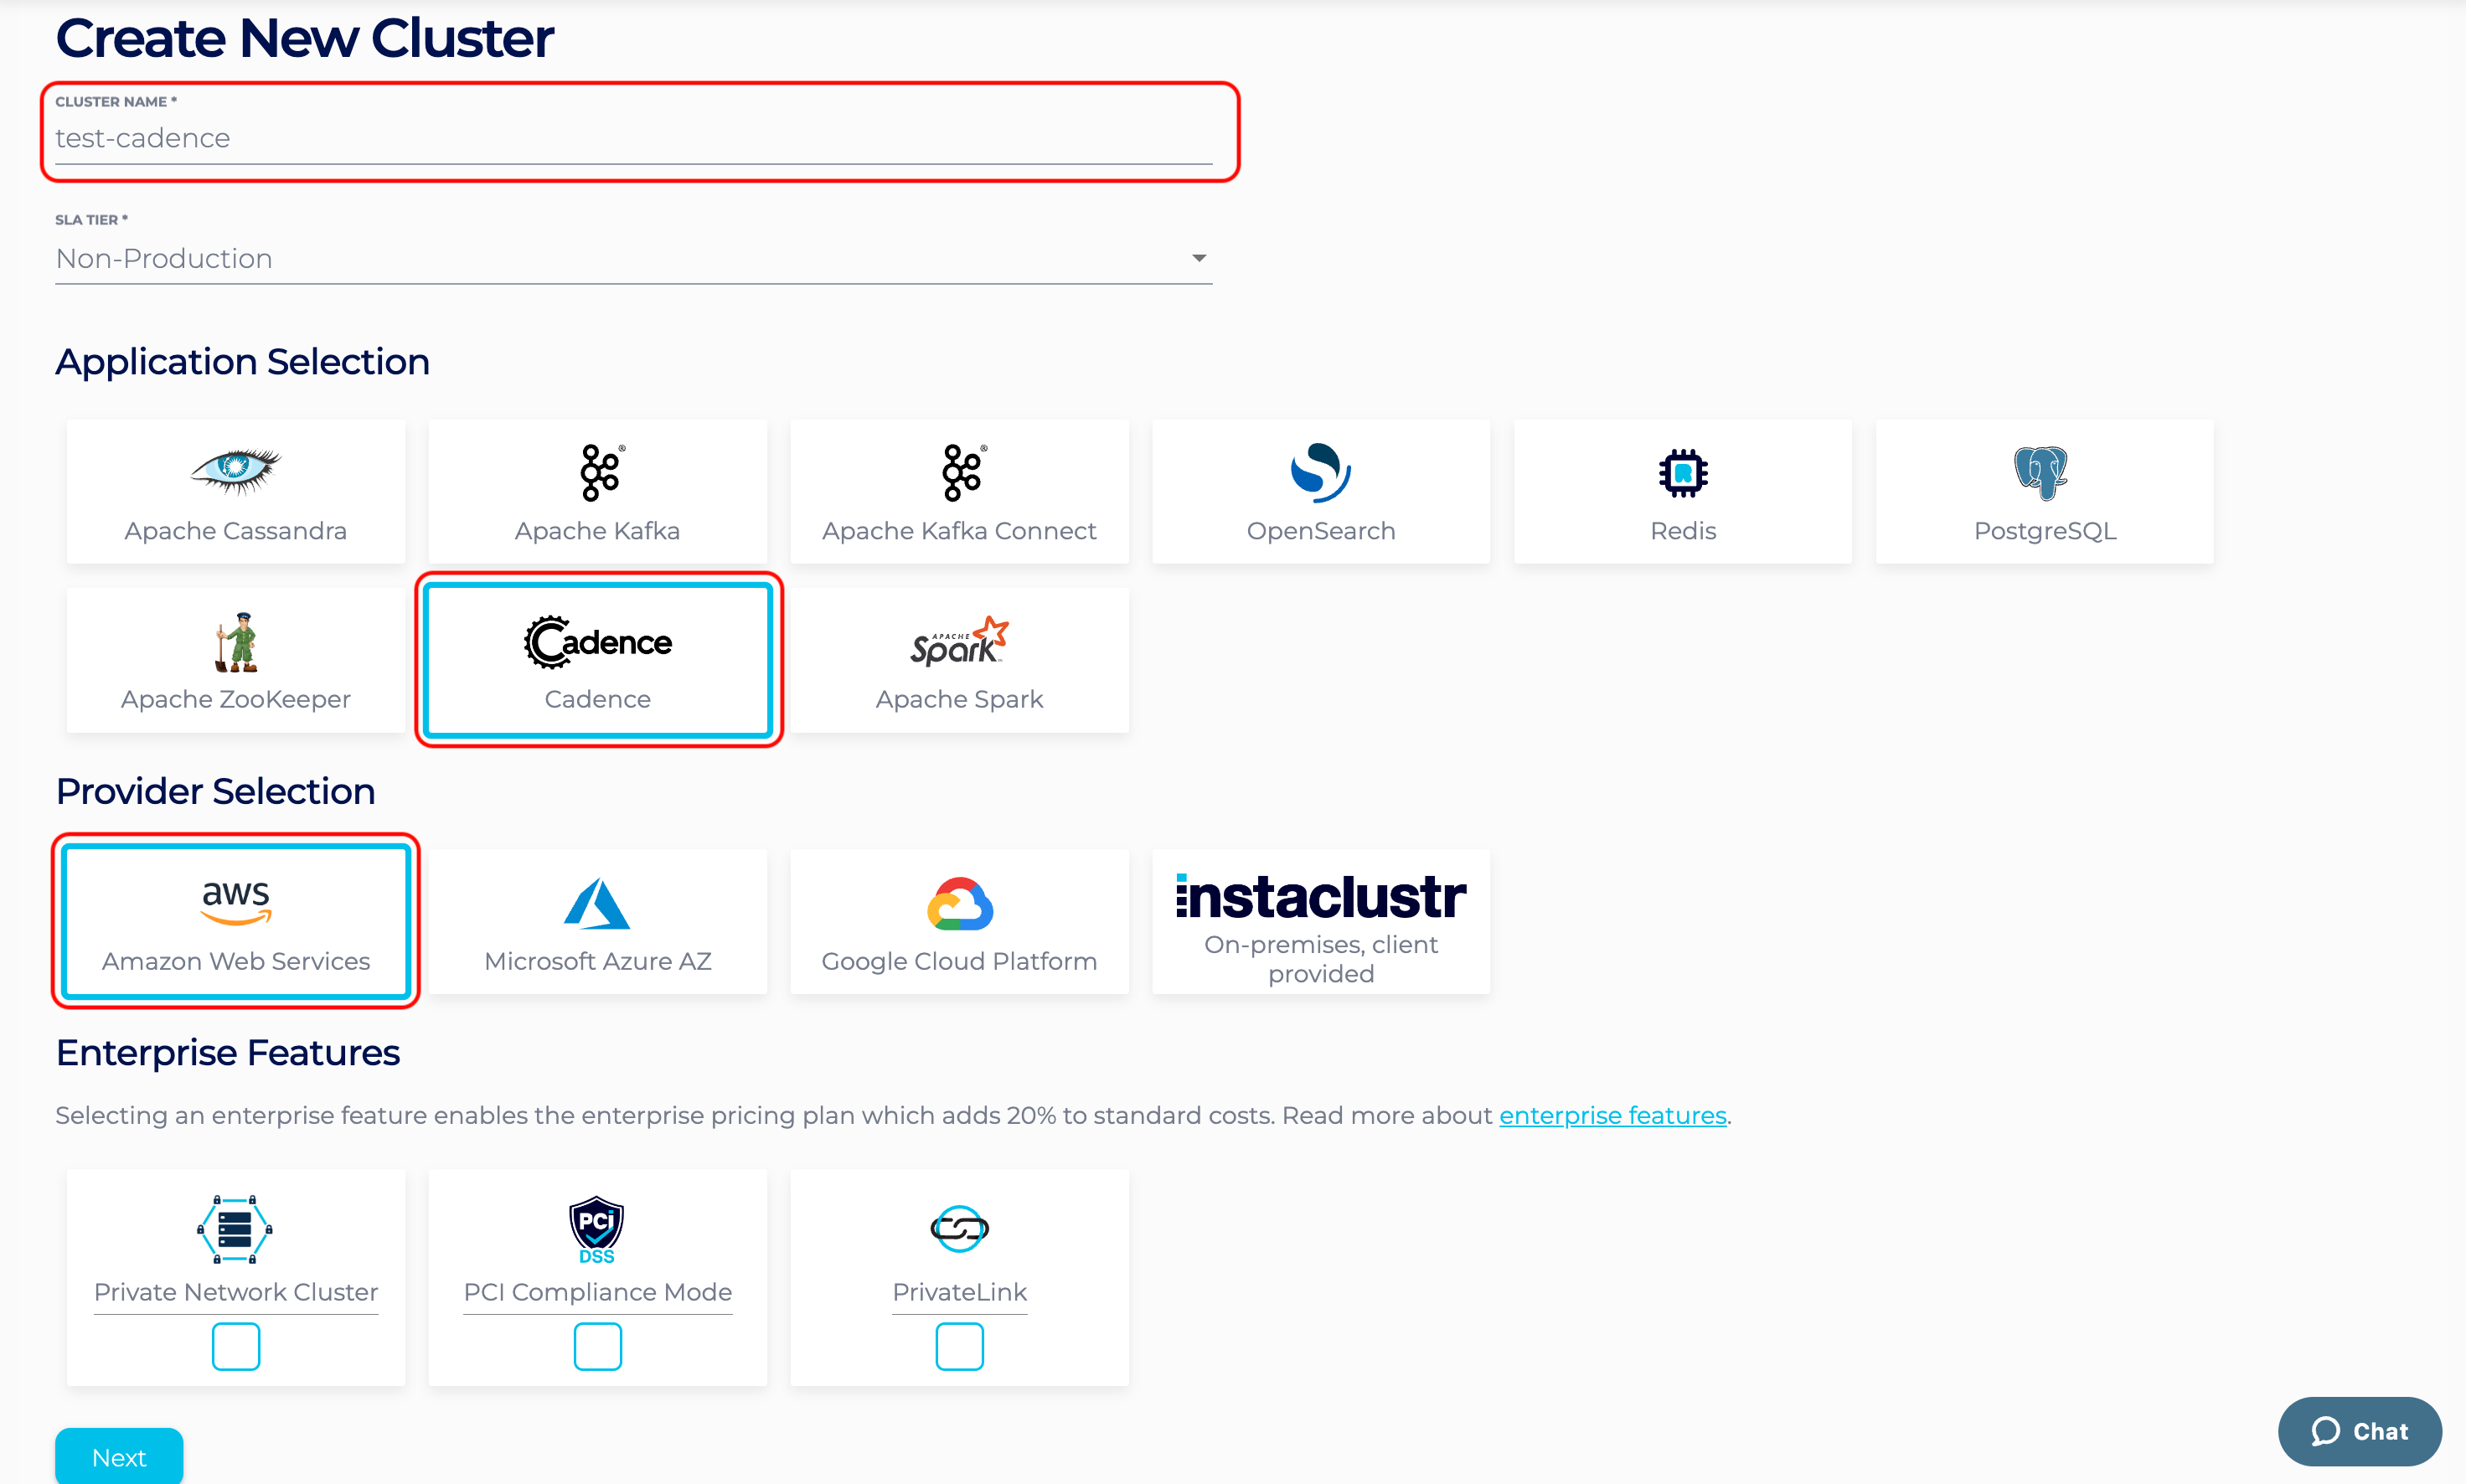
- Give your cluster a name, select Cadence as the application, select Amazon Web Services as the Cloud Service Provider and click Next.
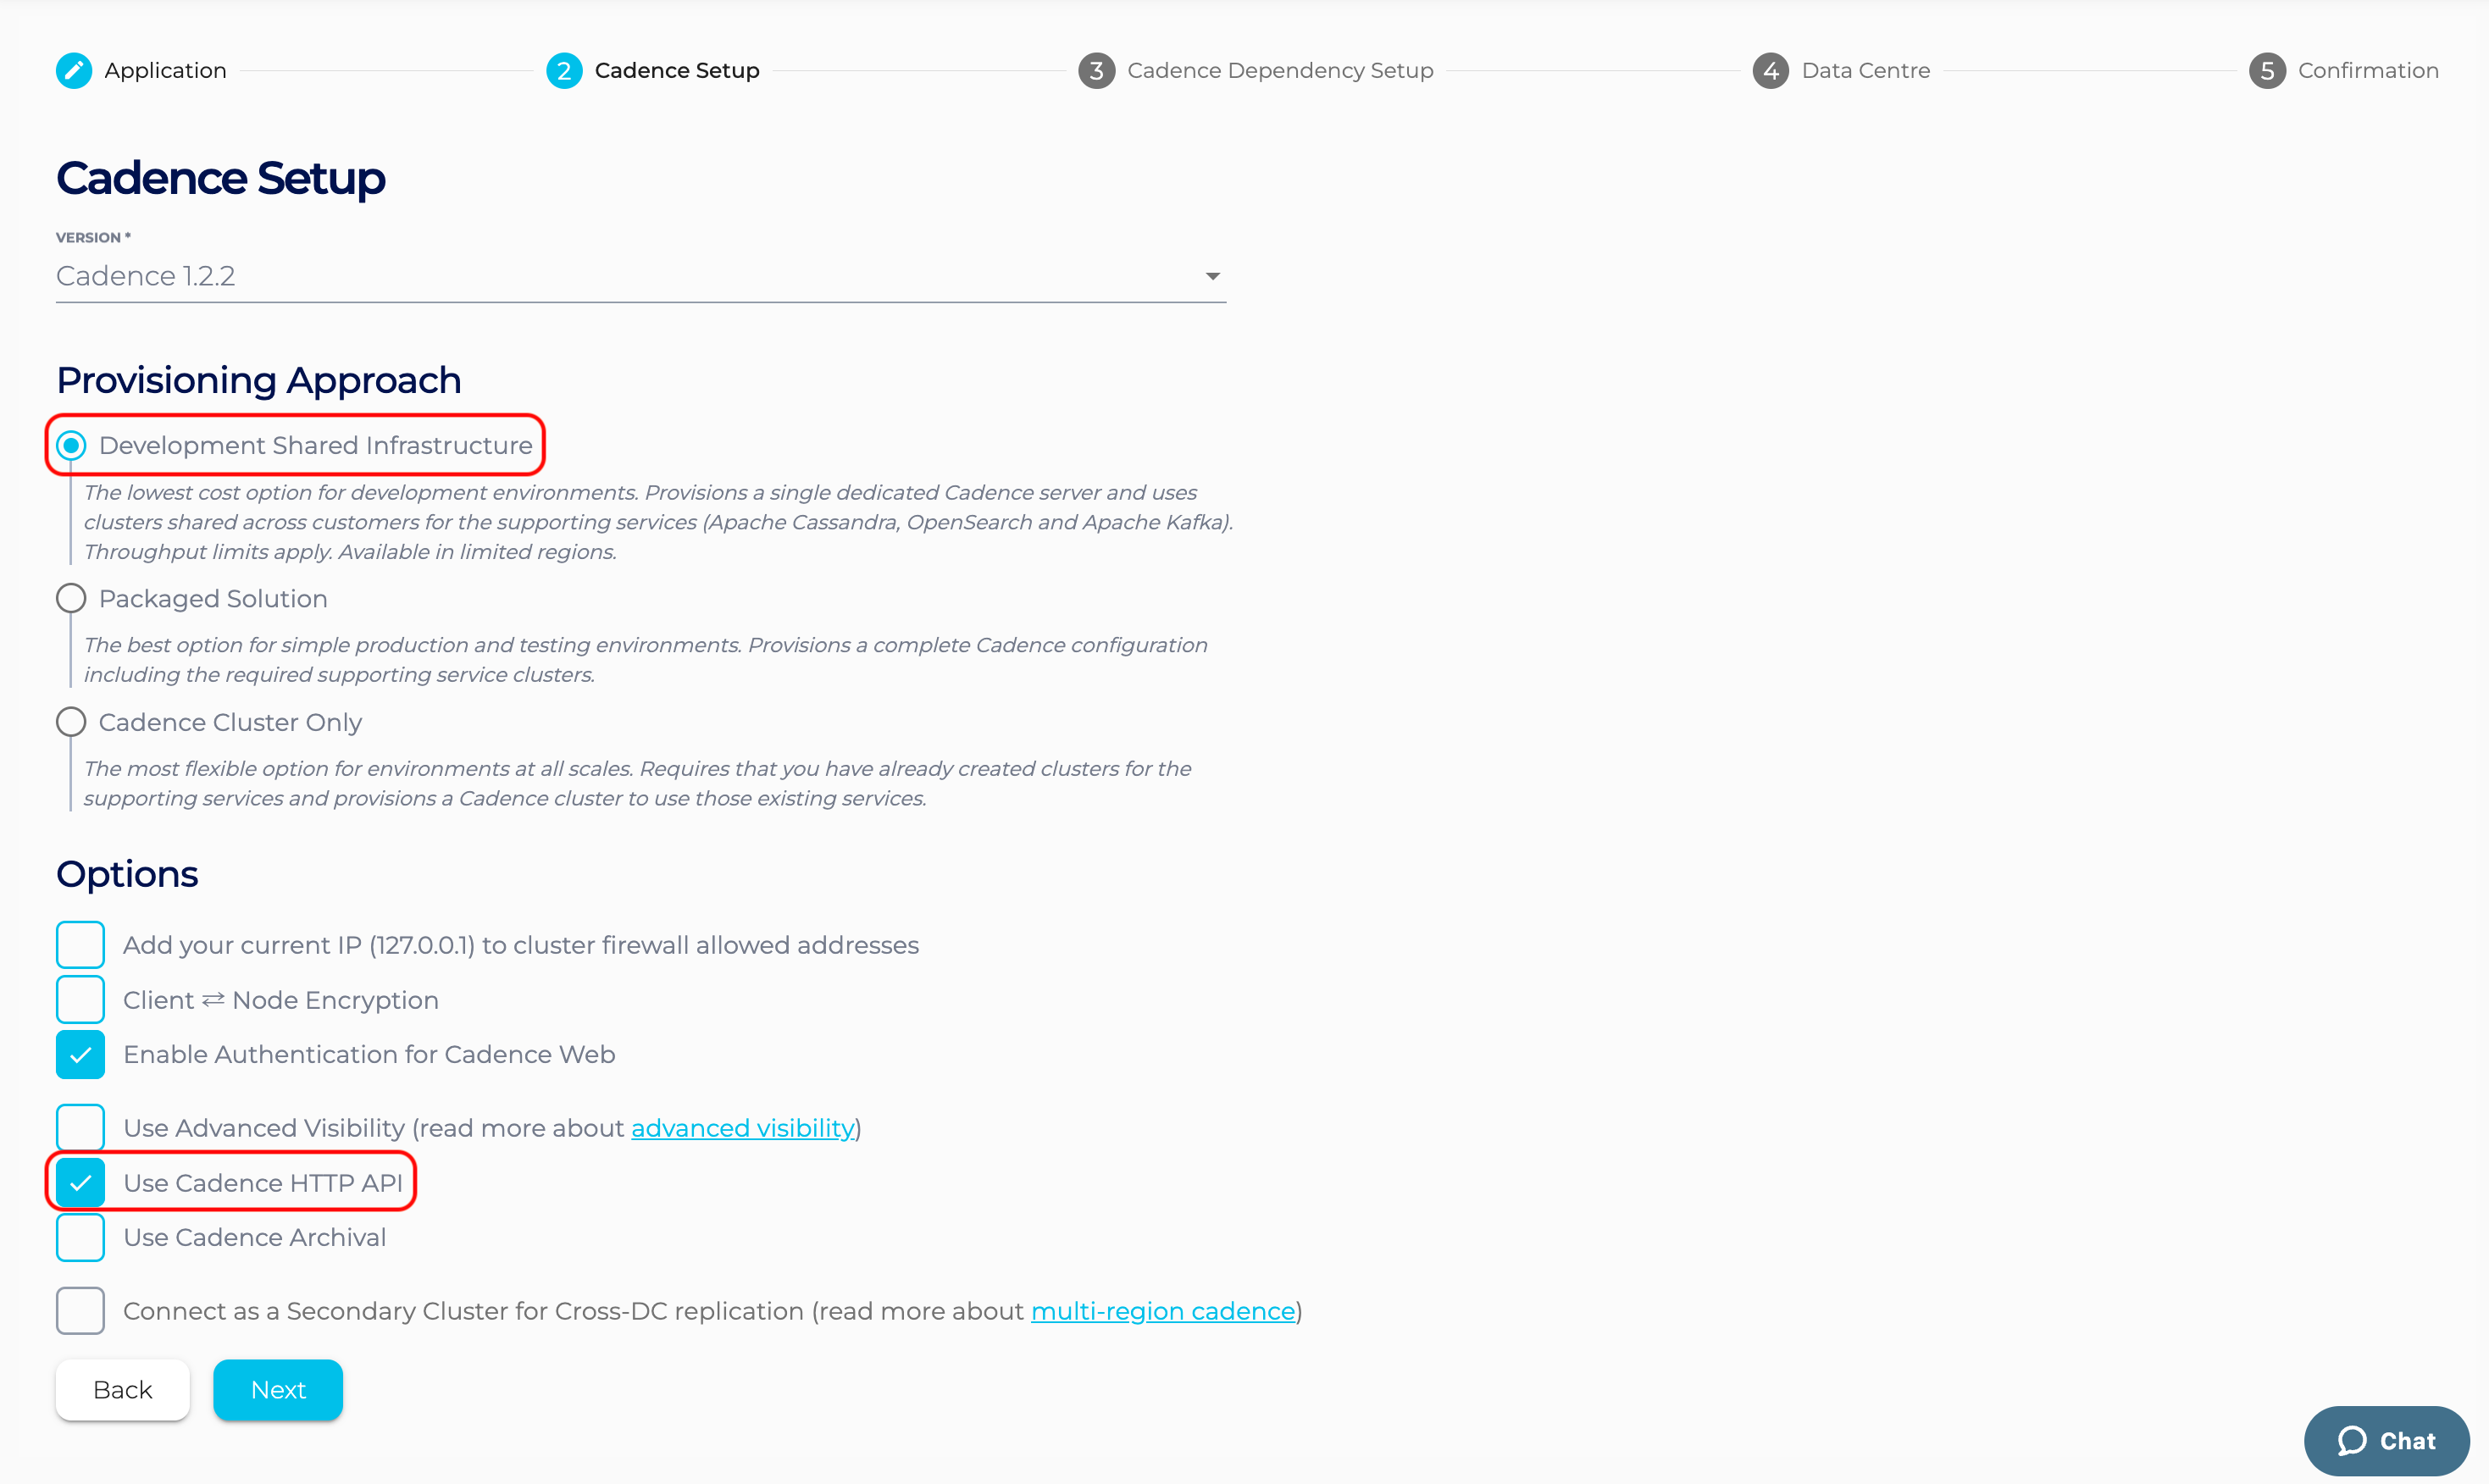
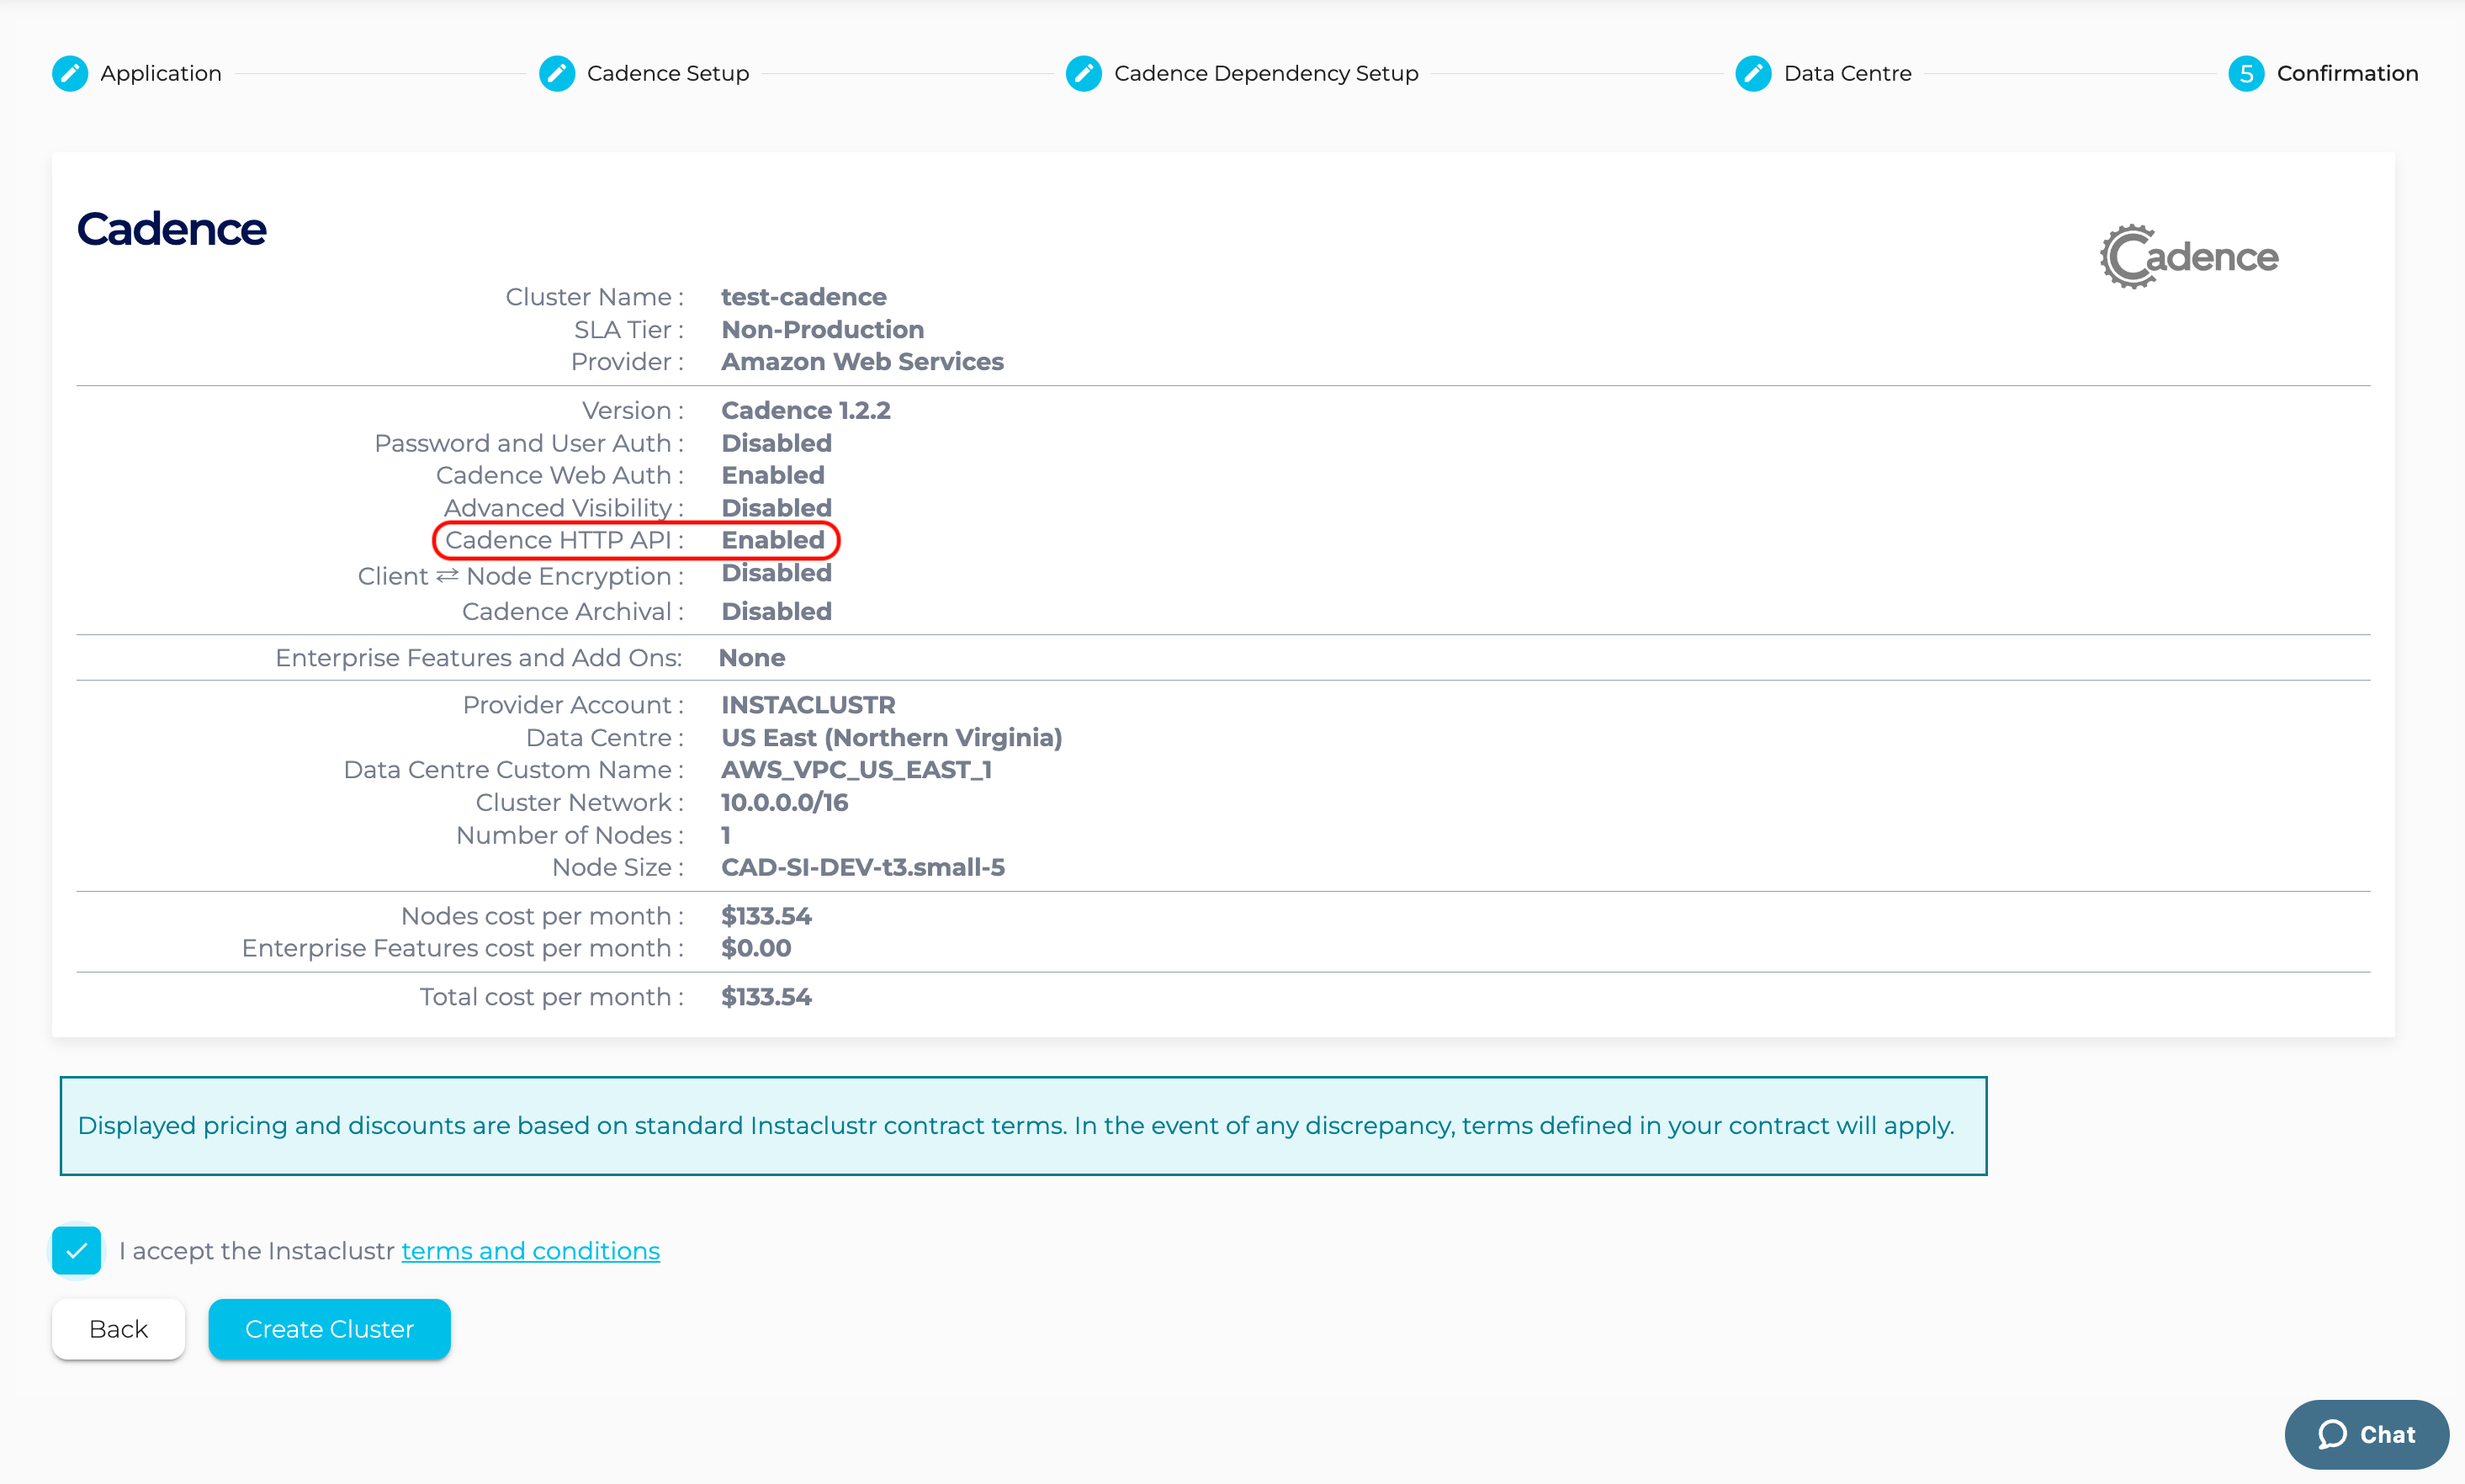
- On the Cadence Setup page, we can select the version of Cadence. We are currently offering Cadence 1.2.2 with HTTP API. Select “Development Shared Infrastructure” as the provisioning approach. Also check the “Use Cadence HTTP API” option.
- On the Cadence Dependency Setup page, click Next.

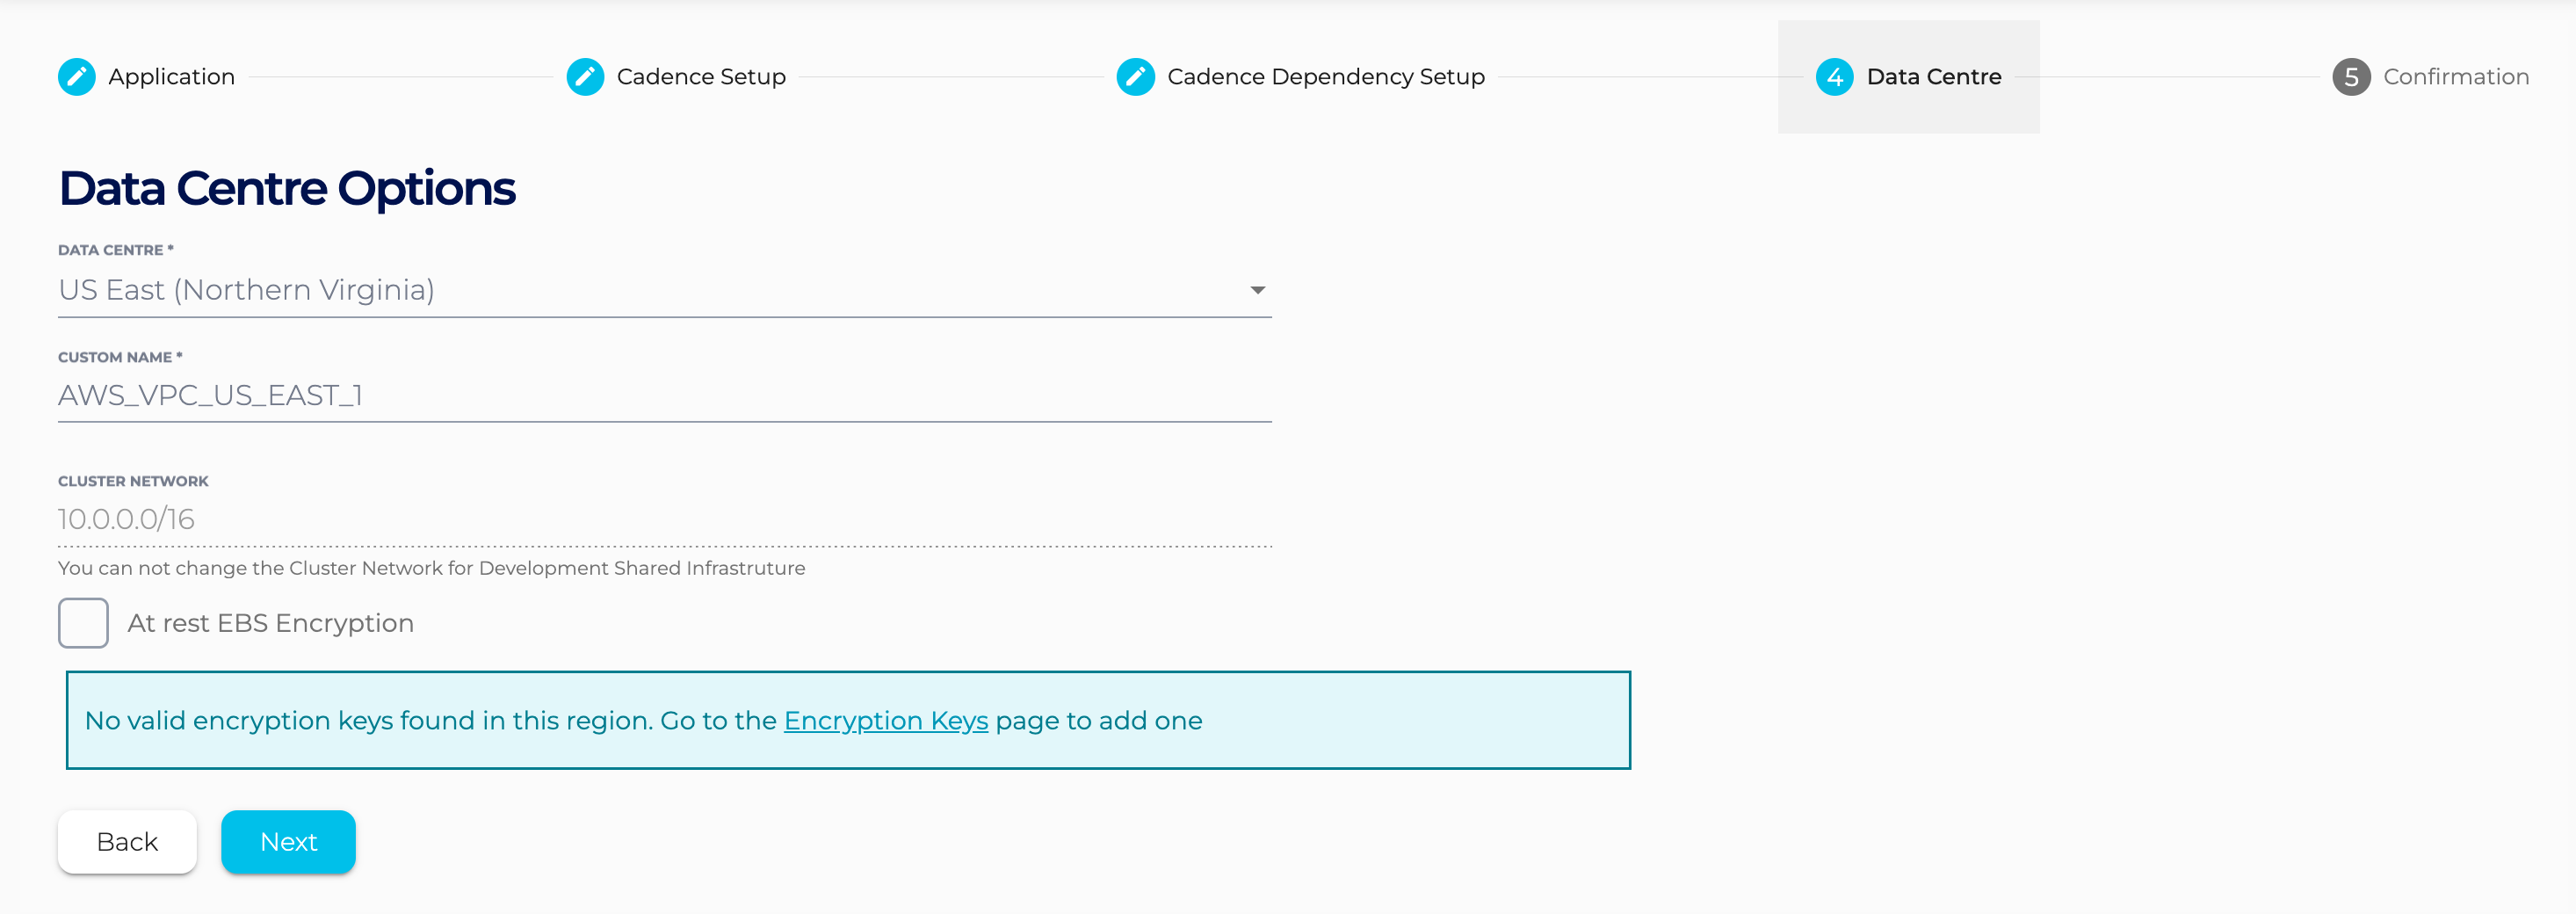
- Under the Data Centre section, only US East (Northern Virginia) – US_EAST_1 is available when running under the Instaclustr account. If selecting to run in your own account, then any region available in your account can be used, but it is highly recommended to use US_EAST_1 to minimise latency and improve performance. Click Next.
- The Confirmation section displays a detailed summary of your cluster configurations and pricing details. If you are happy with the cluster configuration and have accepted the terms and conditions, click the Create Cluster button to start provisioning the Cadence cluster.
- Provisioning the cluster can take some time depending on the responsiveness of the underlying cloud provider. There are a few additional automated steps required to link these clusters that take place during this time.
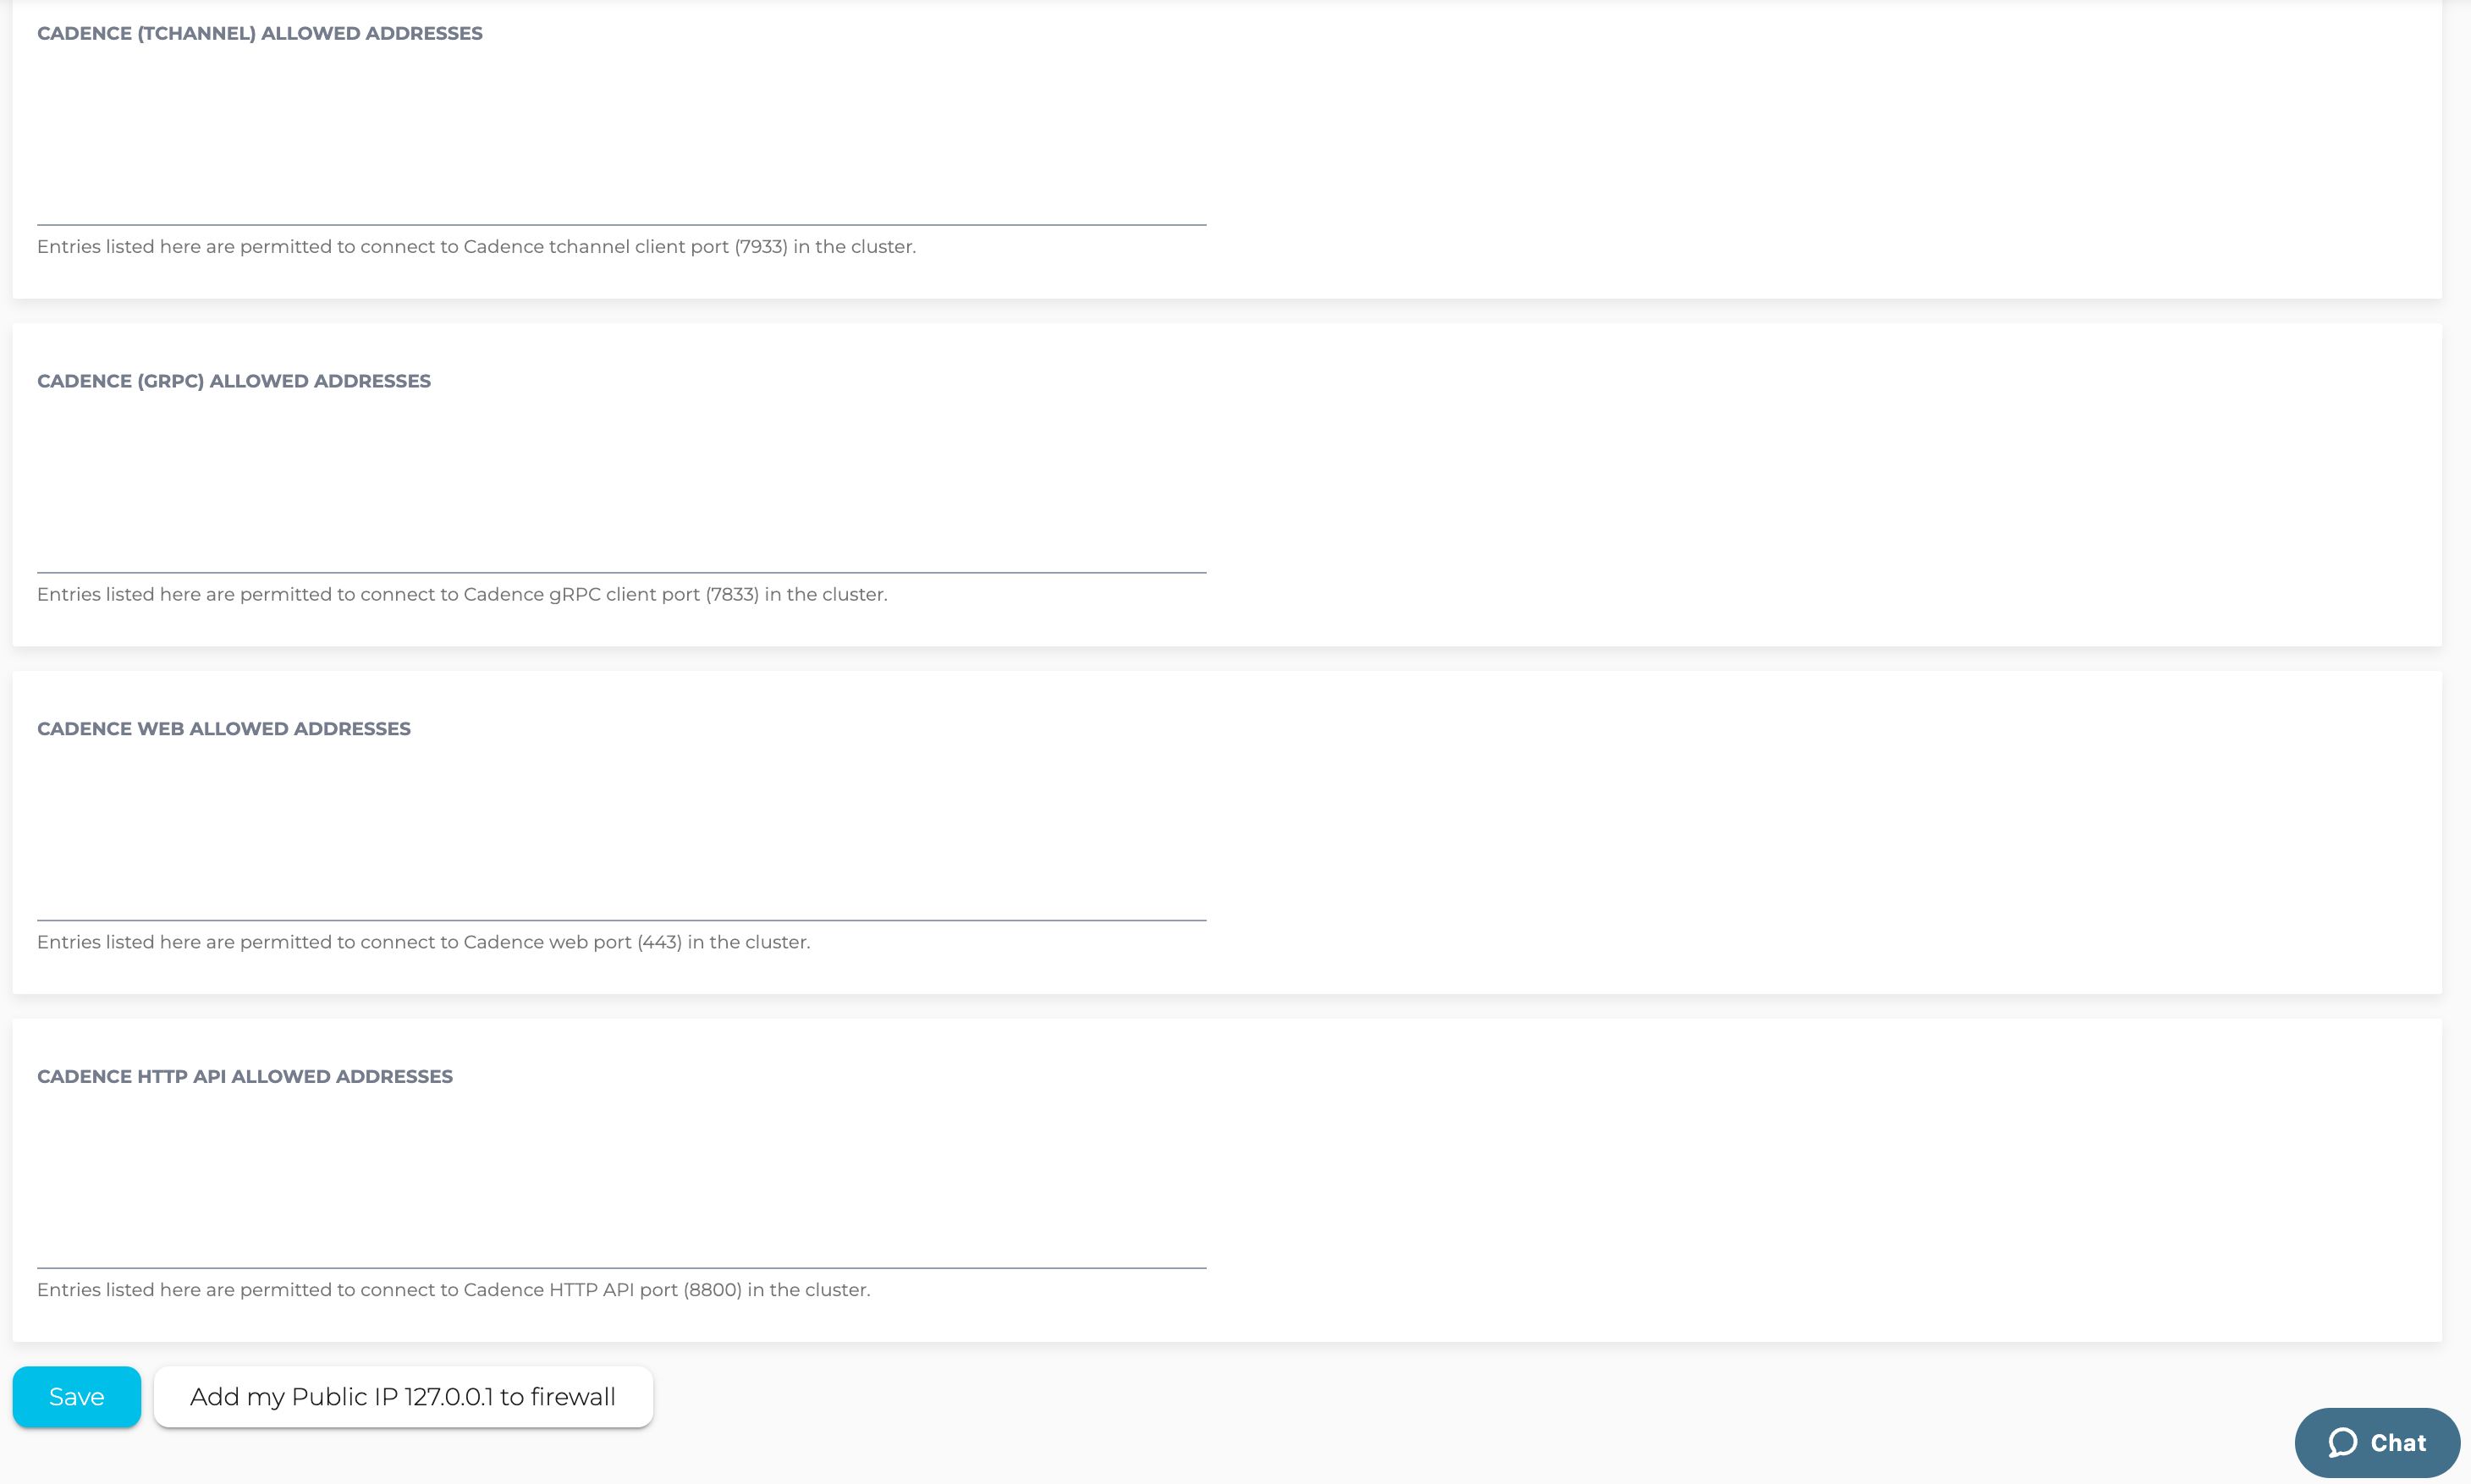
- You have finished creating your Cadence cluster! Now you can add your IP to the firewall rules to enable access to the Cadence server.
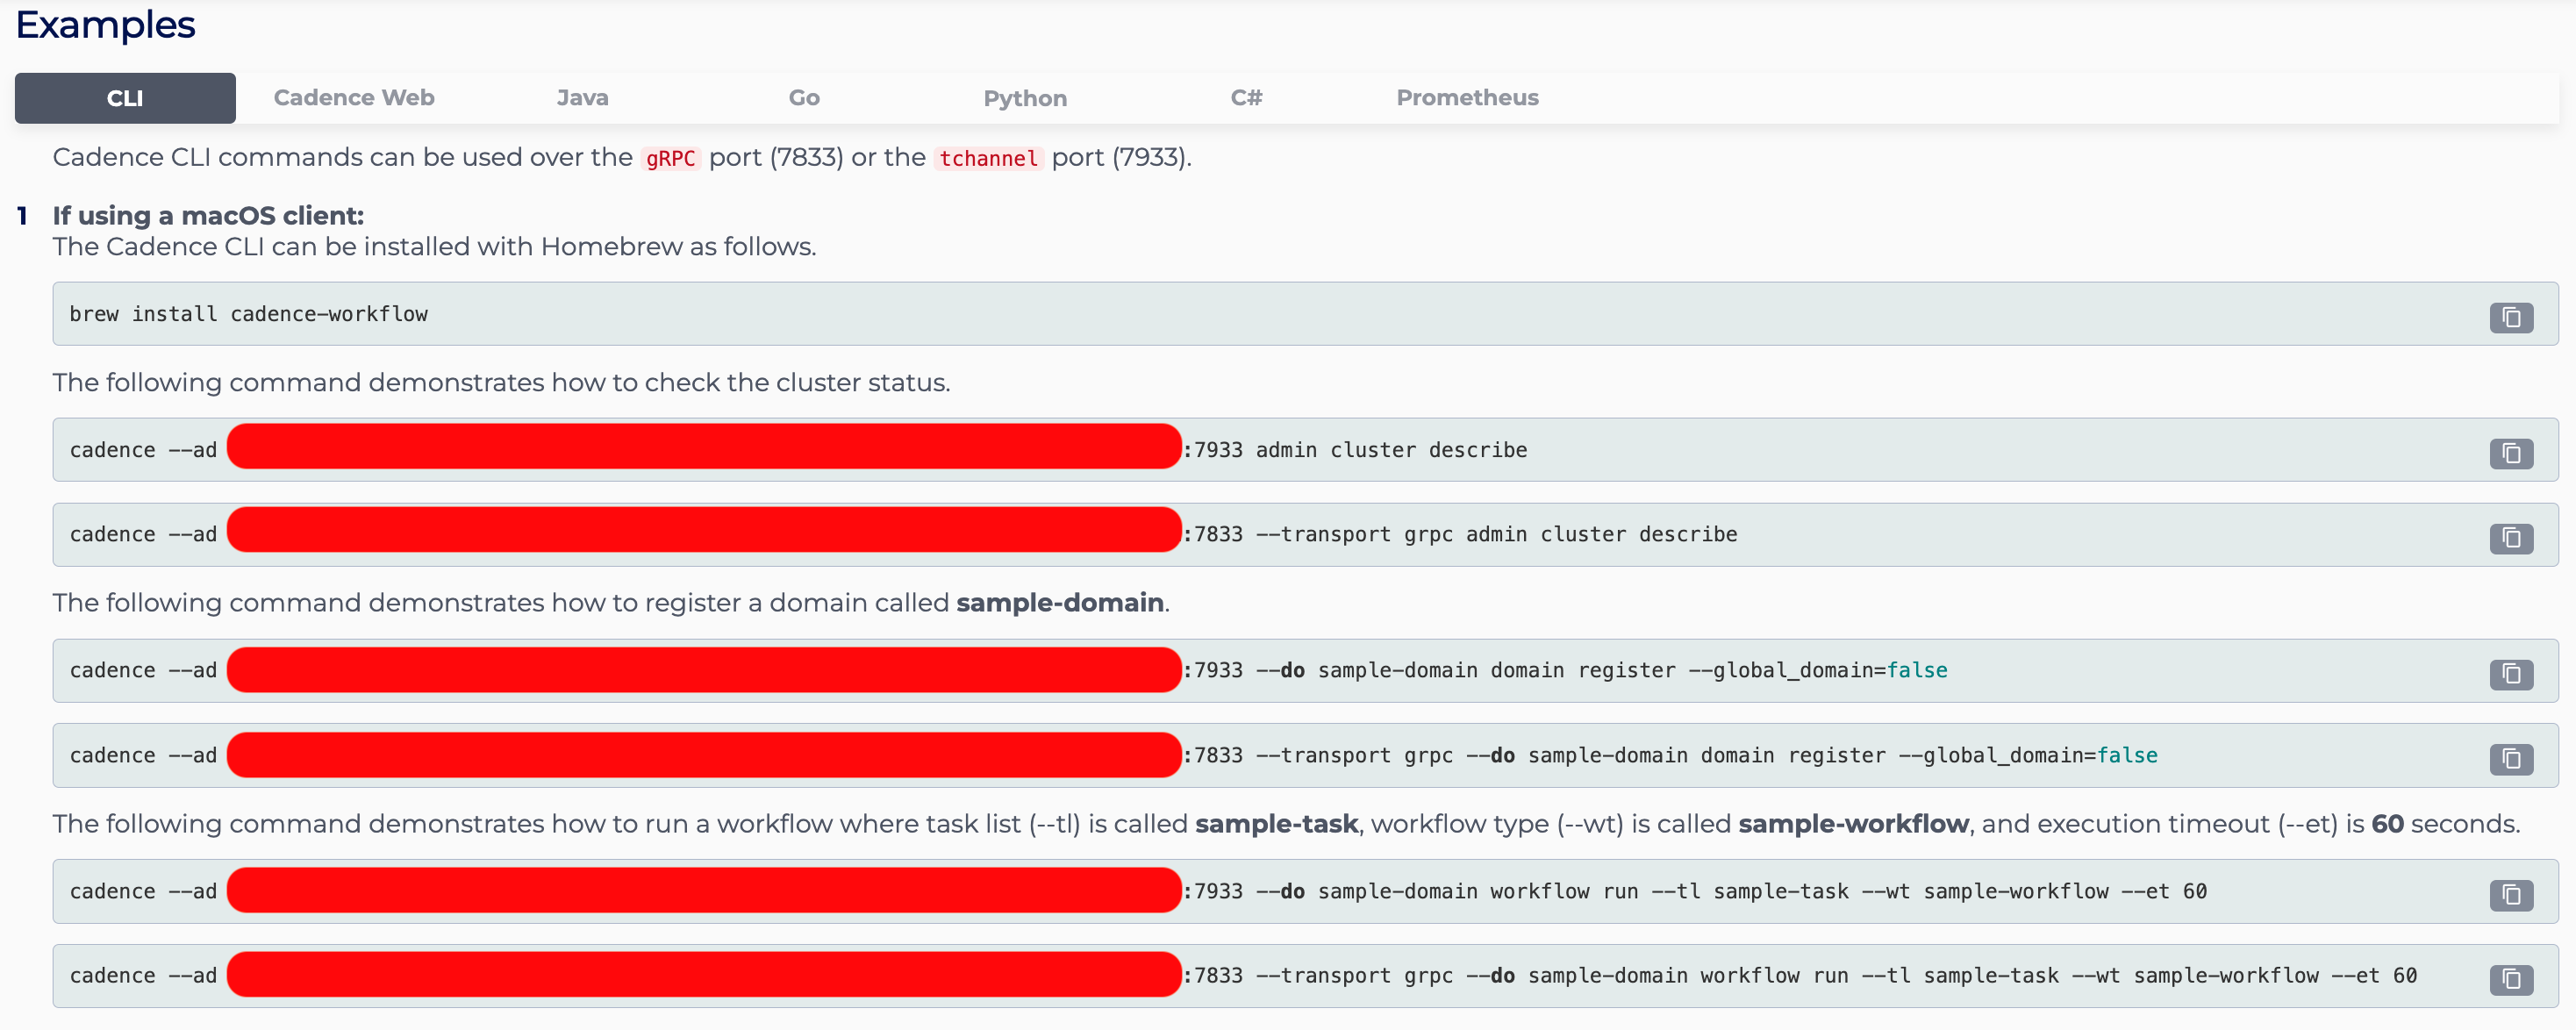
- Go to the Connection Info page and run the Cadence CLI commands to register the “sample-domain”.
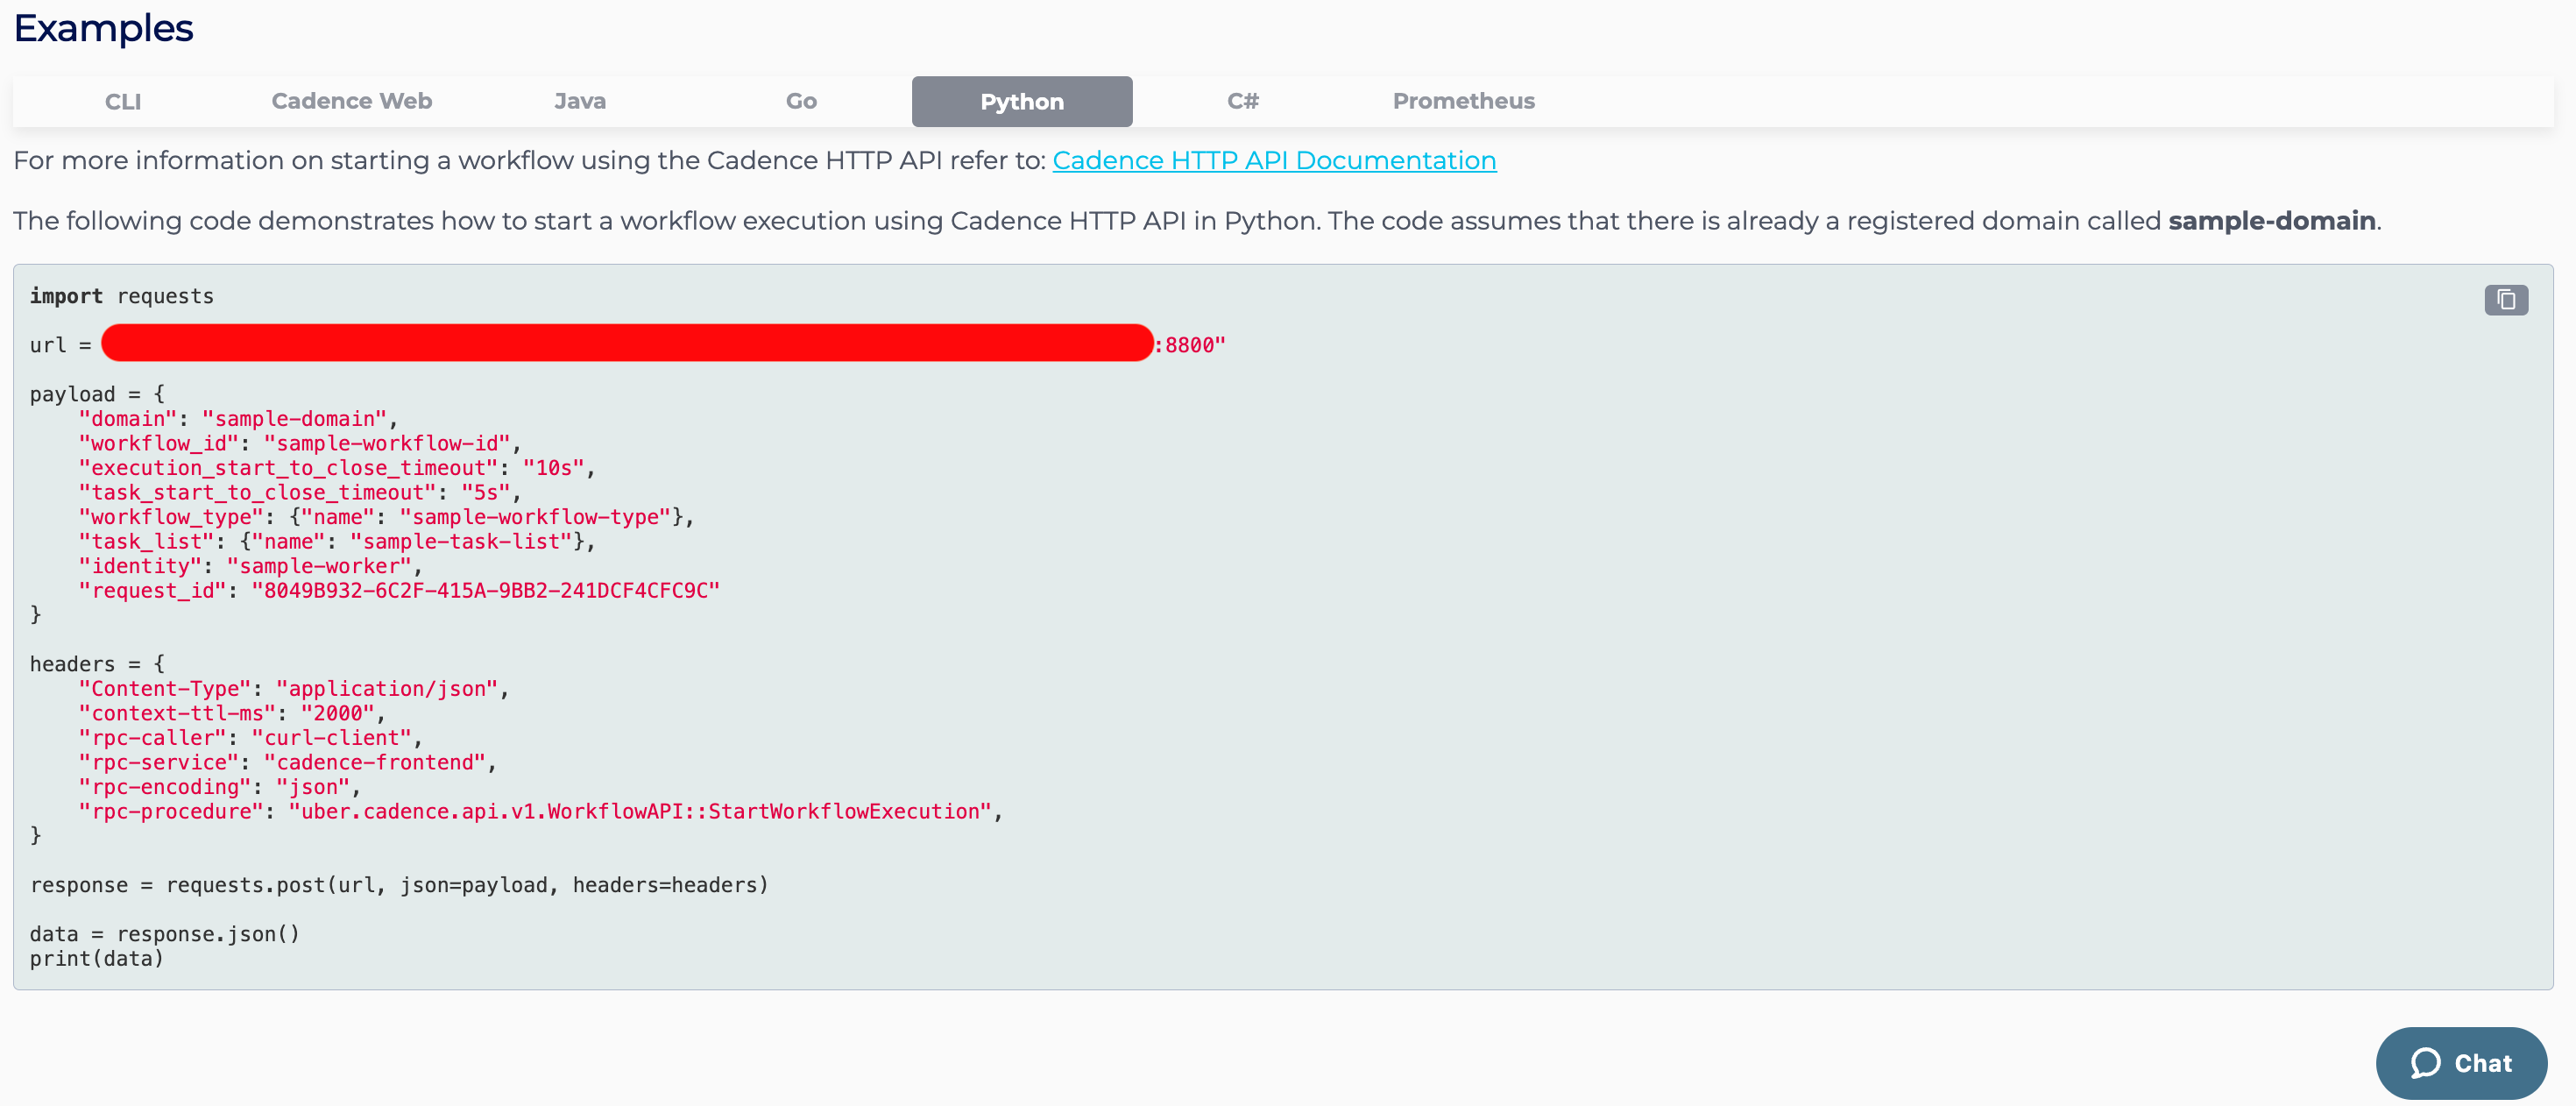
- Go to the Python tab of the Connection Info page, copy and paste the example Python script into your local editor, and run the Python script to test Cadence HTTP API.
Packaged Solution
- Log into the Instaclustr Console and click the Create Cluster button. This will take you to the wizard for creating a new cluster.

- Give your cluster a name, select Cadence as the application, select Amazon Web Services as the Cloud Service Provider and click Next.

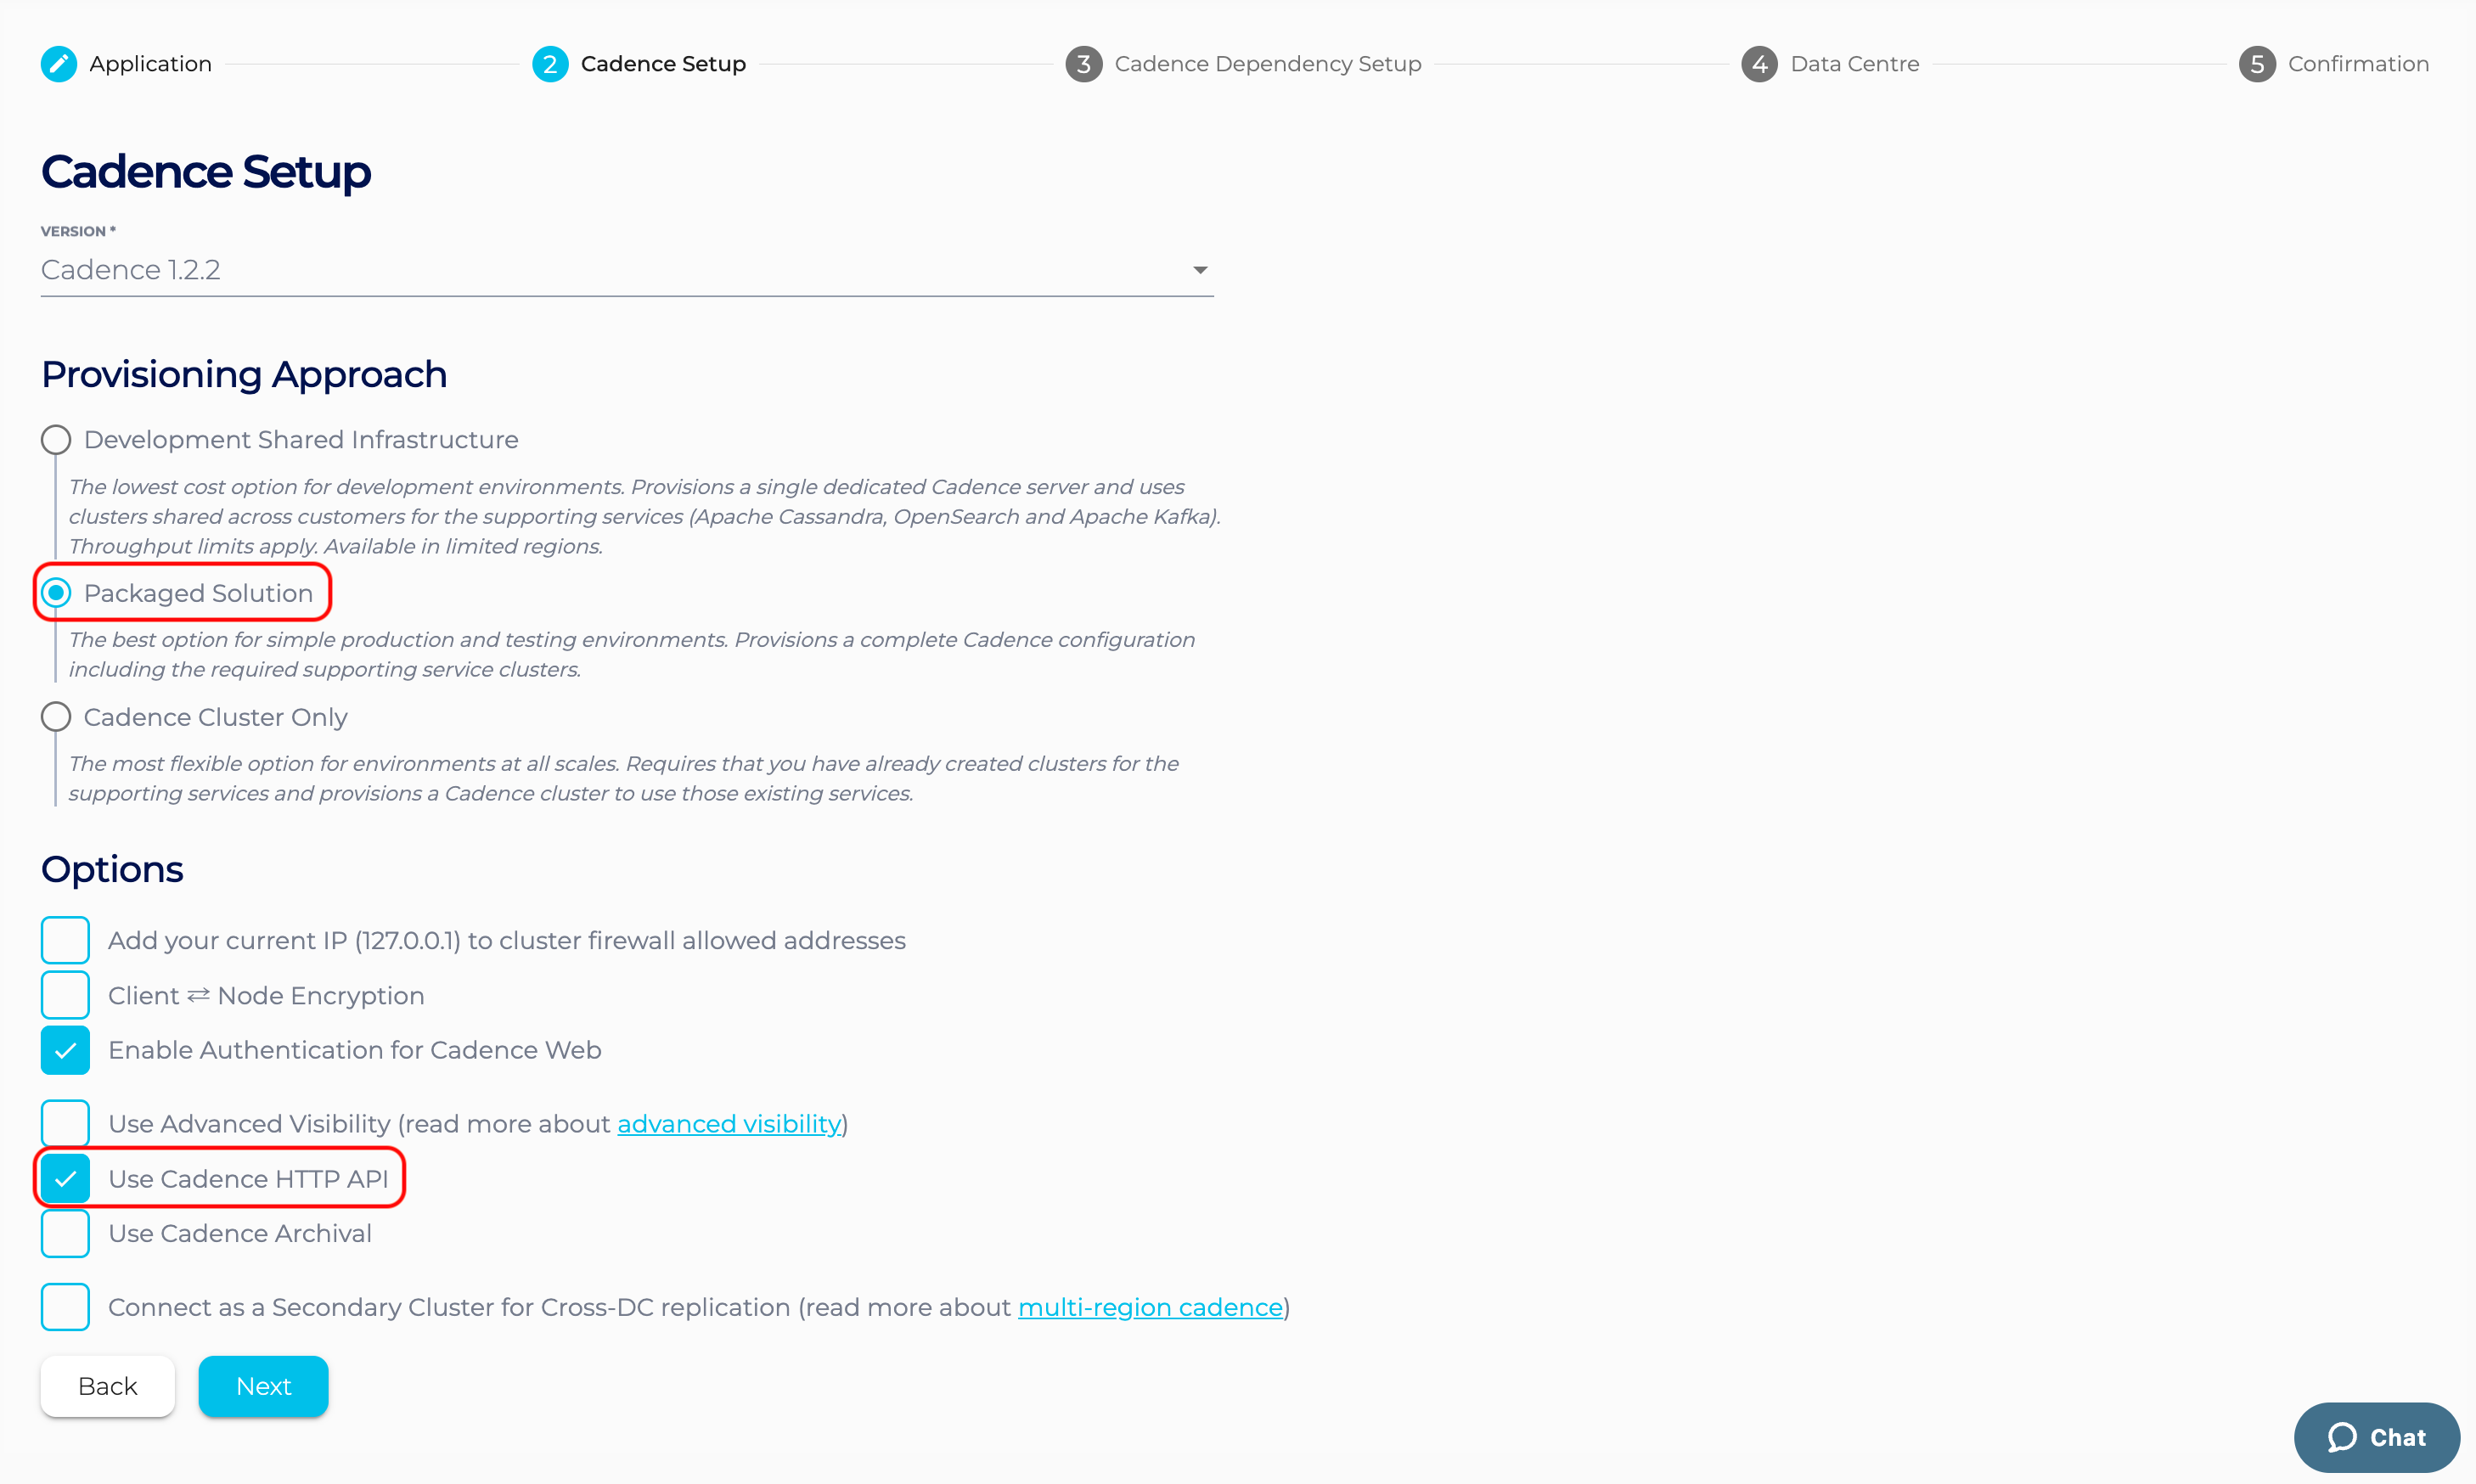
- On the Cadence Setup page, we can select the version of Cadence. We are currently offering Cadence 1.2.2 with HTTP API. Select “Packaged Solution” as the provisioning approach. Also check the “Use Cadence HTTP API” option.
- On the Cadence Dependency Setup page, select one option from the predefined Cadence Solution Sizes (Developer or Production – Starter or Production – Small) and click Next. This will provision a Cadence cluster and the required Cassandra cluster of the selected (predefined) size in your account and link them together.

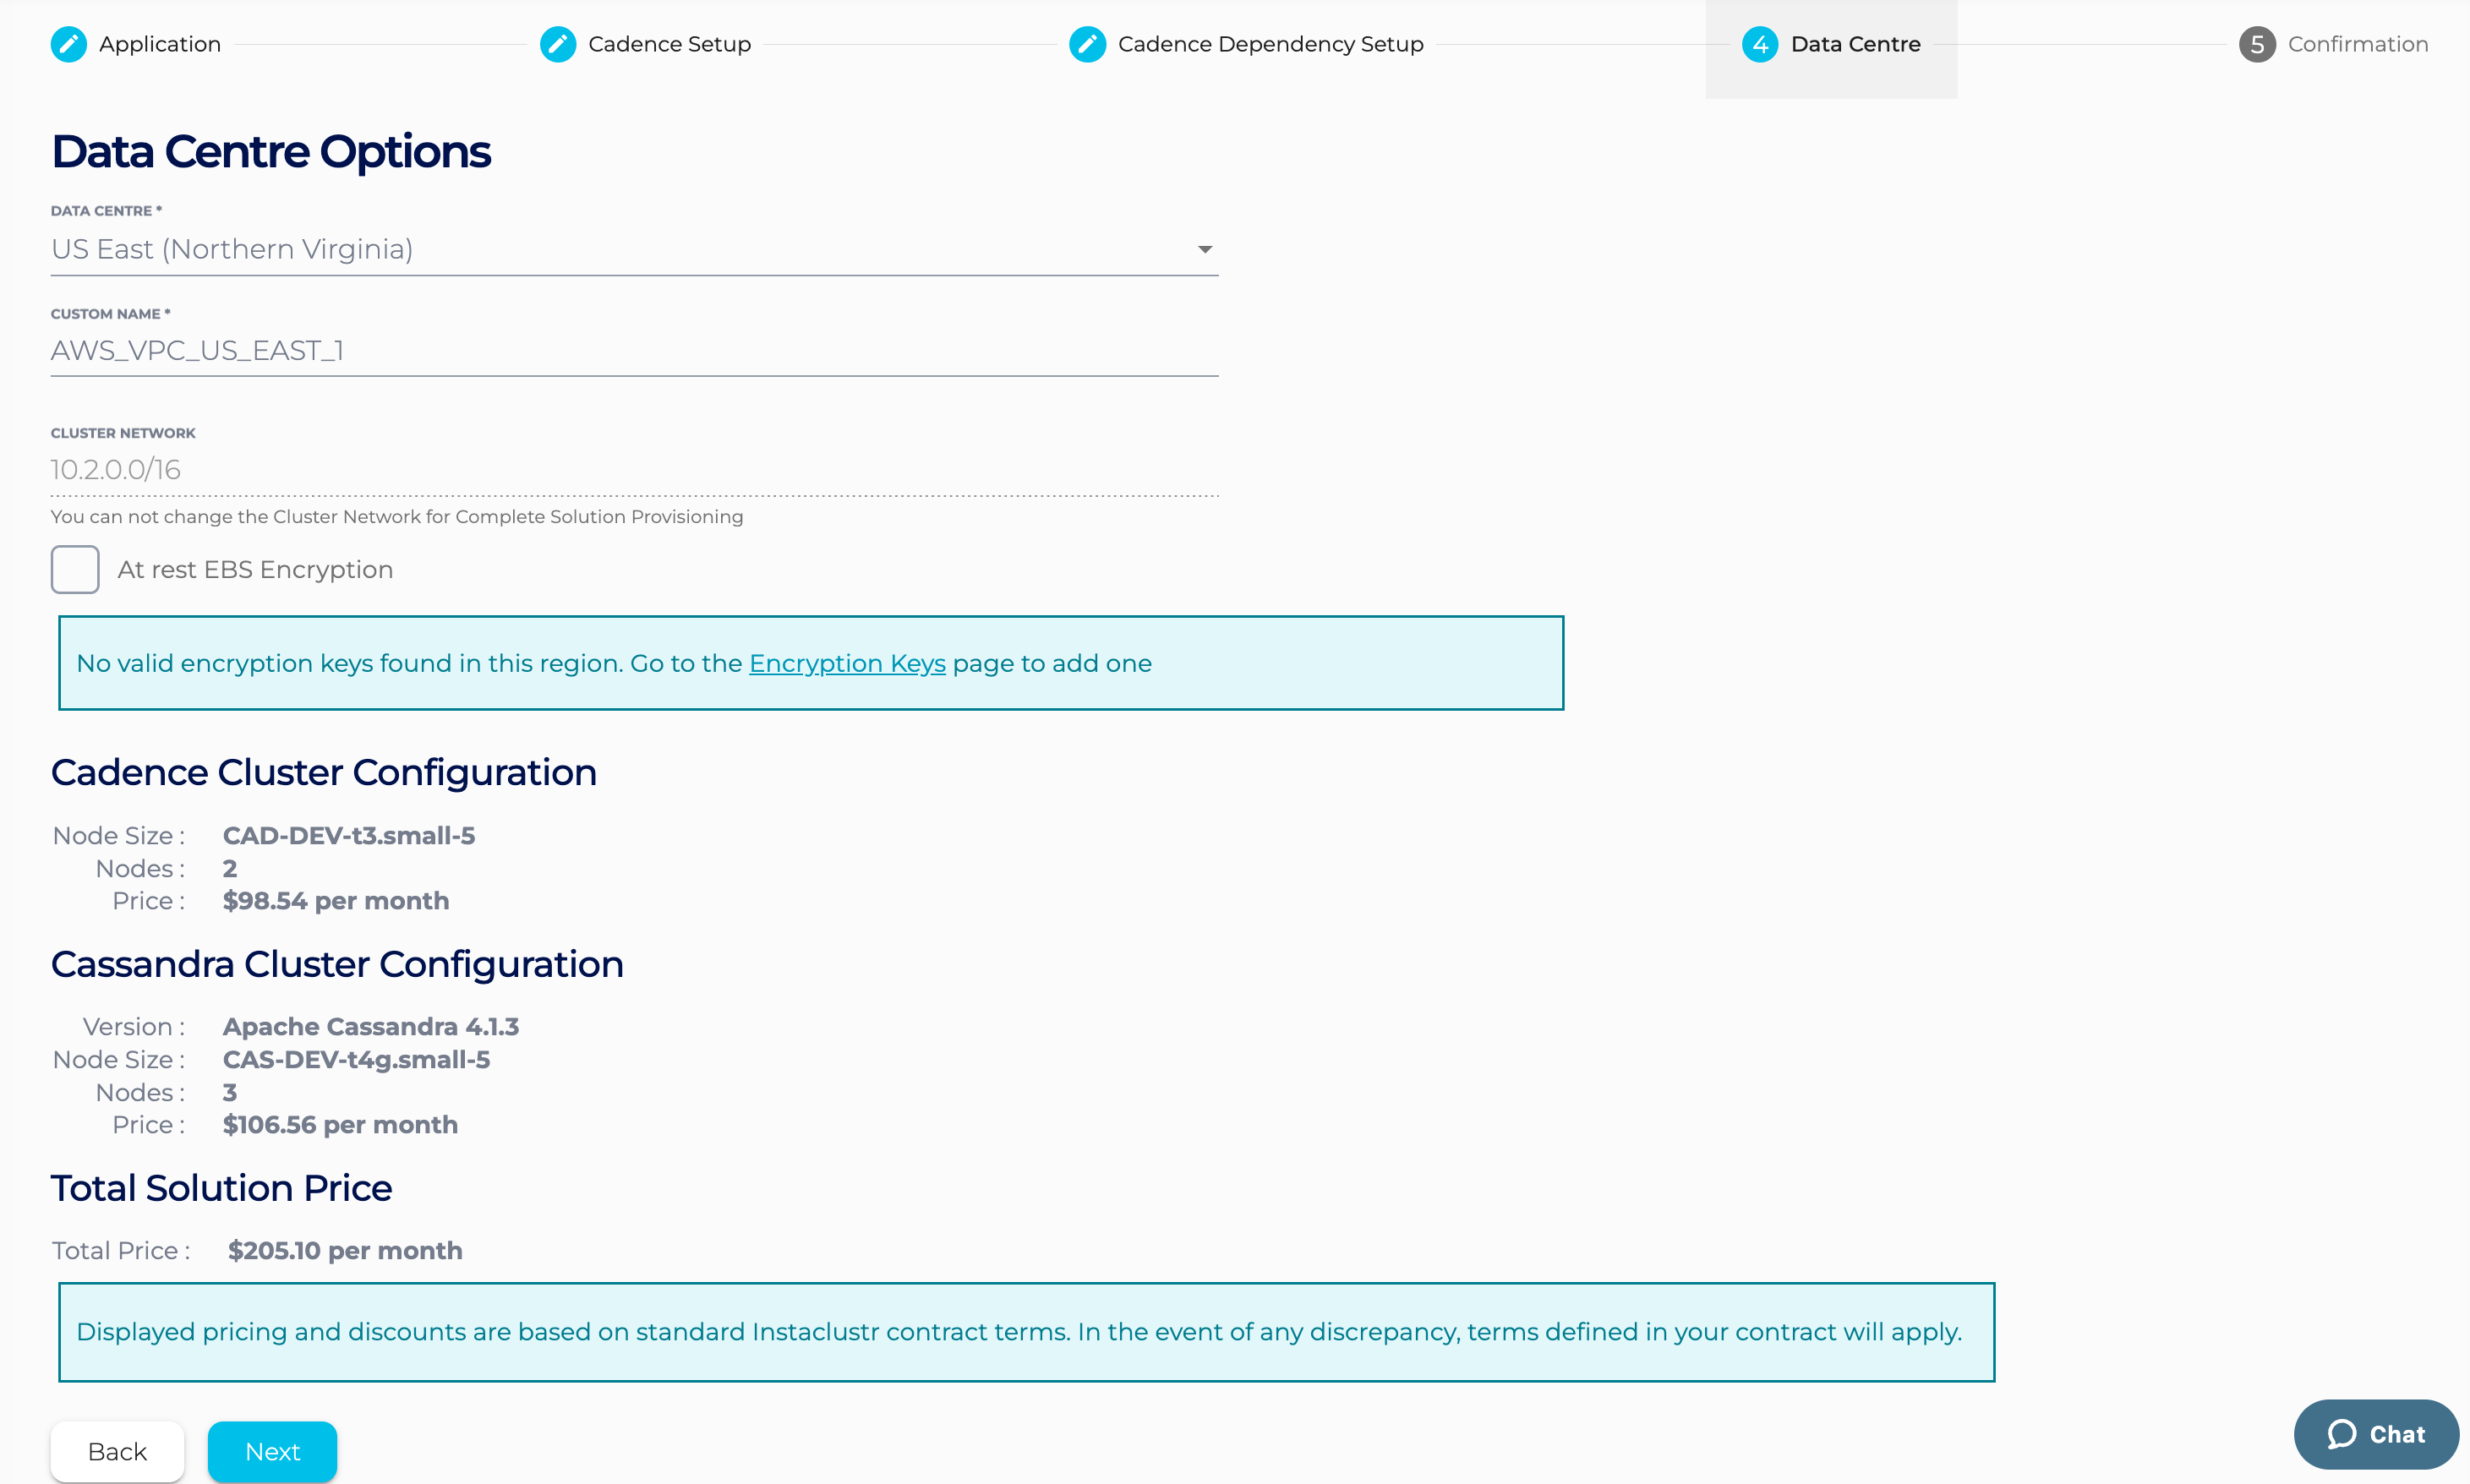
- Under the Data Centre page, confirm the selected Data Centre is correct. Click Next.
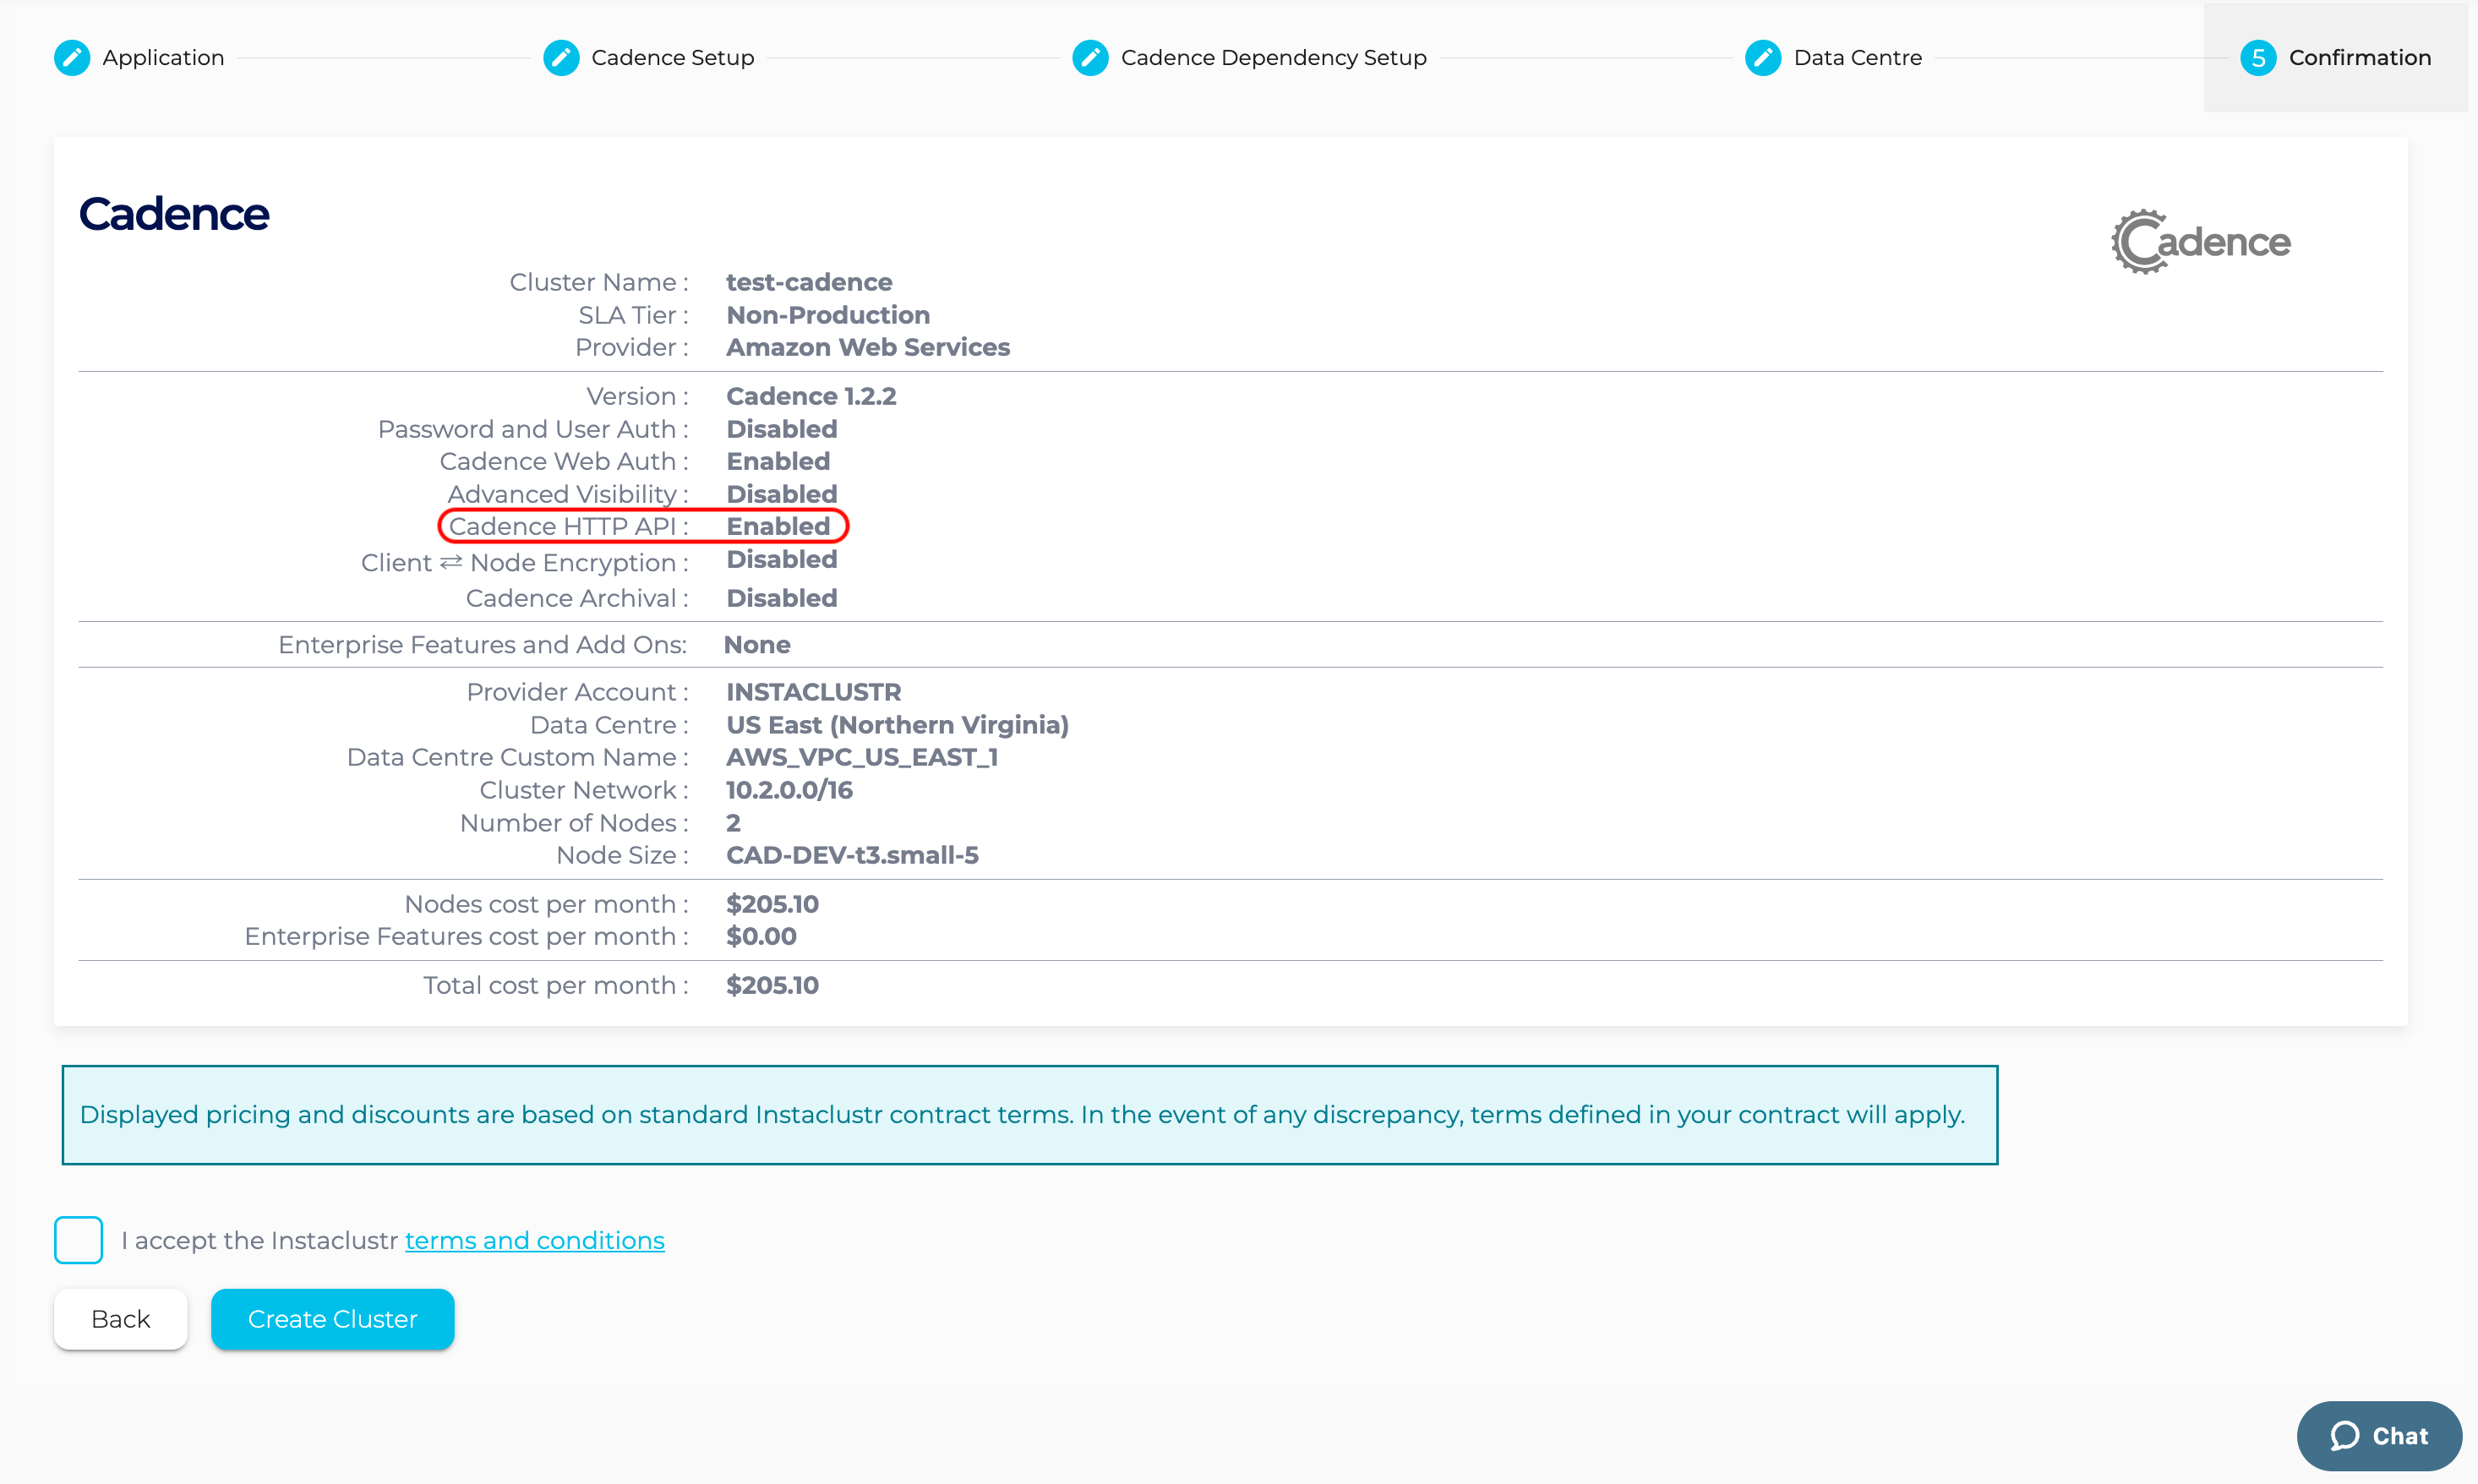
- The Confirmation section displays a detailed summary of your cluster configurations and pricing details. If you are happy with the cluster configuration and have accepted the terms and conditions, click the Create Cluster button to start provisioning the Cadence and Cassandra clusters.
- Provisioning the cluster can take some time depending on the responsiveness of the underlying cloud provider. There are a few additional automated steps required to link these clusters that take place during this time.
- You have finished creating your Cadence cluster! Now you can add your IP to the firewall rules to enable access to the Cadence server.

- Go to the Connection Info page and run the Cadence CLI commands to register the “sample-domain”.

- Go to the Python tab of the Connection Info page, copy and paste the example Python script into your local code editor, and run the Python script to test Cadence HTTP API.

Cadence Cluster Only
Step 1 – Create an Apache Cassandra® cluster
For a step-by-step guide of creating an Apache Cassandra® cluster, you can read this guide.
For an abbreviated guide, you can do as follows:
- Log into the Instaclustr Console and click the Create Cluster button. This will take you to the wizard for creating a new cluster.

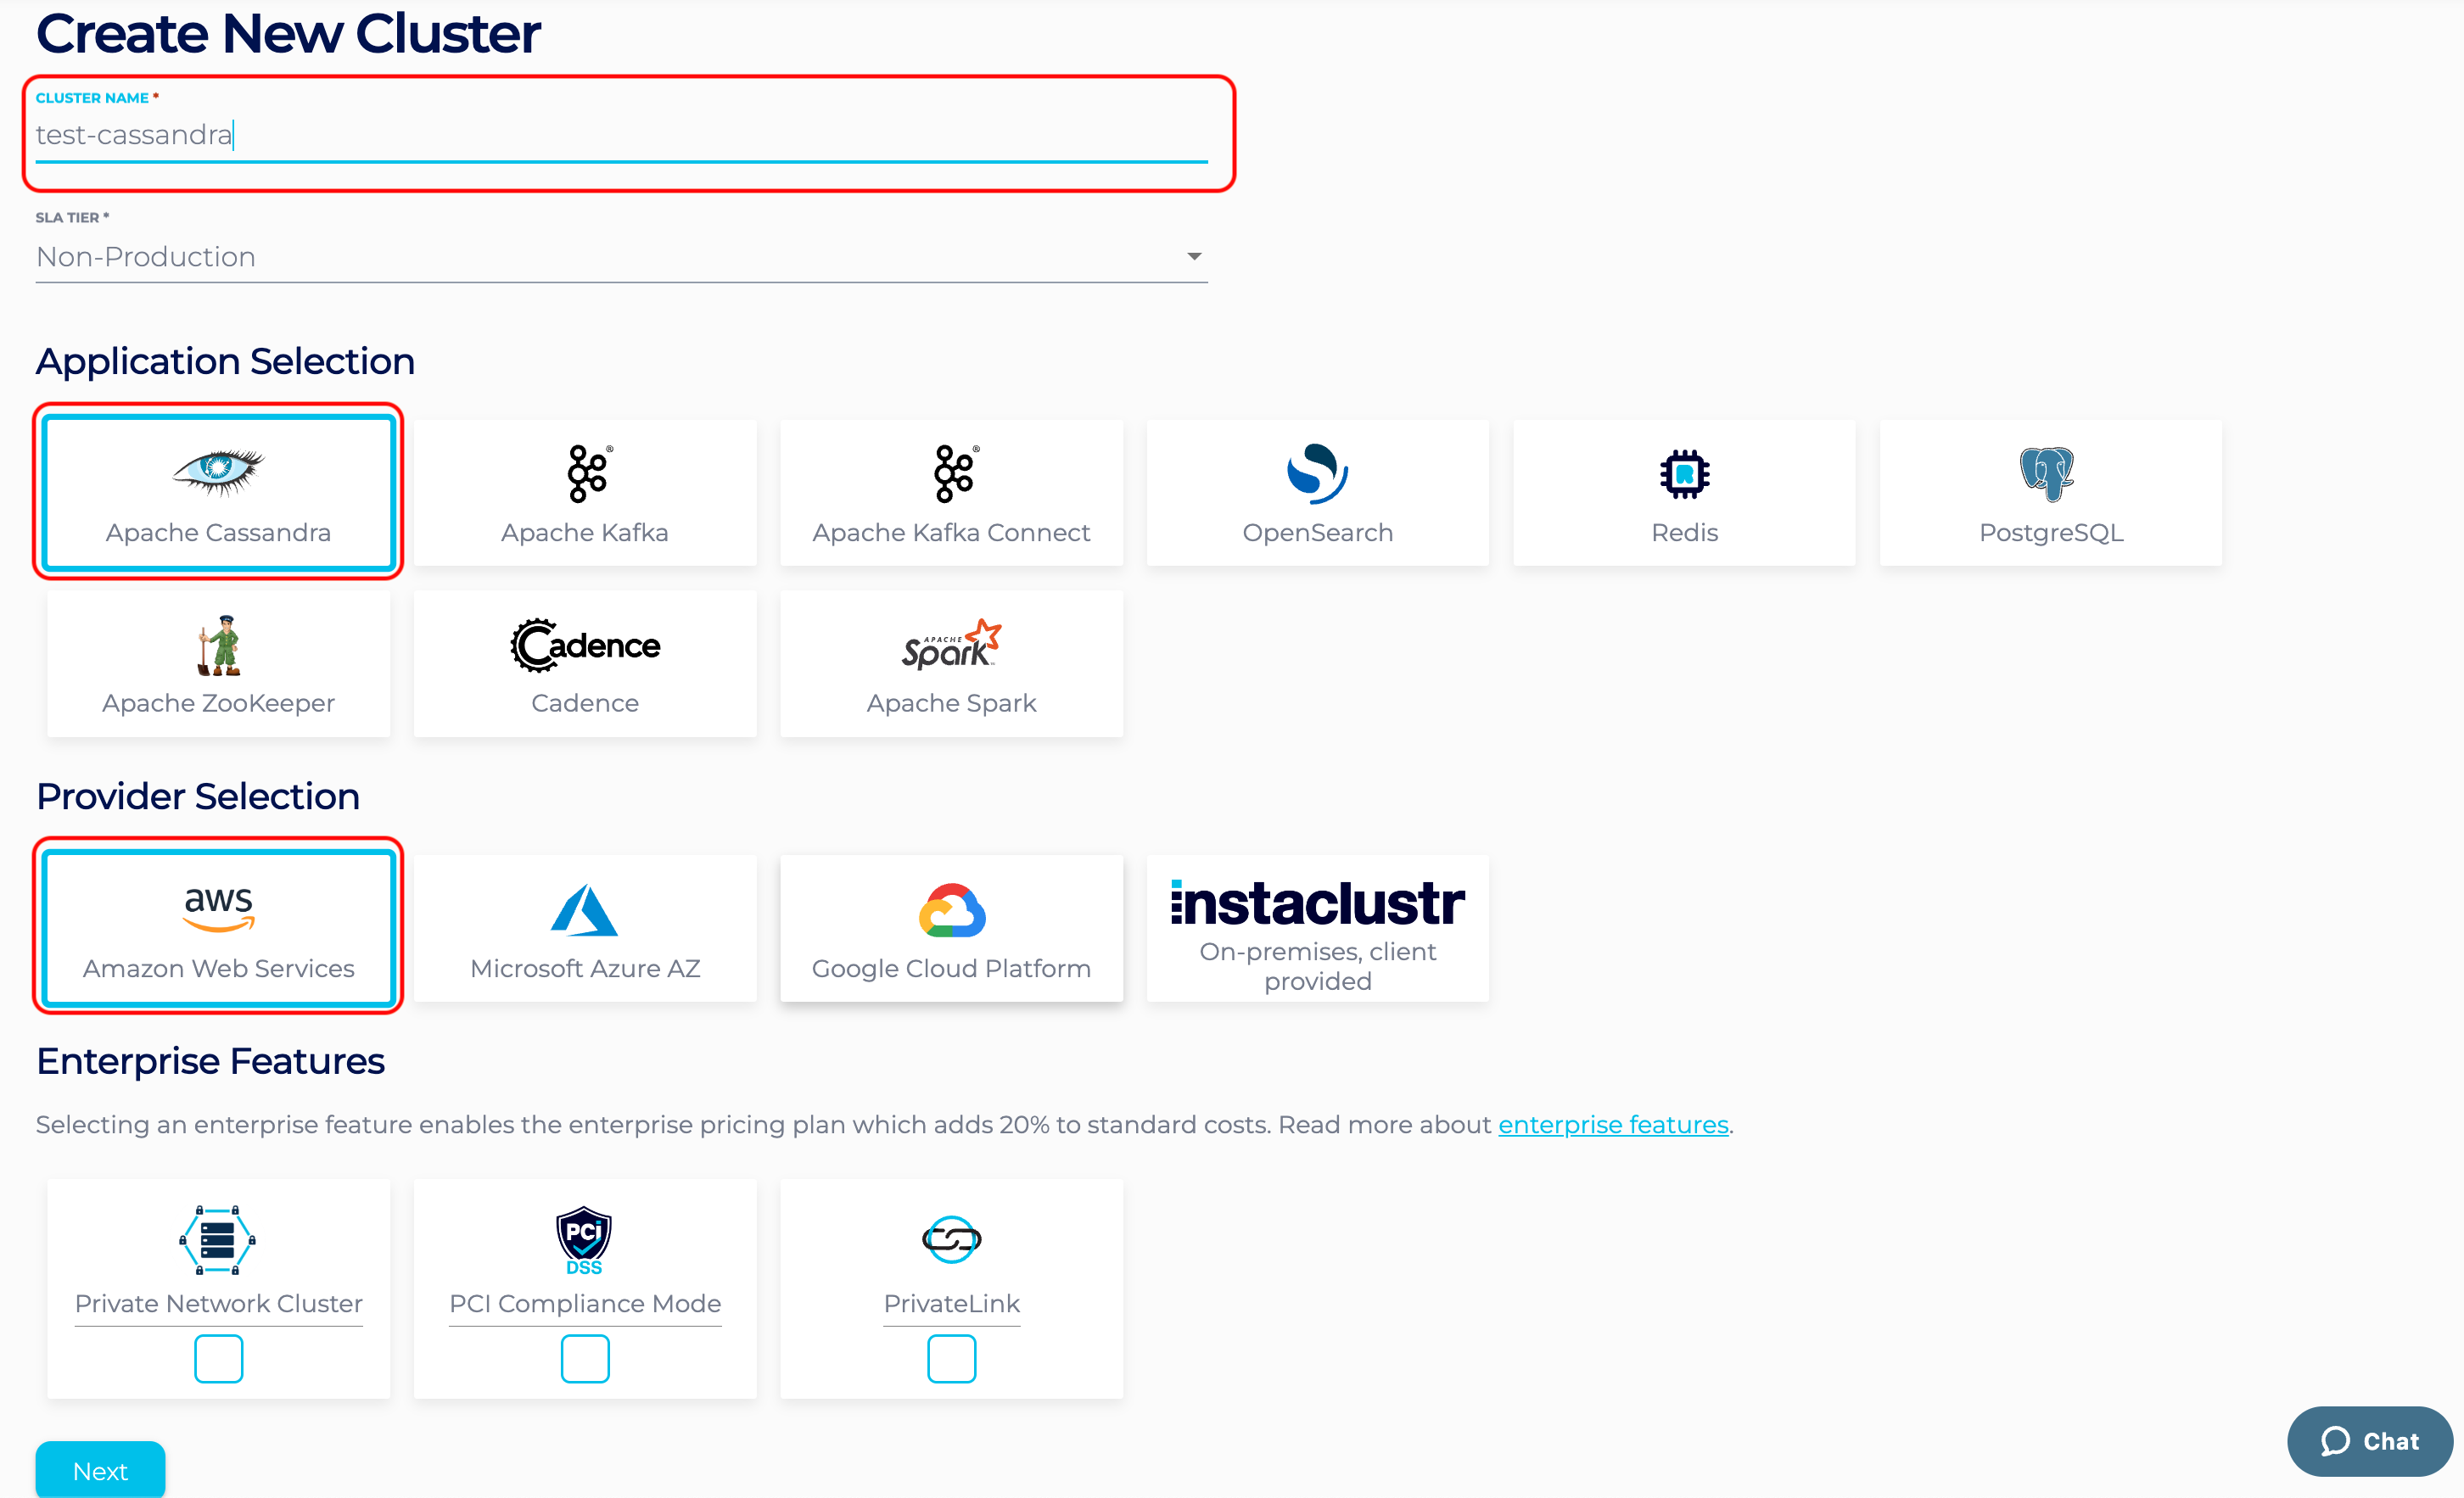
- Give your cluster a name, select Cassandra as the application, select Amazon Web Services as the Cloud Service Provider and click Next.
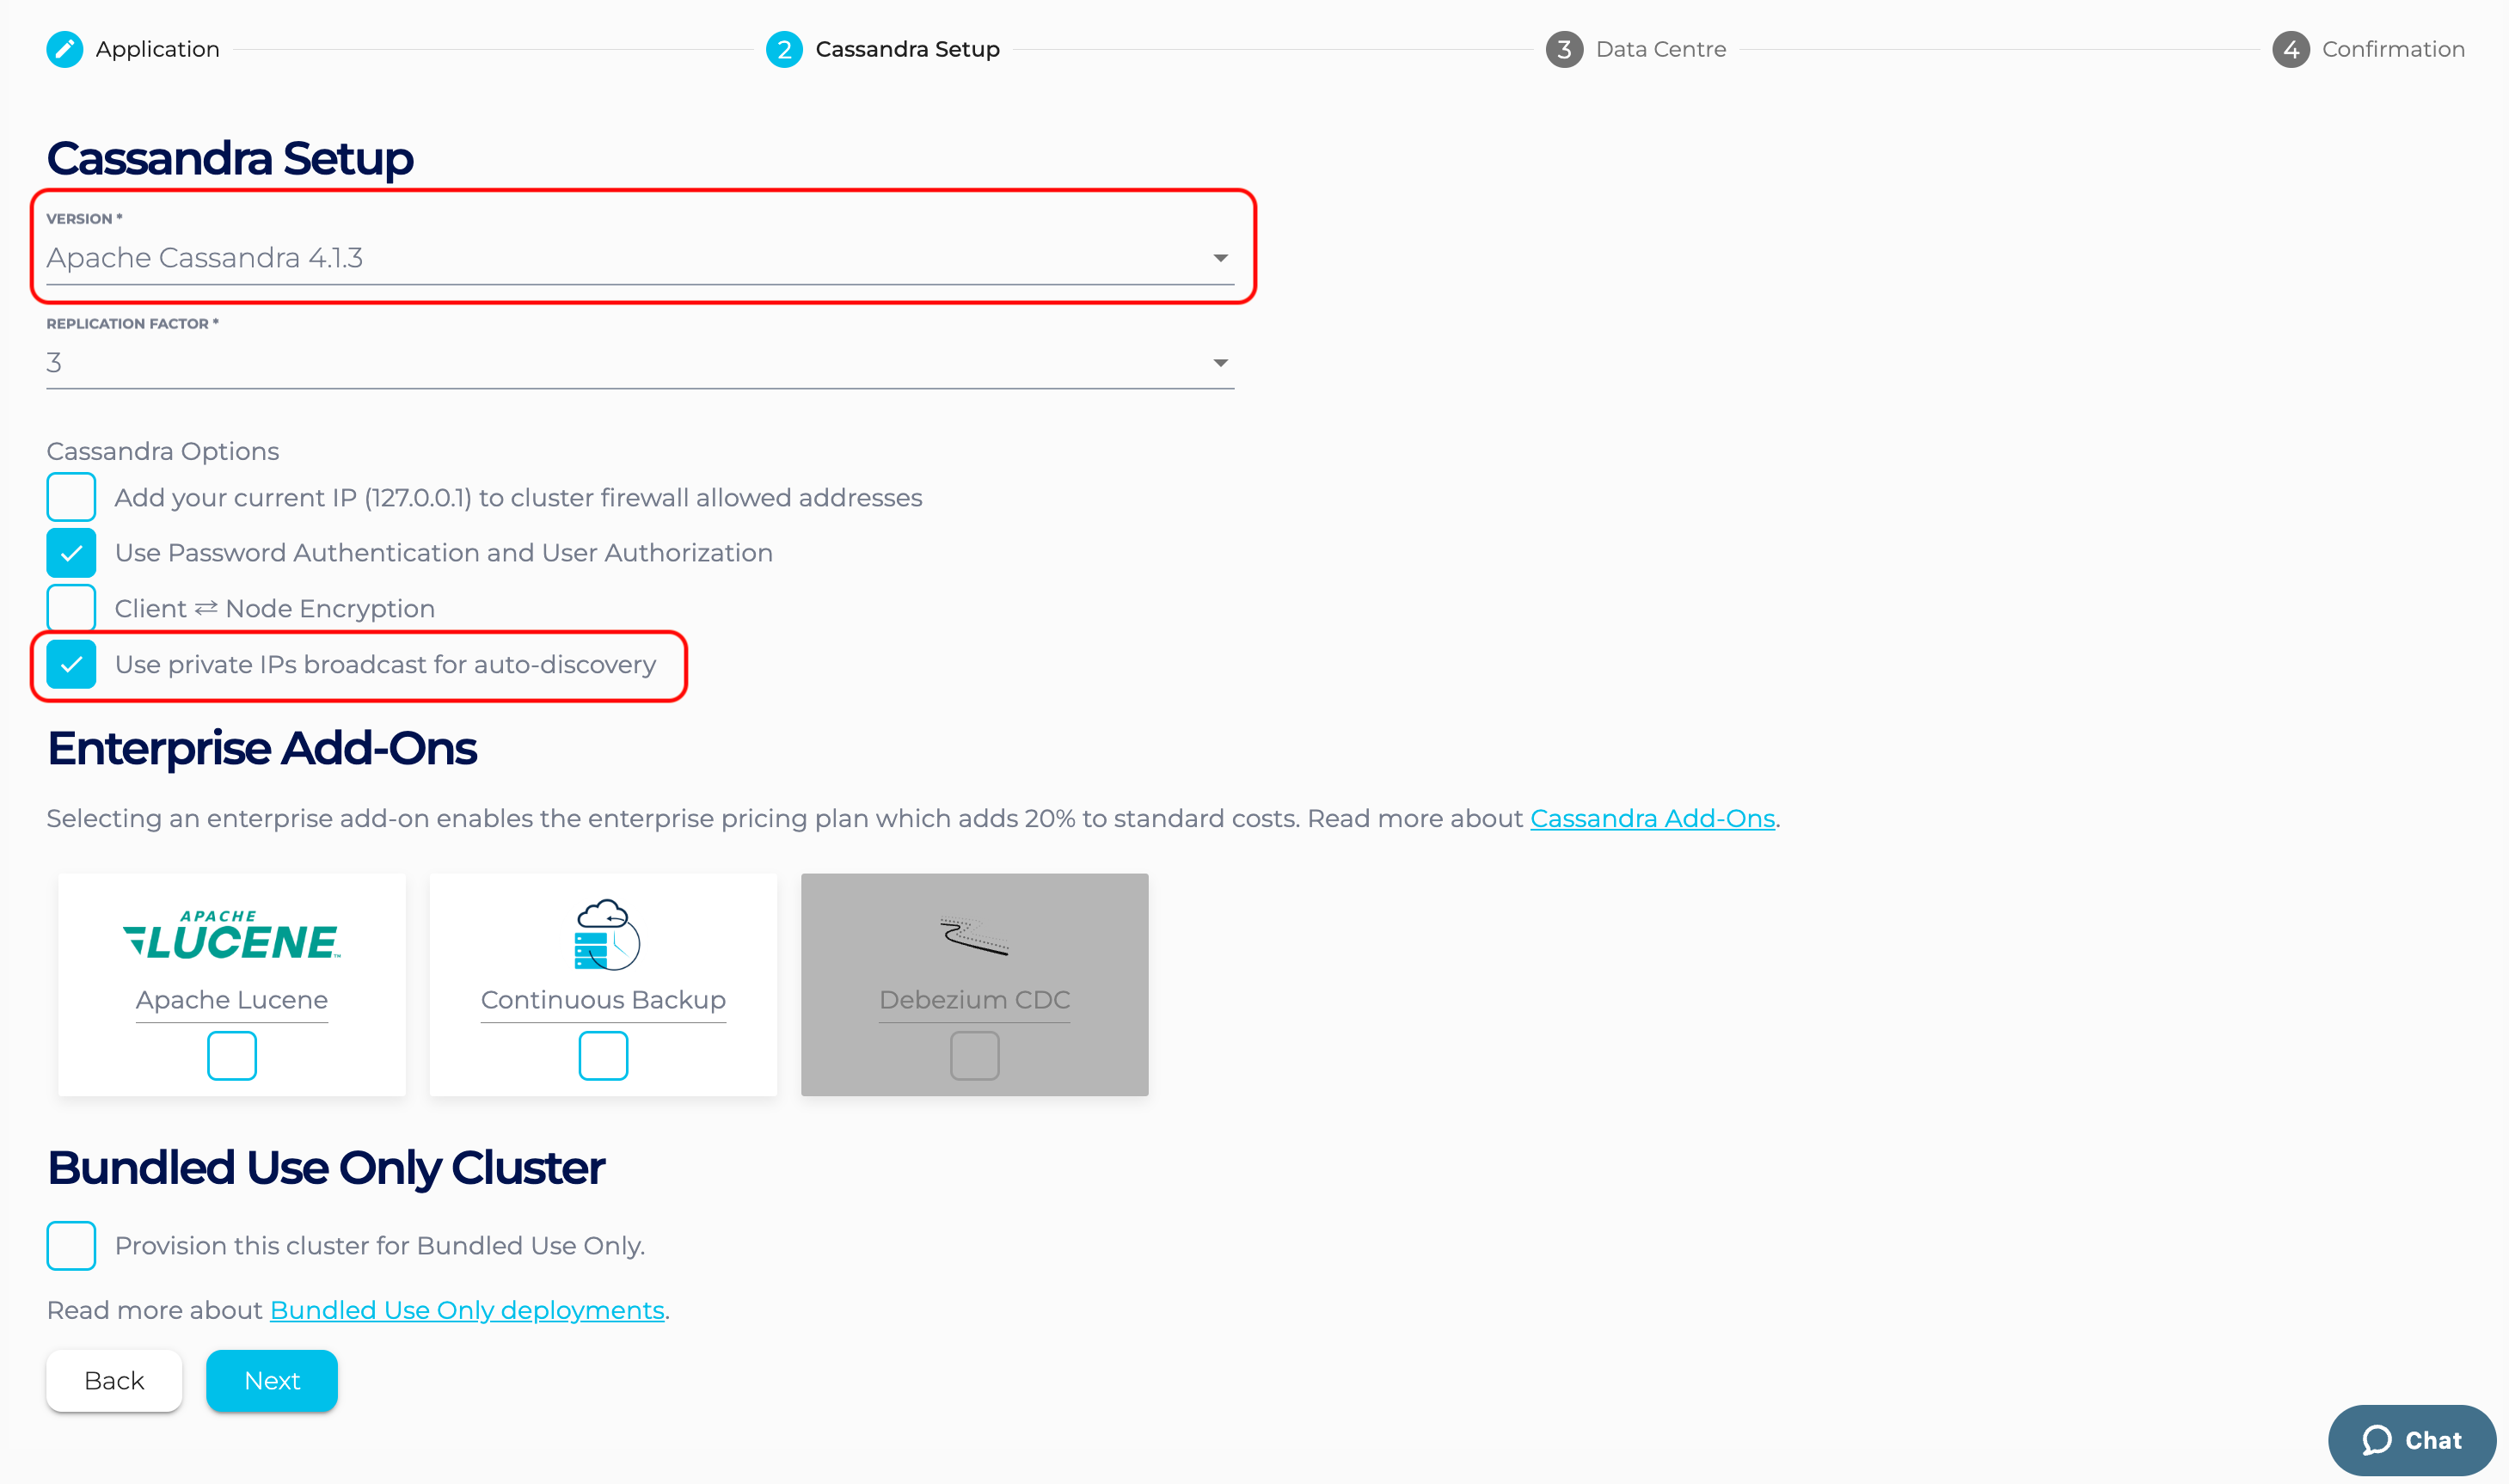
- Under the Cassandra Setup page, select Apache Cassandra version 4.1.3, and check the “Use private IPs broadcast for auto-discovery” option.
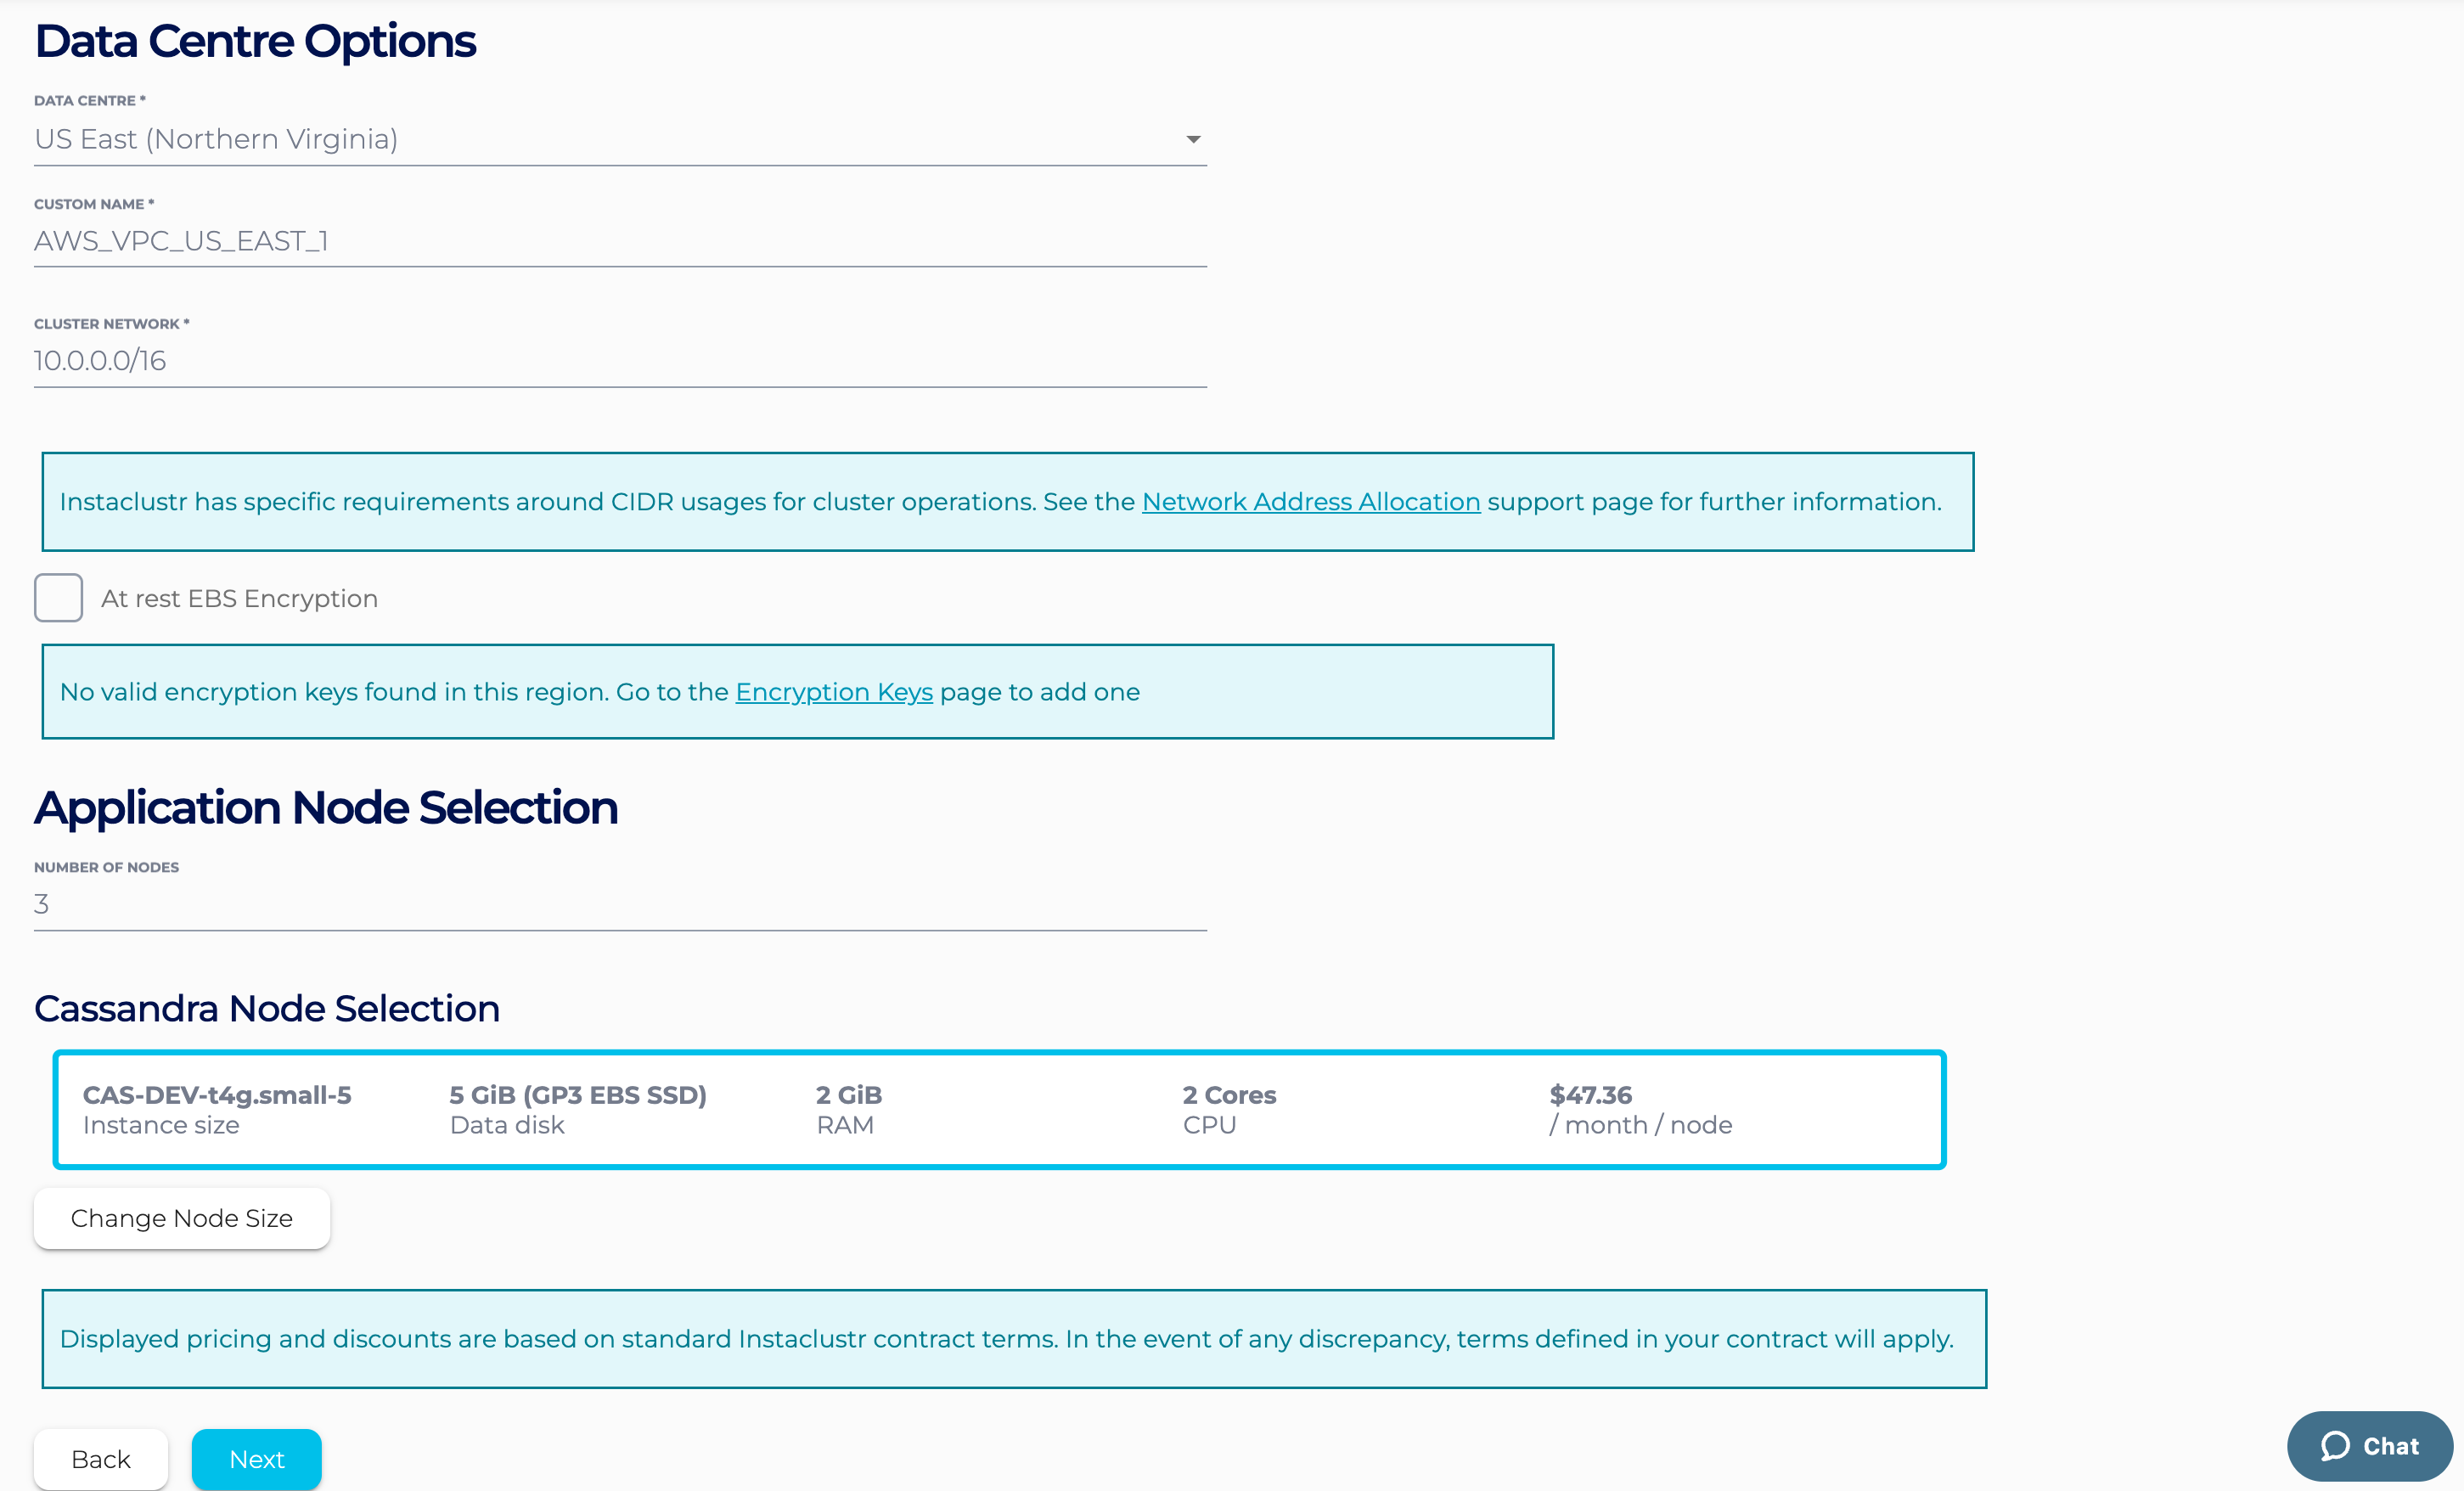
- Under the Data Centre options, select:
- Data Centre Region,
- Cluster Network address block,
- The number of nodes for your application,
- Your desired node size.
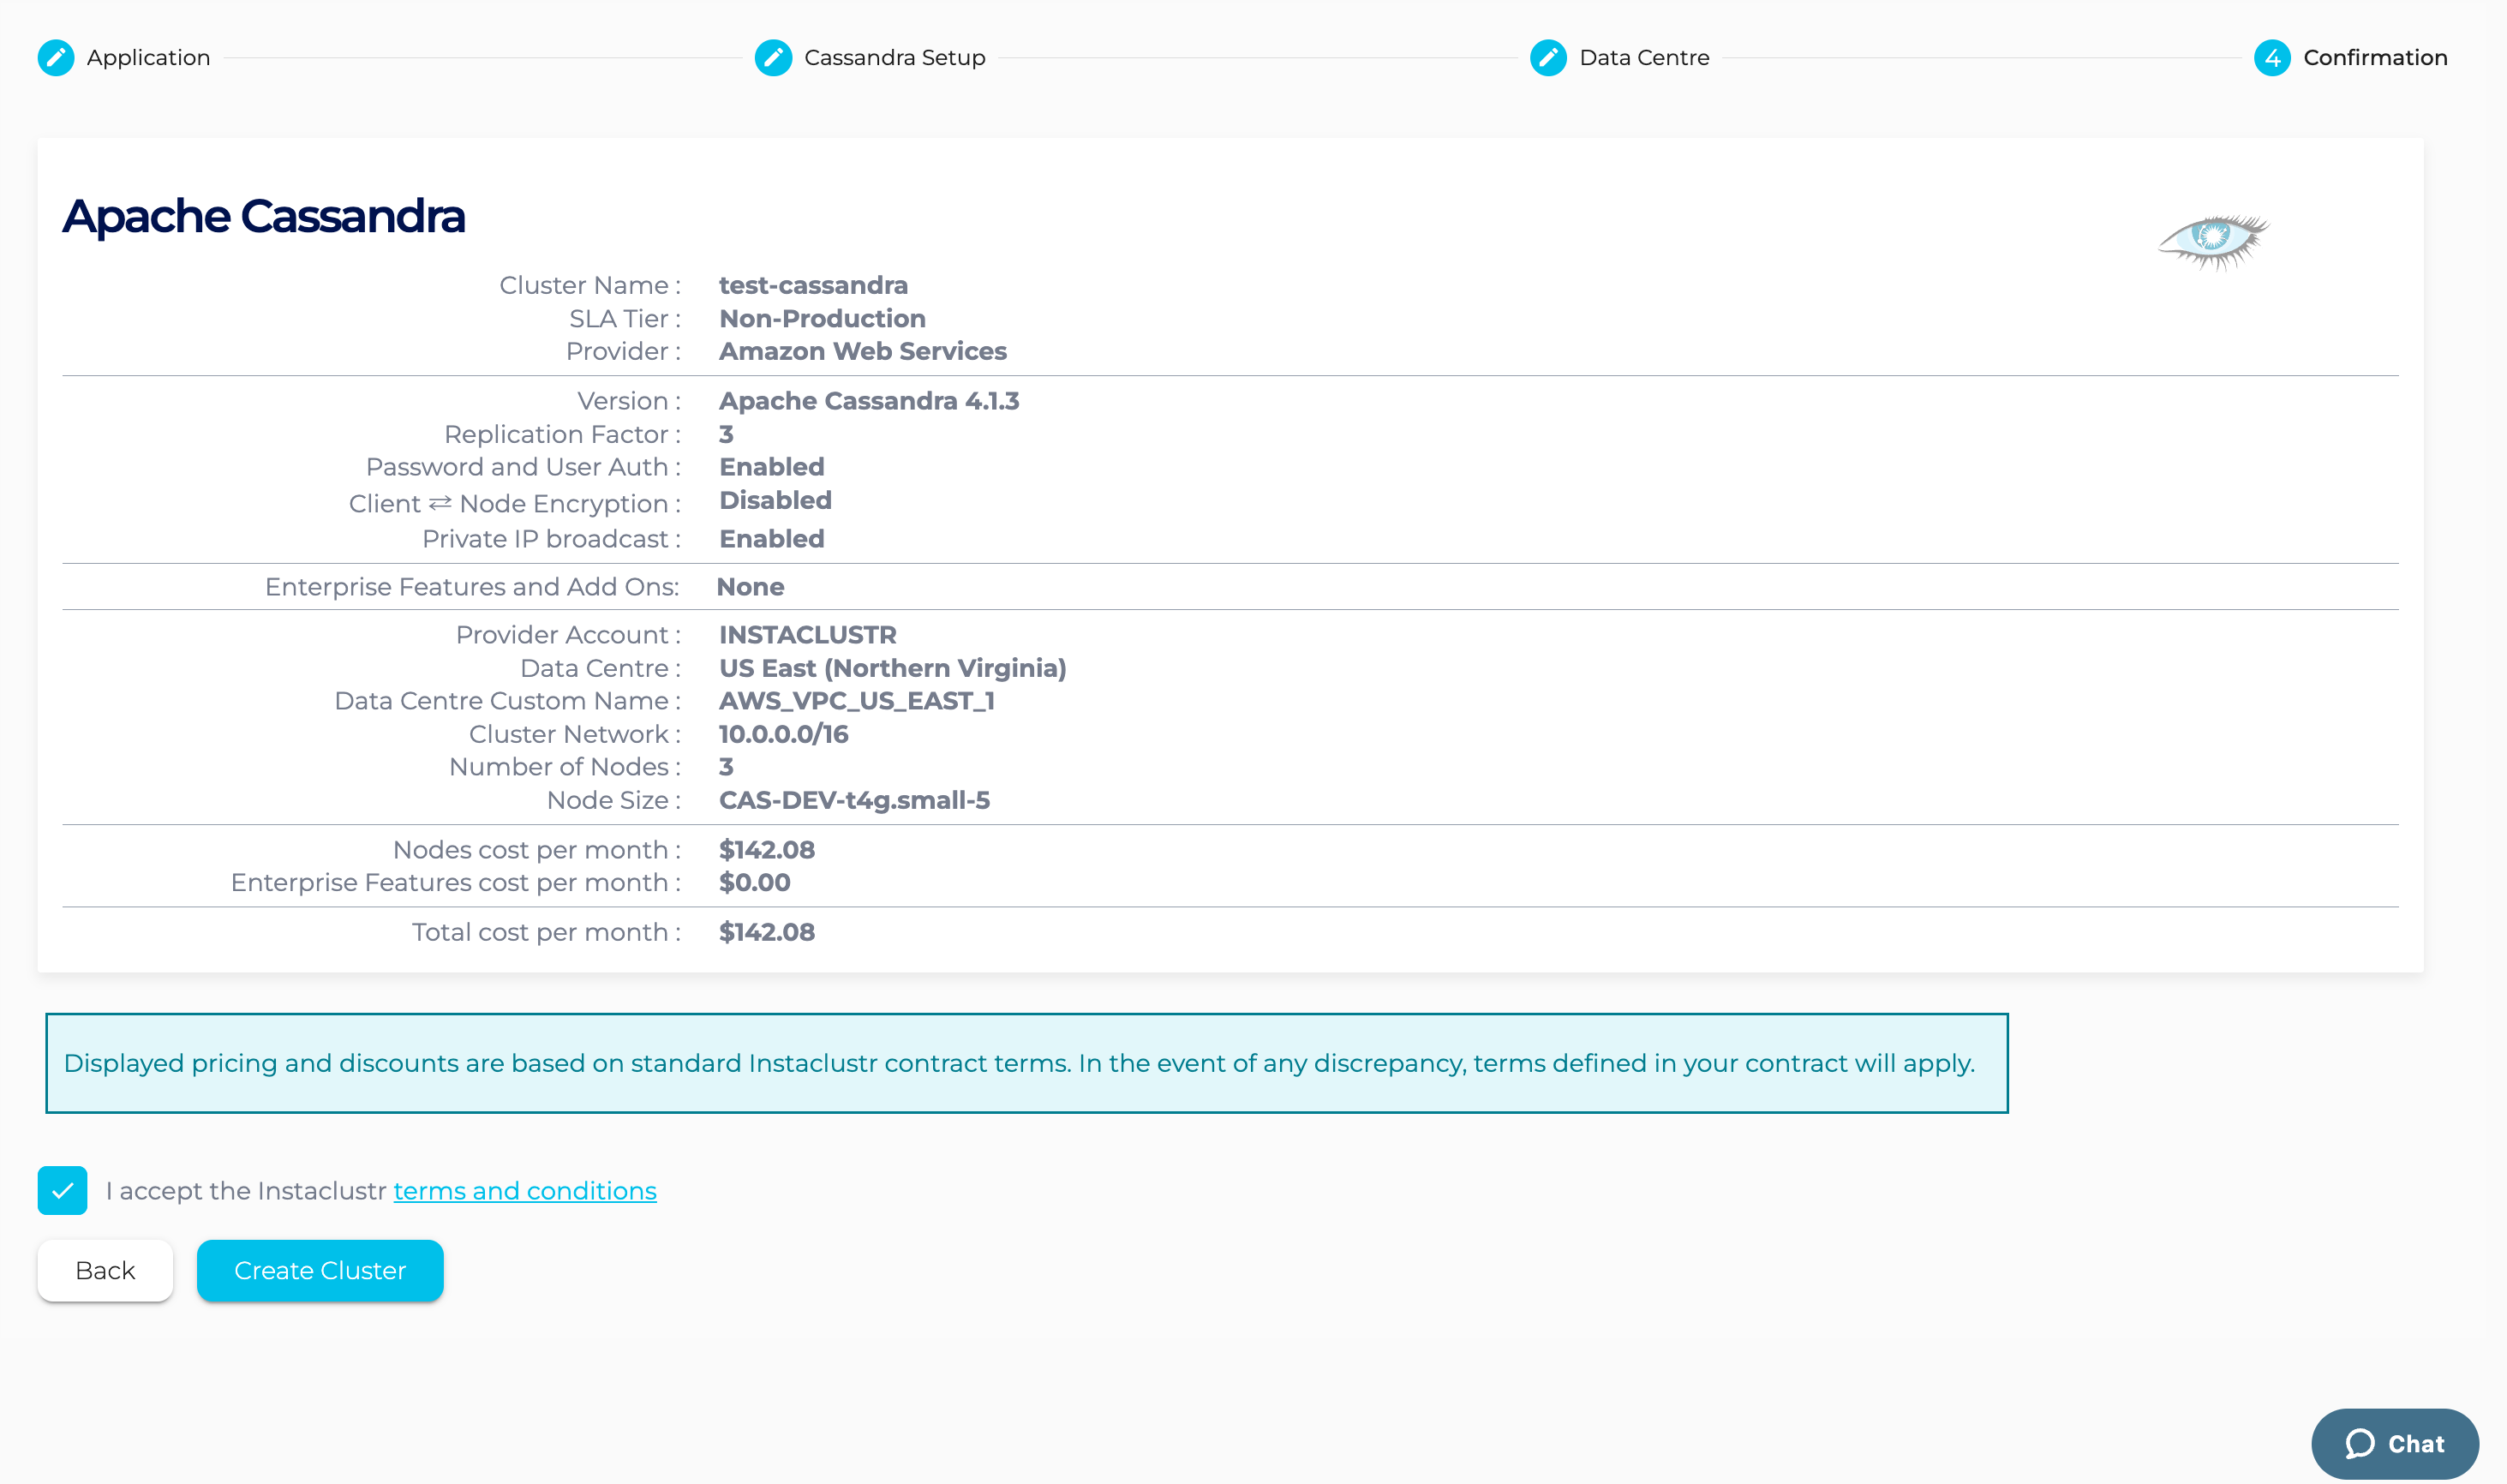
- The Confirmation section displays a detailed summary of your cluster configurations and pricing details. If you are happy with the cluster configuration and have accepted the terms and conditions, click the Create Cluster button to start provisioning the Cassandra cluster.
- Provisioning a cluster can take some time depending on the responsiveness of the underlying cloud provider. There are separate status indicators for the overall cluster provisioning state.
- You have now finished creating your Cassandra cluster, congratulations! All your clusters will be listed on the left sidebar of the Console. You can view your cluster’s configuration details by navigating to the Details page.
Step 2 – Create a Cadence cluster
Now that we have a running Cassandra cluster, we can create a Cadence cluster and link them together:
- On the console, click the Create Cluster button again, this time we will select the Cadence application, select Amazon Web Services as the Cloud Service Provider and click Next.

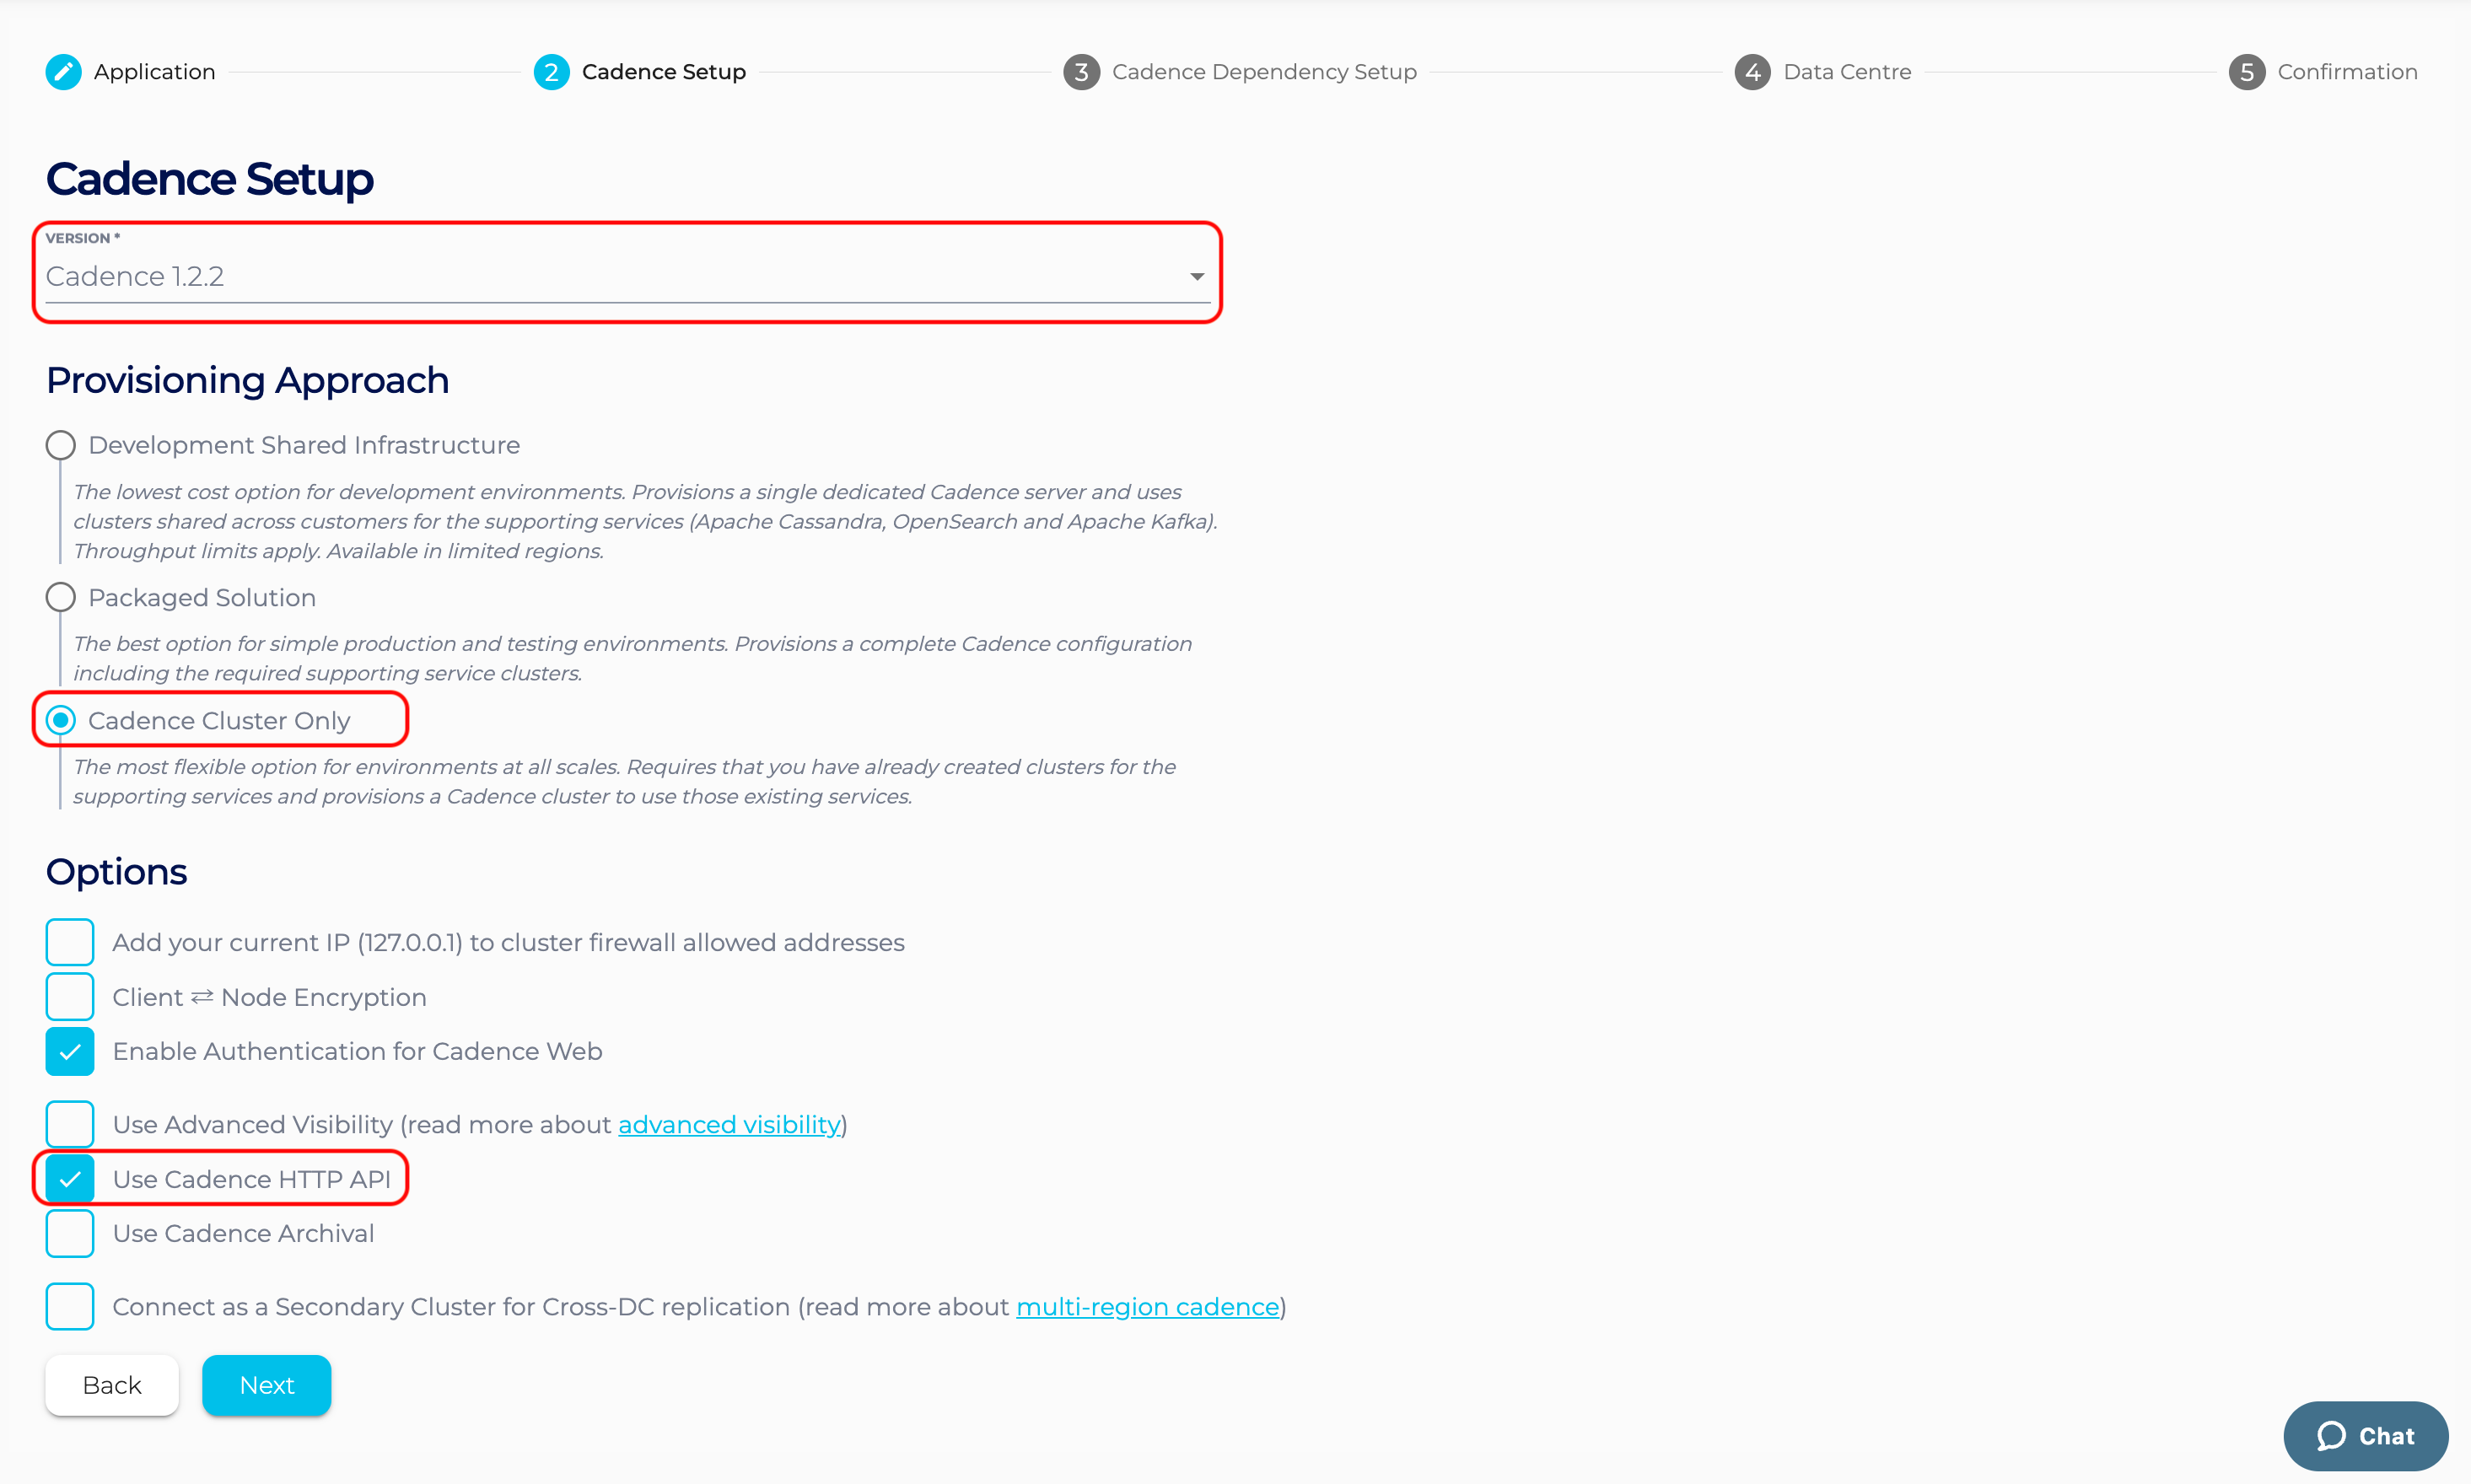
- On the Cadence Setup page, we can select the version of Cadence. We are currently offering Cadence 1.2.2 with HTTP API. Select “Cadence Cluster Only” as the provisioning approach. Also check the “Use Cadence HTTP API” option.
- On the Cadence Dependency Setup page, we can now select our previously created Cassandra cluster as the Cadence persistence store. If there are multiple Cassandra clusters running in your account, you can use the drop down to select the one you want to use with Cadence.
In addition to selecting which Cassandra cluster to link to, we can select how they are linked and communicate over the network, i.e., the Cadence VPC configuration. Configuring the Cadence VPC gives a detailed explanation about the different approaches to configuring the Cadence VPC.

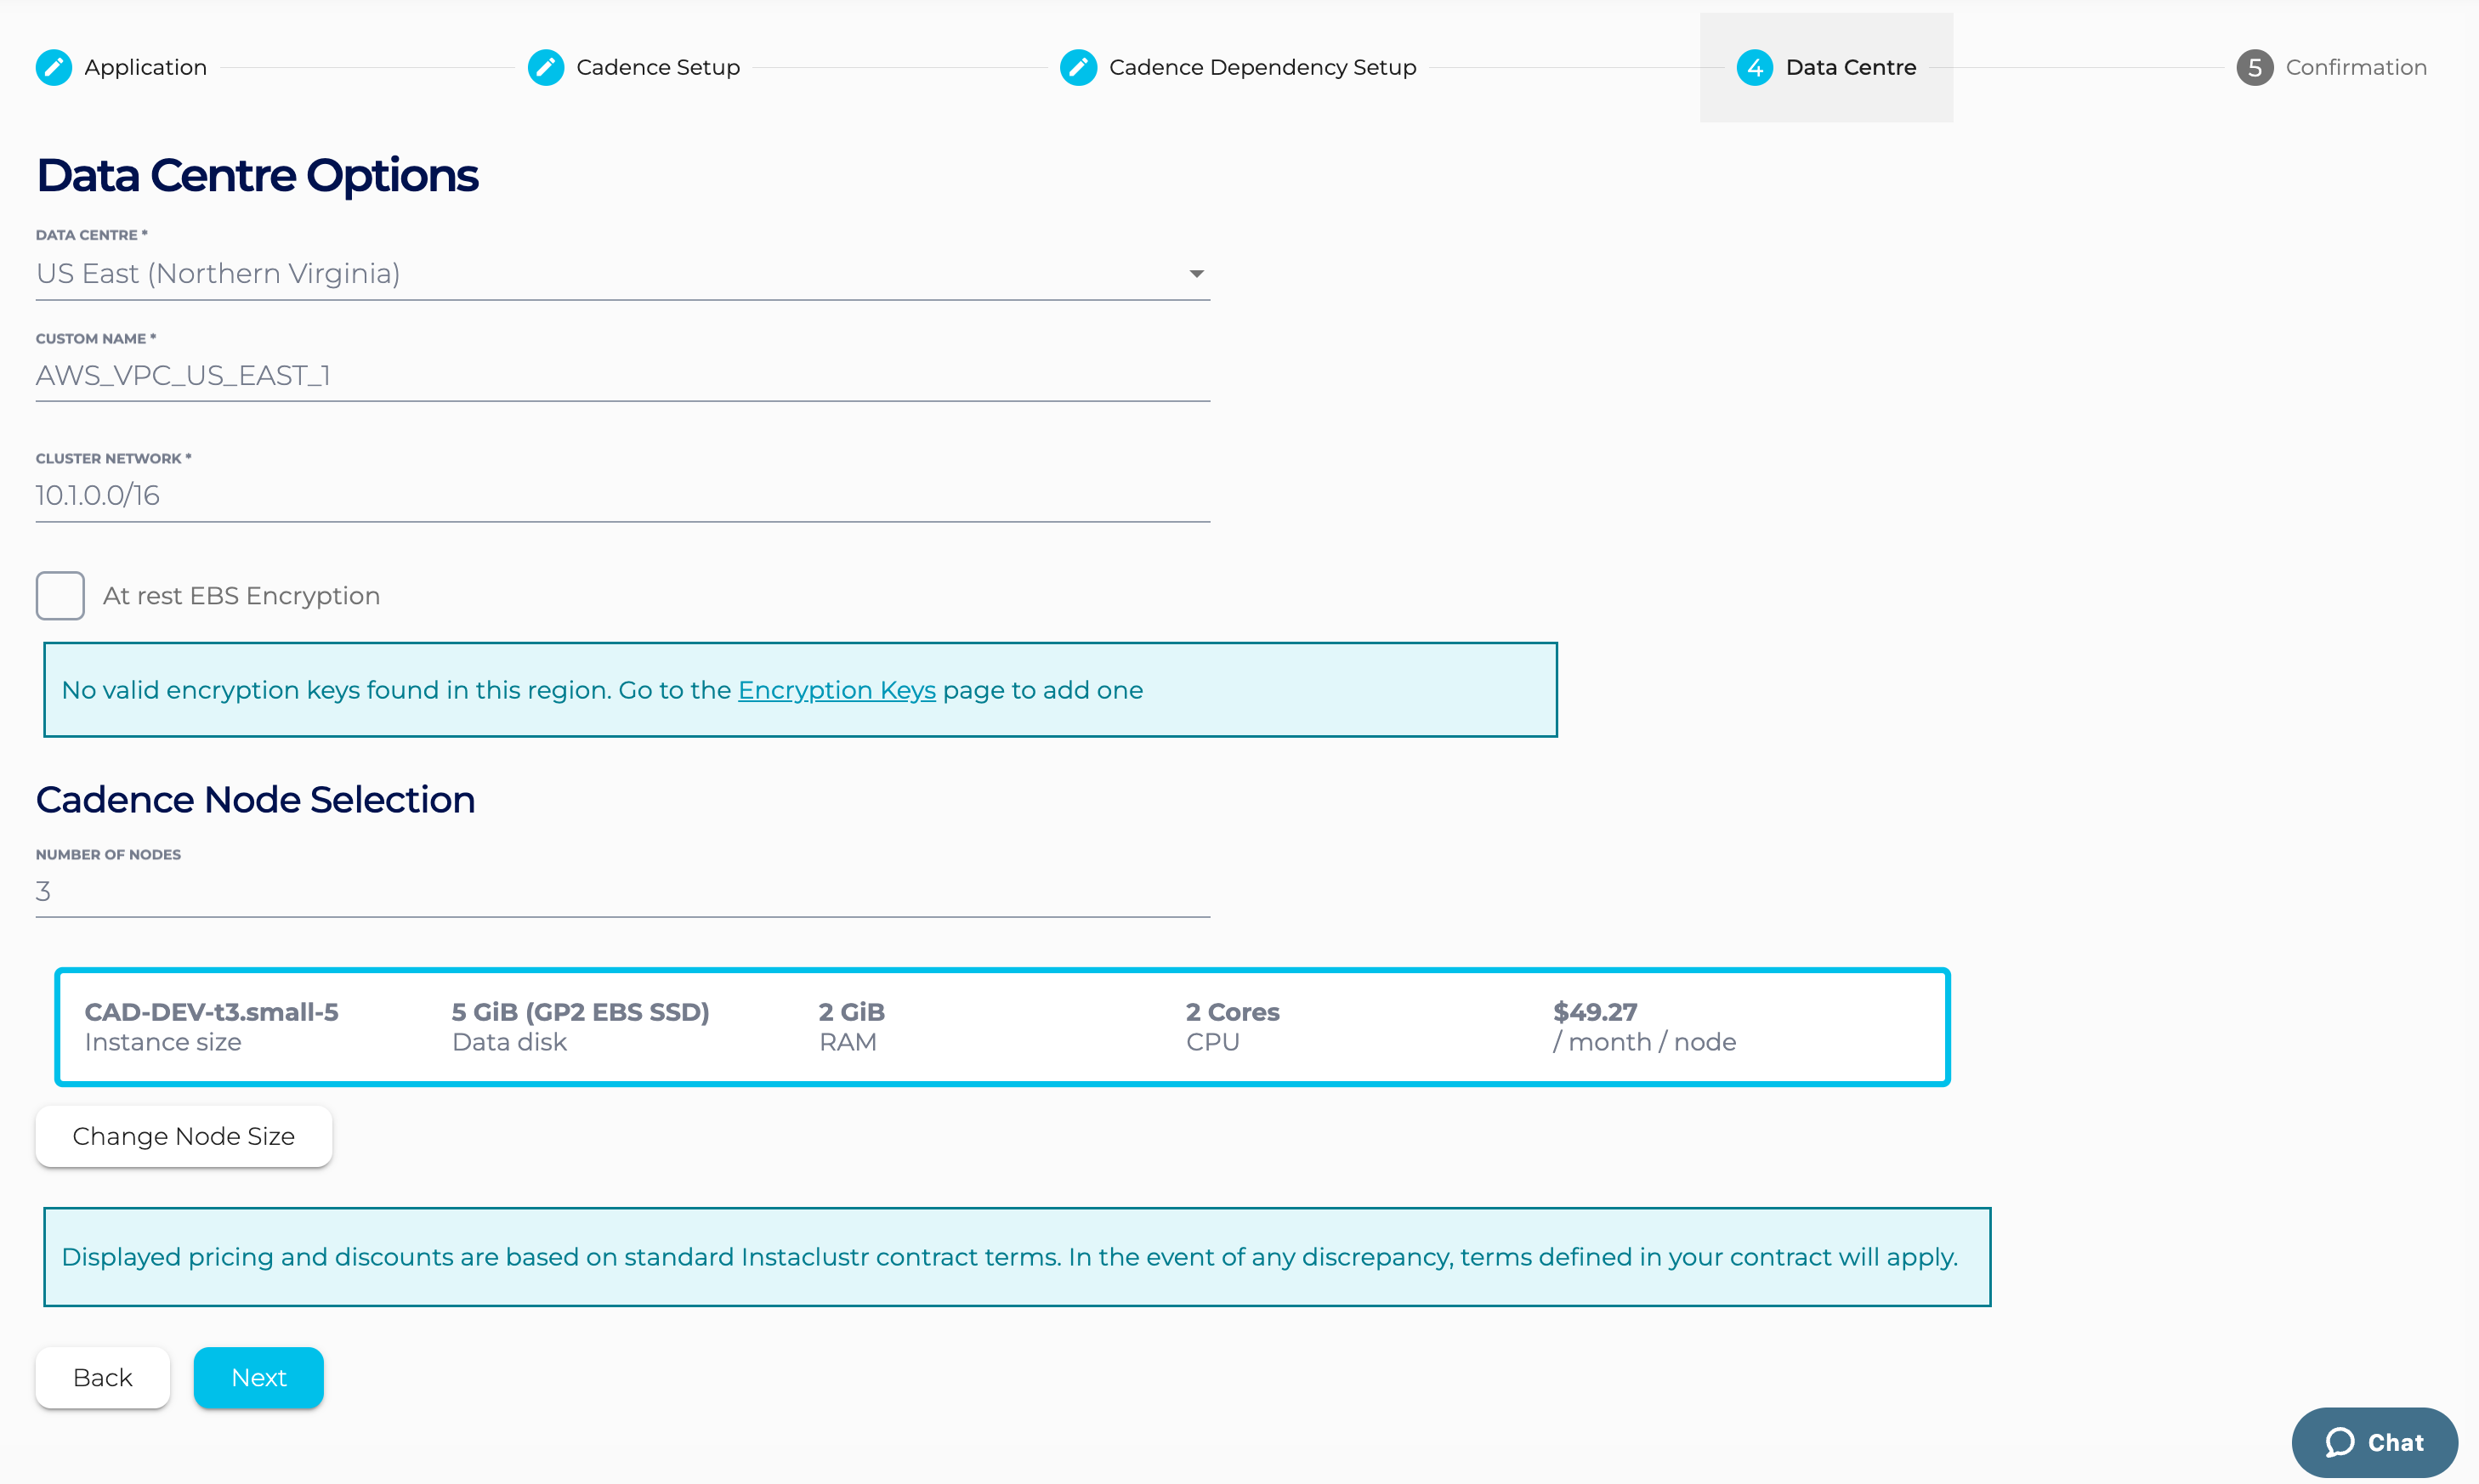
- Under the Data Centre section,
- Select a Data Centre Region,
- A cluster network address block (Note : Provide a non-overlapping CIDR block for VPC Peering and Cassandra Cluster VPC option),
- The number of nodes for your application,
- The desired node size.
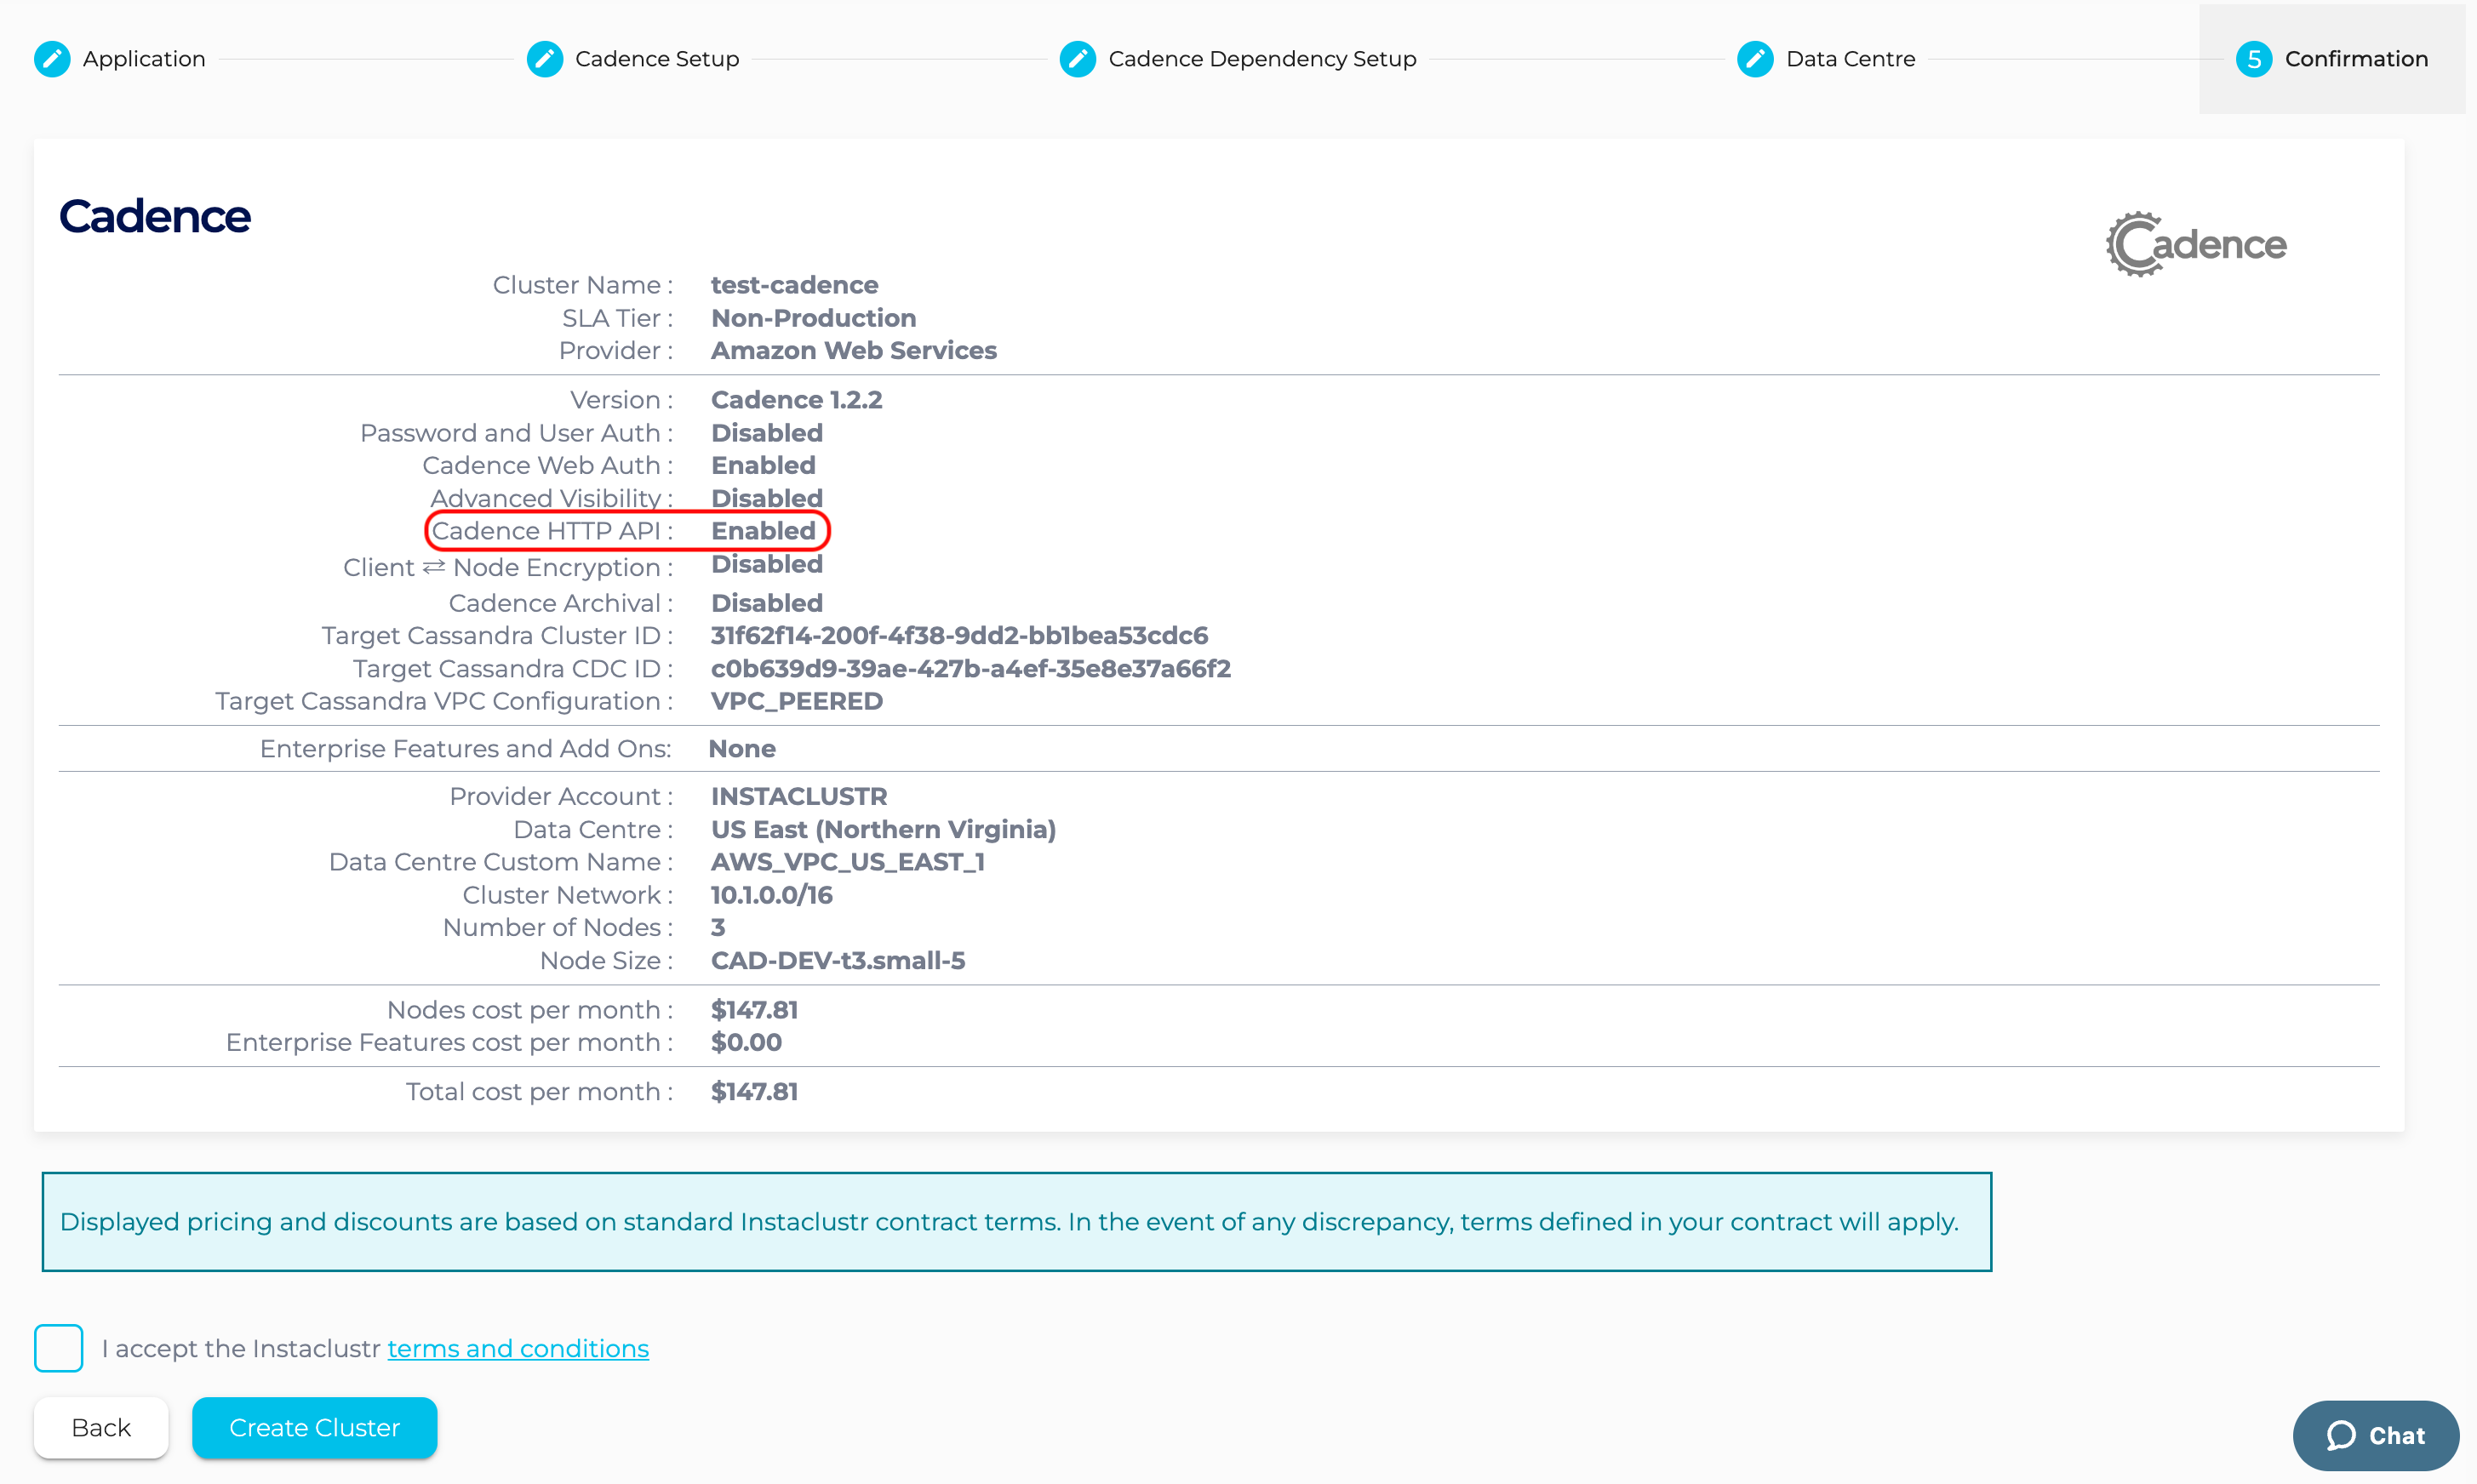
- The Confirmation section displays a detailed summary of your cluster configurations and pricing details. If you are happy with the cluster configuration and have accepted the terms and conditions, click the Create Cluster button to start provisioning the Cadence cluster.
- Provisioning the cluster can take some time depending on the responsiveness of the underlying cloud provider. There are a few additional automated steps required to link these clusters that take place during this time.
- You have finished creating your Cadence cluster! Now you can add your IP to the firewall rules to enable access to the Cadence server.

- Go to the Connection Info page and run the Cadence CLI commands to register the “sample-domain”.

- Go to the Python tab of the Connection Info page, copy and paste the example Python script into your local code editor, and run the Python script to test Cadence HTTP API.

For more information about Cadence HTTP API, please check out the Cadence HTTP API documentation.
Please contact [email protected] if you have any questions.
 By Instaclustr Support
Need Support?
Experiencing difficulties on the website or console?
Already have an account?
Need help with your cluster?
Contact Support
Why sign up?


